Inspection and maintenance 8
0020271943_00 atmoMAG Installation and maintenance instructions
15
carried out earlier, depending on the results. You can
find the inspection and maintenance work table in the ap-
pendix.
8.1
Procuring spare parts
The original components of the product were also certified
by the manufacturer as part of the declaration of conformity.
If you use other, non-certified or unauthorised parts during
maintenance or repair work, this may void the conformity of
the product and it will therefore no longer comply with the
applicable standards.
We strongly recommend that you use original spare parts
from the manufacturer as this guarantees fault-free and safe
operation of the product. To receive information about the
available original spare parts, contact the contact address
provided on the reverse of these instructions.
▶
If you require spare parts for maintenance or repair
work, use only the spare parts that are permitted for the
product.
8.2
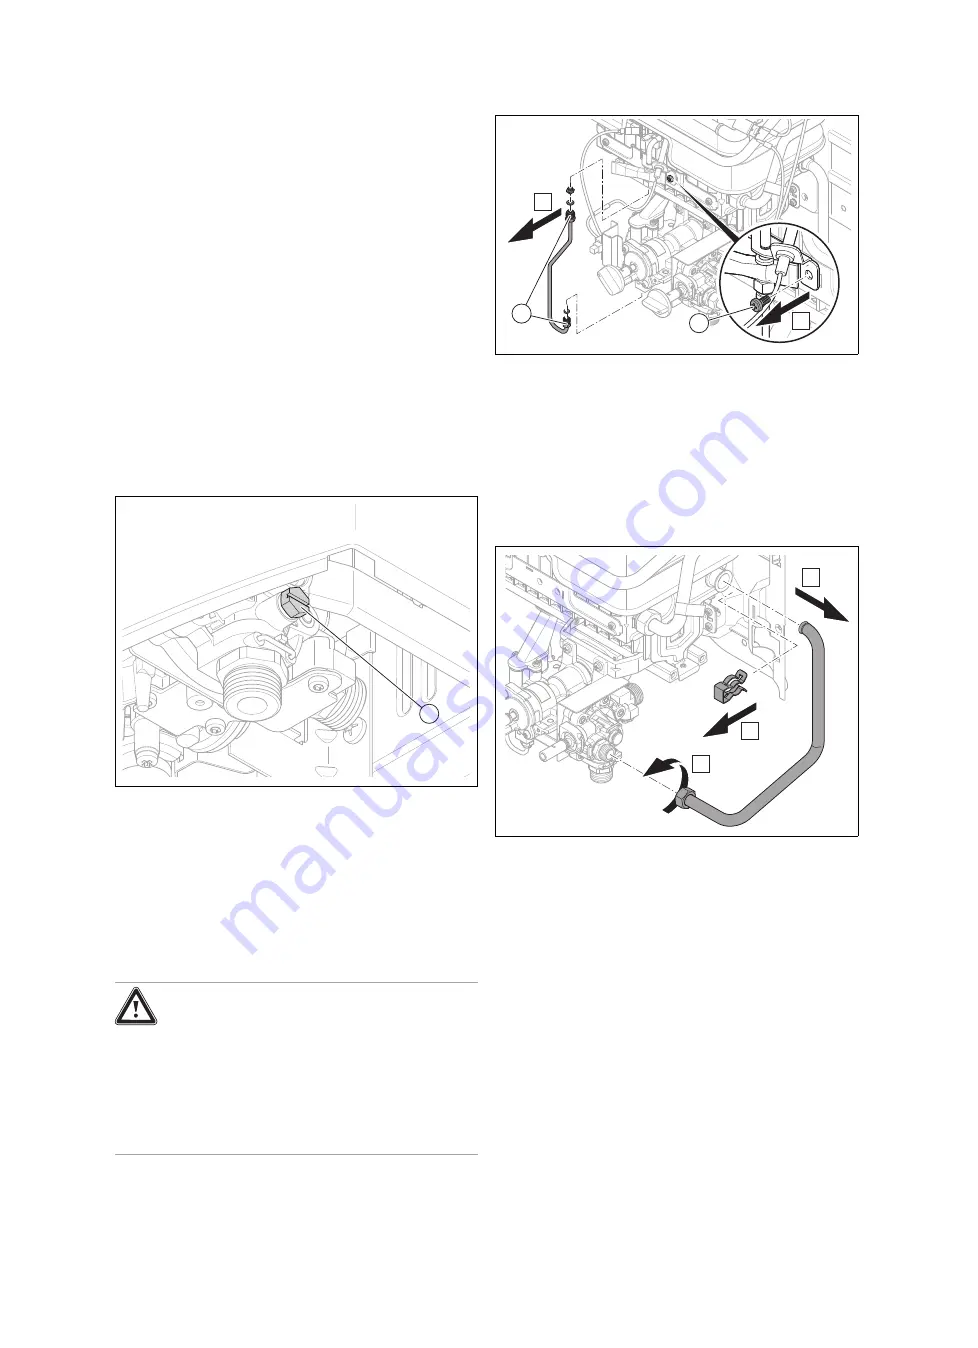
Draining the product
1
1.
Close the gas isolation valve and the isolation valve
upstream of the cold water inlet.
2.
Loosen the drain screw
(1)
and the sealing ring for the
draining.
3.
Open all of the hot water taps that are connected to the
product so that the product and lines drain until they are
completely empty.
8.3
Removing the ignition electrode and ignition
gas filter
Danger!
Risk of being burned or scalded by hot
components!
The burner assembly and all water-carry-
ing components present a risk of burns and
scalding.
▶
Only carry out work on these components
once they have cooled down.
A
A
2
1
1.
Unscrew the nuts
(1)
from the ignition gas pipe.
2.
Carefully remove the ignition gas pipe.
3.
Unscrew the bolt
(2)
for securing the ignition gas fitting
to the burner and remove the ignition gas fitting.
8.4
Removing the burner
1.
Drain the product.
2.
Remove the cold water connection from the product.
3.
Remove the gas connection from the product.
B
A
C
4.
Unscrew the union nuts from the water valve. Remove
the clip from the cold water connection on the burner.
5.
Remove the pipe from the water valve and pull it out of
the cold water connection on the burner.


