9 Inspection and maintenance
34
Installation and maintenance instructions auroCOMPACT 0020181589_04
ertheless necessary to carry out maintenance work at least
every two years.
9.3
Procuring spare parts
The original components of the product were also certified
by the manufacturer as part of the declaration of conformity.
If you use other, non-certified or unauthorised parts during
maintenance or repair work, this may void the conformity of
the product and it will therefore no longer comply with the
applicable standards.
We strongly recommend that you use original spare parts
from the manufacturer as this guarantees fault-free and safe
operation of the product. To receive information about the
available original spare parts, contact the contact address
provided on the reverse of these instructions.
▶
If you require spare parts for maintenance or repair
work, use only the spare parts that are permitted for the
product.
9.4
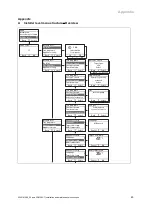
Using the function menu
The function menu allows you to actuate and test individual
components in the heating installation.
Menu
→
Installer level
→
Test programs
→
Function menu
▶
Choose the heating installation components.
▶
Press (
Select
) to confirm your selection.
Display
Test
programme
Action
T.01
Check internal
pump
Switch the internal pump on
and off.
T.02
Check 3-way
valve
Move the diverter valve to
the heating position or to the
hot water position.
T.03
Check fan
Switch the fan on and off.
The fan runs at maximum
rotational speed.
T.04
Check cylinder
charge pump
Switch the cylinder charging
pump on and off.
T.05
Check circulation
pump
Switch the circulation pump
on and off.
T.06
Check external
pump
Switch the external pump on
and off.
T.07
Inspect solar
pump
Switch the solar pump on
and off.
T.08
Checking the
burner
The product starts up and
switches to minimum load.
The flow temperature is
shown in the display.
T.92
Inspect Legion-
ella protection
pump
Switch the Legionella protec-
tion pump on and off.
Terminate function menu
▶
To terminate the function menu, select (
Cancel
).
9.5
Carrying out electronics self-tests
Menu
→
Installer level
→
Test programs
→
Electronics
self-test
You can use the electronics self-test to check the PCB in
advance.
9.6
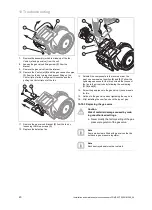
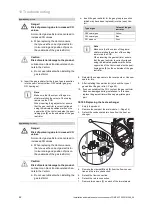
Removing the compact thermal module
Note
The compact thermal module consists of five main
components:
–
Speed-regulated fan,
–
Gas valve including support plate,
–
Venturi including mass flow sensor and gas
connection pipe,
–
Burner door,
–
Premix burner.
Danger!
Risk of death and risk of material damage
caused by hot flue gas.
The seal, heat insulation and self-locking nuts
on the burner flange must not be damaged.
Otherwise, hot flue gases may escape and
cause personal injury and material damage.
▶
Replace the seal each time you open the
burner flange.
▶
Replace the self-locking nuts on the
burner flange each time you open the
burner flange.
▶
If the heat insulation on the burner flange
or on the back wall of the heat exchanger
shows signs of damage, replace the heat
insulation.
1.
Switch off the product using the on/off button.
2.
Close the gas isolator cock.
3.
Remove the front casing. (
→
Page 11)
4.
Tilt the electronics box forward.
5.
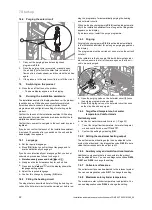
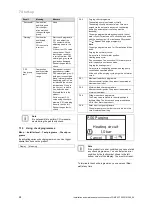
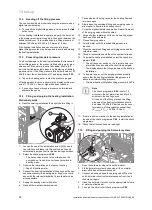
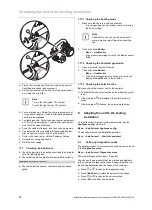
Remove the vacuum chamber's front wall.


