On-roof fitting and installation 4
0020077994_02 auroTHERM exclusive Installation manual
29
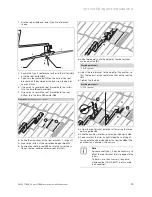
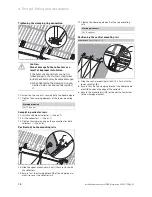
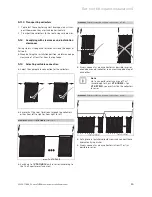
Installing the upper collectors
Conditions
: Collector rows: 2 … 3
2
1
3
▶
Place the upper collector (
1
) into the central mounting
rail (
2
).
▶
Tightly screw in the clamping elements (
3
) of the cent-
ral rail.
Working materials
SW 13 spanner
▶
Install the collector row in the same way as for the first
collector row.
▶
Complete the collector row. (
→
Page 28)
▶
Position the top mounting rails. (
→
Page 28)
4.2.3 Installing hydraulic connections
Caution.
Lack of tightness due to incorrect ac-
cessories.
Incorrect accessories may result in lack
of tightness of the solar circuit and cause
material damage.
▶
Only work in the solar circuit with hard
soldered connections, flat seals, com-
pression fittings or press fittings which
have been approved by the manufac-
turer for use in solar circuits and at cor-
respondingly high temperatures.
Caution.
Risk of damage to the collectors as a
result of improper installation.
If the hydraulic connections are not in-
stalled properly, the stainless steel tubes
inside the collector may become damaged.
▶
When tightening the clamping ring con-
nection, hold a second spanner against
it.
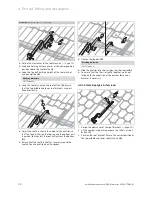
1.
Connect the collector flow and return to the system
with the connection tubes.
Conditions
: System with collector sensor
▶
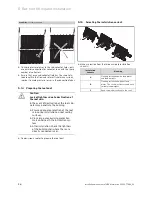
Insert the collector sensor into the opening provided on
the collector flow side ("hot side").
Note
In general, the collector sensor can be at-
tached to the right or left side of the col-
lector field because the collectors on both
sides have a corresponding opening.


