Set-up 5
0020200969_07 Set-up instructions
25
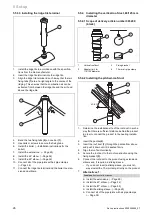
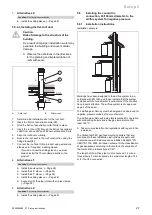
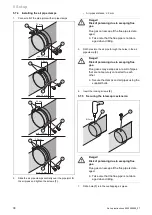
5.5.2.4 Installing the flat-roof duct
Caution.
Risk of damage to the structure of the
building.
As a result of improper installation, water may
penetrate the building and cause material
damage.
▶
Observe the definitions in the directives
for the planning and implementation of
roofs with seals.
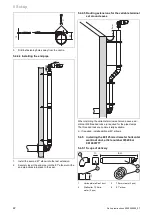
1
2
4
3
A
B
C
Ø120
Ø100
A
Cold roof
B
Warm roof
C
Position of the internal
flue pipe seal
1.
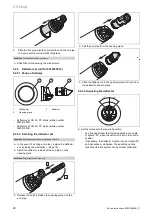
Determine the installation site for the roof duct.
2.
Insert the flat roof penetration collar
(2)
.
3.
Glue the flat roof penetration collar firmly in place.
4.
Insert the roof duct
(1)
through the flat roof penetration
collar from above and push it down until seated firmly.
–
Ensure that the internal flue pipe seal lies above the
roof.
5.
Align the roof duct vertically.
6.
Put the cover plate
(3)
on.
7.
Secure the roof duct to the roof construction using the
fixing bracket
(4)
.
8.
Connect the roof duct to the product using extensions,
elbows and, if required, a sliding sleeve. If you do not
insert a sliding sleeve, you must always install the 48
mm clamp directly on the product.
9.
Alternatives 1:
Condition
: Roof duct with extension
▶
Install the extensions. (
▶
Install the 45° elbow. (
▶
Install the 87° elbow. (
▶
Install the sliding sleeve. (
▶
Connect all of the pipe joints with air pipe clamps.
(
9.
Alternatives 2:
Condition
: Roof duct without extension
▶
Install the sliding sleeve. (
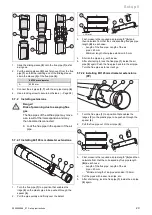
5.5.3
Installing the ridge tiles for the 60/100 mm
diameter roof duct
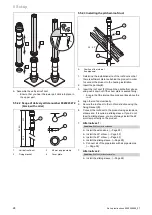
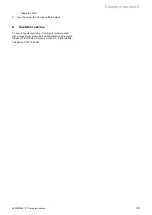
5.5.3.1 Scope of delivery, article number 303982
(black)
48
760
2
1
1
Ridge tile terminal,
black
2
48 mm air pipe clamp
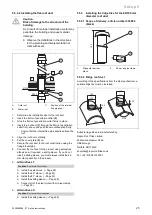
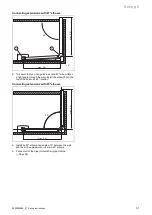
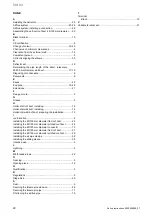
5.5.3.2 Ridge roof duct
According to the specifications from the tile manufacturer, a
suitable ridge tile must be installed.
130
133
130
103
103
≥25
≥20
≤125°
Suitable ridge tiles are manufactured by:
Repco Roof Tiles Limited
49 Maurice Gaymer Road
Attleborough
Norfolk, NR17 2QZ
enquiries@repcorooftiles.co.uk
Tel: +44 (0) 808 1333001


