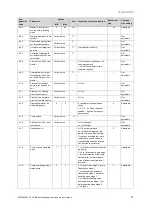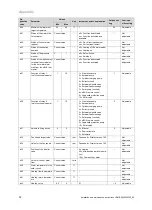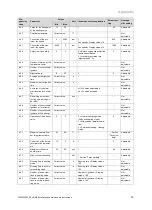
8 Adapting the unit to the heating installation
20
Installation and maintenance instructions HOME 0020224355_00
Note
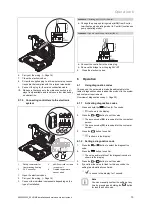
The actual reading on the digital pressure
gauge should ideally be 0,05 MPa (0,5 bar)
plus an additional pressure corresponding
to the highest point of the system above the
base of the boiler
–
10 m head equals an ad-
ditional 1 bar reading on the pressure gauge.
The minimum pressure should not be less
than 0,1 MPa (1 bar) in any installation. If
the system is to be treated with an inhibitor it
should be applied at this stage in accordance
with the manufacturer’s instructions. Further
information can be obtained from Sentinel,
Betz Dearborn Ltd., Tel: 0151 420 9595, or
Fernox, Alpha
–
Fry technologies. Tel: 0870
8700362.
8.
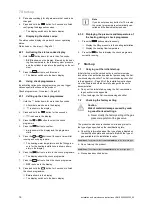
Fit the front panel. (
→
Page 10)
7.9.4
Checking the CO
₂
content
1.
Start up the product with the check programme
(P.01)
and set the value.
–
Setting value for the programme P.01: 100
Check programmes
–
Overview (
→
Page 30)
2.
Wait until the value that is read is stable.
–
Waiting period for reading a stable value: 5 min
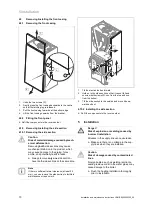
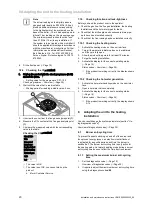
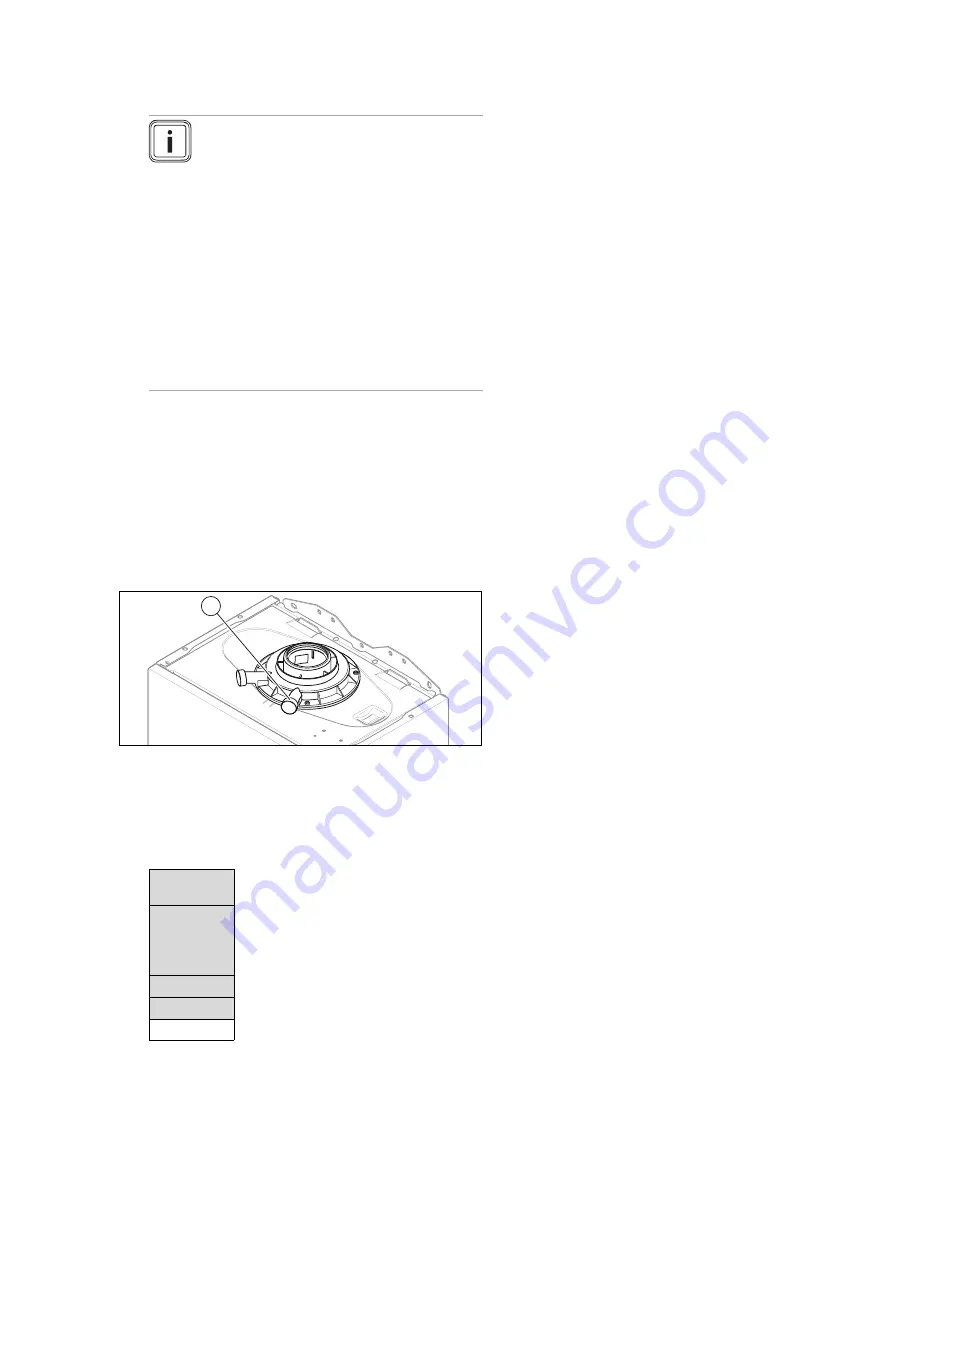
1
3.
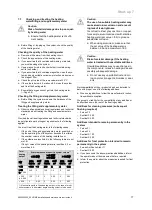
Unscrew the cover from the flue gas analysis point
(1)
.
4.
Measure the CO
₂
content at the flue gas analysis point
(1)
.
5.
Compare the measured value with the corresponding
value in the table.
Checking the CO
₂
content
Great Bri-
tain
Removed
front cas-
ing/installed
front casing
Natural gas
G20
9.2
±
1 %
◁
The value is OK.
▽
The value is not OK; you cannot start up the
product.
▶
Inform Customer Service.
7.10
Checking function and leak-tightness
Before you hand the product over to the operator:
▶
Check the gas line, the flue gas installation, the heating
installation and the hot water pipes for leaks.
▶
Check that the air/flue pipe and condensate drain pipe-
work have been installed correctly.
▶
Check that the front casing has been installed correctly.
7.10.1 Checking the heating mode
1.
Activate the heating mode on the user interface.
2.
Turn all thermostatic radiator valves on the radiators
until they are fully open.
3.
Allow the product to operate for at least 15 minutes.
4.
Purge the heating installation.
5.
Activate the display for the current operating status.
(
→
Page 16)
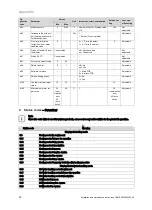
Status codes
–
Overview (
→
Page 34)
◁
If the product is working correctly, the display shows
S.04.
7.10.2 Checking the hot water generation
1.
Activate the hot water handling mode on the user inter-
face.
2.
Open a hot water valve completely.
3.
Activate the display for the current operating status.
(
→
Page 16)
Status codes
–
Overview (
→
Page 34)
◁
If the product is working correctly, the display shows
S.14.
8
Adapting the unit to the heating
installation
You can reset/change the system parameters (section "Us-
ing diagnostics codes").
Overview of diagnostics codes (
→
Page 30)
8.1
Burner anti-cycling time
To prevent frequent switching on and off of the burner and
thus prevent energy losses, an electronic restart lockout
is activated for a specific period each time the burner is
switched off. The burner anti-cycling time is only active for
the heating mode. Hot water handling mode during a burner
anti-cycling time does not affect the time function element.
8.1.1
Setting the maximum burner anti-cycling
time
1.
Set the diagnostics code. (
→
Page 15)
Overview of diagnostics codes (
→
Page 30)
2.
If required, adjust the maximum burner anti-cycling time
using the diagnostics code
d.02
.
Summary of Contents for home combi
Page 51: ......

