Inspection, maintenance and repair 10
0020188110_03 recoVAIR Installation and maintenance instructions
17
6.
Unscrew the condensate siphon from the product.
7.
If they are dirty, clean the condensate discharge pipe,
the condensate tray and the condensate siphon.
8.
Secure the condensate siphon to the product.
(
→
Page 10)
9.
Place the heat exchanger in the guide rails and slide
the heat exchanger back into the product.
10. Place the cover on the heat exchanger with new seals
and screw it down tightly.
11. Close the product. (
→
Page 11)
10.3.4 Cleaning the frost protection element
1.
Open the product. (
→
Page 11)
Caution.
Risk of material damage caused by incor-
rect cleaning.
Water and other liquids may damage the frost
protection element.
▶
Use only a vacuum cleaner to clean the
frost protection element.
2.
Clean the frost protection element.
–
Vacuum cleaner
3.
Close the product. (
→
Page 11)
10.3.5 Maintaining the filters
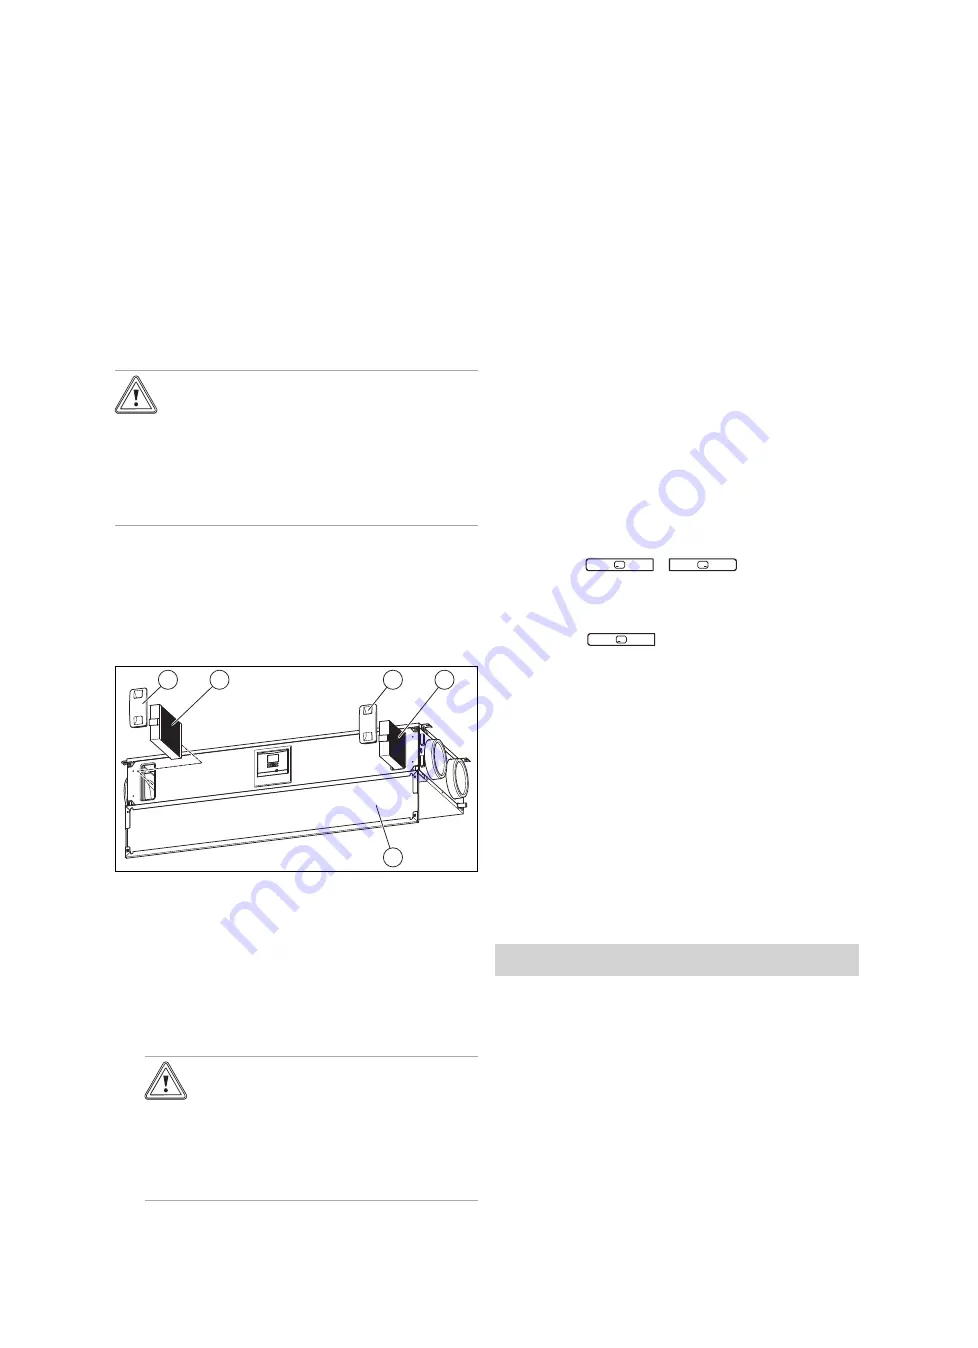
Removing the filters
1
2
1
3
2
1.
Open the front flap
(3)
.
2.
Pull out both of the filter plugs
(1)
.
3.
Pull the outdoor- and exhaust-air filter
(2)
out of the
product.
4.
Check the filters for dirt.
–
Recommended check: Every three months
1 / 2
Degree of contamination: Filter is lightly soiled
Caution.
Risk of material damage caused by
incorrect cleaning of the filter.
Water and other liquids may damage the
filters and the product.
▶
Only clean the filters with a vacuum
cleaner.
▶
Clean the filters.
–
Vacuum cleaner at a low setting
2 / 2
Degree of contamination: Filter is heavily soiled
Operating days:
≥
182 d
Replacement interval reached: At least twice annually
▶
Replace the filters.
–
Exhaust-air filter class: G4 (in accordance
with EN 779)/ISO Coarse (in accordance with
ISO 16890)
–
Outdoor-air filter class: F7 or F9 (in ac-
cordance with EN 779)/ISO ePM2.5 70%
or ISO ePM1,0 85% (in accordance with
ISO 16890)
–
Exhaust air valve filter
Installing the filters
5.
Install the filters in the product and ensure that they are
correctly aligned as you do so.
–
Labelling on the filters
–
Sticker on the inside of the front flap
6.
Place the filter plugs on the filters.
Resetting the filter days
7.
Switch on the product. (
→
Page 13)
8.
Press the
+
buttons simultan-
eously to access the menu.
9.
Navigate to the
Resets
menu
→
Res. days until fil. ch.
.
10. Reset the filter days.
11. Press the
button to exit the menu.
12. Close the front flap.
10.3.6 Increase/establish system efficiency
1.
Clean the supply and exhaust air valves and their cor-
responding filters. (
→
Page 16)
2.
Check the exposed piping for leaks.
3.
Check whether any obstructions are impeding the air
flows.
4.
If required, re-adjust the supply-air and exhaust-air
valves.
5.
Clean the outside air's intake tract and the exit air's
outlet openings.
6.
Carry out maintenance on the product filter.
(
→
Page 17)
7.
Remove the front flap if this has not yet been done.
Conditions
: The maintenance message
M.802
was previously shown in
the display.
▶
Switch the product on if this has not already been done.
(
→
Page 13)
◁
The system efficiency is checked automatically.
1 / 2
Maintenance message
M.802
is no longer shown in the
display.
No other measures are required.
2 / 2
Maintenance message
M.802
is still being shown in the
display.
▶
Measure/initialise the system. (
→
Page 15)


