background image

12

13

FR

FR

Aperçu de l’appareil

Aperçu de l’appareil

A

A

13

FR

Informations pratiques

C

12

FR

Utilisation de l’appareil

B

12

13

EN

Overview of the appliance

A

A

13

EN

Using the appliance

B

12

EN

Using the appliance

B

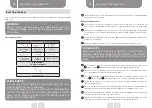
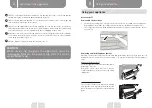
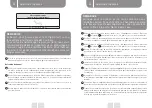
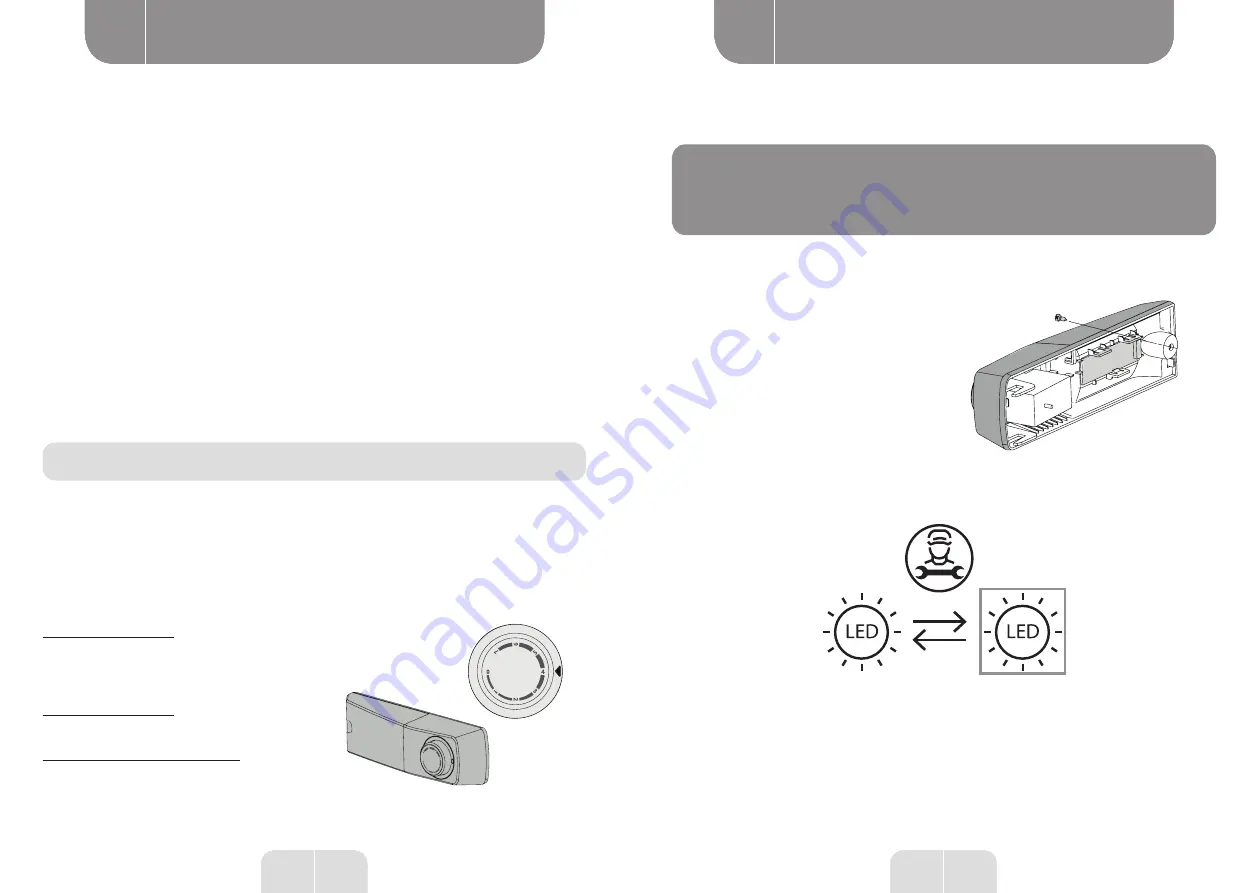
Replacing the LED lighting

CAUTION 

If the LED light is damaged, USERS MUST NOT 

REPLACE IT BY THEMSELVES!

Replacing the LED lighting by inexperienced persons may result in injury or serious malfunction. 

This must be replaced by a qualified person to avoid any danger. Contact your local service 

centre for assistance.
•  Before replacing the LED light, switch 

off the appliance and unplug it or 

remove the corresponding fuse or switch 

the circuit breaker.

•  LED lighting features: 220-240 V, 2 W 

max.

•  Disconnect the plug from the mains 

socket.

•  To replace the LED light, unscrew the 

screw.

•  Replace the defective LED light.

•  Turn the refrigerator back on.

Refrigerator compartment

•  For storing food that does not need to be frozen. It has different sections for different 

types of food.

Freezer compartment 2)

•  For the freezing of fresh food and the long-term storage of frozen or deep-frozen food.

Thawing food products 2)

•  In the refrigerator compartment.

•  At room temperature.

•  In a microwave oven.

•  In a traditional or convection oven.

•  Once defrosted, food must not be refrozen under any circumstances.

1.  If the appliance has the corresponding accessories and functions.

2.  If the appliance has a freezer compartment.

Crisper

•  To store fruit and vegetables.

Operation

Switching on and setting the temperature

•  Insert the plug of the connecting cable into a socket equipped with a grounding contact. 

When the refrigerator compartment door is opened, the interior light comes on. Once 

the refrigerator is installed, wait 5 minutes before plugging it in. Do not place any food 

inside until the temperature inside has dropped sufficiently.

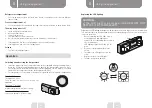
•  The temperature selector switch is located on the right side of the refrigerator compartment.

Position “0” means:

The appliance is off.

Turn the dial clockwise to switch on the 

appliance.

Position “1” means:

Highest temperature, warmest setting.

Position “7” (furthest) means:

Lowest temperature, coldest setting.

Summary of Contents for 2D 206 E S180C

Page 1: ...s les vices ou les dommages r sultant d une mauvaise installation d une utilisation incorrecte ou de l usure anormale du produit sur pr sentation du ticket de caisse NL GARANTIEVOORWAARDEN Dit product...

Page 2: ...A C E 1 2 F B 1 2 3 D H 1 2 G 1 2 3 4 5 6 7 8 9 10 11 12...

Page 3: ...ce Operation Useful information C Maintenance and cleaning Useful tips and advice Troubleshooting 3 EN Table of contents 2 EN Thanks Thank you for choosing this VALBERG product Chosen tested and recom...

Page 4: ...and 38 C T Between 16 and 43 C A multi class appliance can handle the lowest and highest temperature of all classes covered Using the appliance outside the recommended temperature range will lead to i...

Page 5: ...the device for the first time please note the following tips Ventilation of the appliance CAUTION To improve the efficiency of the cooling system and save energy you must maintain good ventilation aro...

Page 6: ...bottom door in place H Place the bottom door on a smooth surface with the outer panel facing up Loosen the screw 2 and the stopper 1 and install them on the left side tightening them firmly I Remove...

Page 7: ...helf by tilting it upwards Installing the door shelf First tilt the left side of the door shelf making sure that the catch is properly inserted into the door Then press the right inner side down into...

Page 8: ...for different types of food Freezer compartment 2 For the freezing of fresh food and the long term storage of frozen or deep frozen food Thawing food products 2 In the refrigerator compartment At room...

Page 9: ...detergent chlorine bleach essential oils abrasive cleaners or organic solvents such as benzene for cleaning 15 FR Aper u de l appareil A 15 FR Informations pratiques C 15 A 15 EN Useful information C...

Page 10: ...ble to scrape off ice and frost or to remove food from containers that were frozen with it using sharp tools or wooden rods so as not to damage the inner lining or the surface of the evaporator CAUTIO...

Page 11: ...en to prevent the formation of mould in the appliance 1 Remove all food 2 Disconnect the power plug from the mains socket 3 Clean and dry the interior thoroughly 4 Ensure that all doors are wedged ope...

Page 12: ...m connected to a water supply if water has not been drawn for 5 days 21 FR Aper u de l appareil A 21 FR Informations pratiques C 21 A 21 EN Useful information C Troubleshooting If you have a problem w...

Page 13: ...ou may have opened the doors too often or for too long or the correct closing of the doors may be impeded by an obstacle There may also be insufficient clearance at the sides back and top of the appli...

Page 14: ...isi ce produit VALBERG Choisis test s et recommand s par ELECTRO DEPOT les produits de la marque VALBERG vous assurent une utilisation simple une performance fiable et une qualit irr prochable Gr ce c...

Page 15: ...3 C Un appareil multi classes peut g rer la temp rature la plus basse et la plus lev e de l ensemble des classes couvertes L utilisation de l appareil en dehors de la plage de temp rature ambiante alt...

Page 16: ...us aurez besoin Non fournis Cl douille 8 mm Tournevis fin et plat Spatule Tournevis cruciforme Cl anglaise Cl 8 mm Installation de votre nouvel appareil Avant d utiliser l appareil pour la premi re fo...

Page 17: ...du r frig rateur puis serrez les boulons N Transf rez la porte sup rieure dans la position appropri e S curisez le niveau de la porte ins rez l axe d articulation central dans le trou inf rieur de la...

Page 18: ...alconnet de porte est endommag contactez le service client le pour obtenir de l aide Pour remplacer le balconnet de porte il convient de suivre les tapes suivantes Retrait du balconnet Appuyez sur le...

Page 19: ...che du balconnet en vous assurant que le cran soit bien ins r dans la porte Appuyez ensuite sur le c t int rieur droit en poussant vers le bas pour le mettre en place Compartiment r frig rateur Pour l...

Page 20: ...lairage LED doit tre remplac par une personne comp tente Si l clairage LED est endommag contactez le service client le pour obtenir de l aide Avant de proc der l entretien de l appareil teignez le et...

Page 21: ...u r frig rateur l ouverture des portes peut former une couche de gel l int rieur de l appareil Lorsque la couche de gel devient paisse elle r duit l effet de r frig ration de l appareil Lorsqu elle fa...

Page 22: ...ateurs sont susceptibles de g n rer des gelures sur la peau Conseils pour la conservation de denr es congel es Assurez vous que les denr es congel es ont t correctement stock es par le distributeur al...

Page 23: ...artiellement transform s aliments non adapt s la cong lation Ordre Type de compartiment Temp rature de stockage vis e oC Nourriture appropri e 7 Compartiment frais 2 3 Porc boeuf poulet frais produits...

Page 24: ...re r guli rement le bruit du moteur Ce dernier aura besoin de fonctionner davantage dans les circonstances suivantes Le r glage de la temp rature est plus froid que n cessaire Une importante quantit d...

Page 25: ...hun onberispelijke kwaliteit ELECTRO DEPOT beveelt de VALBERG toestellen aan en is ervan overtuigd dat u uiterst tevreden zal zijn bij elk gebruik van het toestel Welkom bij ELECTRO DEPOT Bezoek onze...

Page 26: ...evolen temperatuurinstelling voor een optimale opslag van de voedingswaren De graden van de omgevingstemperatuur T C worden ter informatie gegeven De plaatsing in de ruimte de frequentie van het opene...

Page 27: ...temperatuur dan de aangegeven vork kan het toestel werkingsstoornissen vertonen Installeer uw toestel op een droge plaats om elke beschadiging door vocht te vermijden Hou uw toestel weg van rechtstree...

Page 28: ...oven Schroef de schroef 2 en de stootrand 1 los en installeer ze vervolgens aan de linkerkant door ze stevig vast te schroeven G Schroef de twee zelftappende schroeven met kraag die gebruikt zijn om h...

Page 29: ...rbare roosters plateaus Verschillende opbergrekjes in glas of kunststof of opbergroosters zijn inbegrepen in uw toestel Afhankelijk van het model vertoont de koelkast verschillende combinaties en kenm...

Page 30: ...ntact dat voorzien is van een aarding Wanneer de deur van de koelkast geopend wordt gaat de verlichting aan de binnenkant branden Eenmaal de koelkast is ge nstalleerd wacht 5 minuten alvorens deze aan...

Page 31: ...Gebruik geen verdunningsmiddel detergenten voor auto s Clorox product essenti le oli n schuur reinigingsmiddelen of organisch oplosmiddel zoals benzeen voor het reinigen Deze zouden het oppervlak van...

Page 32: ...riezer ophoopt Verwijder het water met behulp van een zachte vod Om het ontdooiingsproces te versnellen kunt u een kom warm water ongeveer 50 C in het diepvriescompartiment plaatsen en het ijs wegschr...

Page 33: ...nomen of nadat het een langere periode niet gebruikt geweest is gedurende minimaal 2 uur werken op de hoogste stand alvorens voedingswaren in het diepvriescompartiment te plaatsen Bereid kleine portie...

Page 34: ...ak en aan voedingselementen verliezen Niet voor het diepvriezen van verse voedingswaren geschikt compartiment Volgorde Type compartiment Beoogde bewaartemperatuur C Geschikte voeding 5 Diepvriezer 6 Z...

Page 35: ...iet zelf te repareren Wanneer het probleem blijft aanhouden nadat u de hierboven vermelde controles heeft uitgevoerd gelieve dan contact op te nemen met een gekwalificeerd elektricien een erkend techn...

Page 36: ...hebt geopend of dat de correcte sluiting van de deuren verhinderd wordt door een obstakel Het is ook mogelijk dat ruimte die vrijgelaten is aan de zijkanten de achterkant of de bovenkant van het toes...

Page 37: ...vo puede estar s eg uro de que siempre quedar satisfecho al utilizarlo Le damos la bienvenida a ELECTRO DEPOT Visite nuestra p gina web www electrodepot es 71 ES ndice Descripci n del aparato A Temper...

Page 38: ...el almacenamiento ptimo de los alimentos Los grados de temperaturas ambientes T C se dan a t tulo indicativo La colocaci n en la habitaci n la frecuencia de apertura de puerta s o incluso el nivel de...

Page 39: ...e muestra en la siguiente tabla Si se expone a una temperatura superior o inferior a la especificada durante un per odo de tiempo prolongado el aparato puede sufrir fallos de funcionamiento Instale el...

Page 40: ...ntando cuidadosamente la puerta verticalmente OBSERVACIONES Al retirar la puerta tenga cuidado con las arandelas que se encuentran entre la bisagra central y la parte inferior de la puerta del congela...

Page 41: ...estantes y ci rrela ATENCI N Al proceder a cambiar el sentido de la puerta el aparato se debe desconectar Desenchufe previamente el enchufe de alimentaci n de la toma de corriente Utilizaci n de su ap...

Page 42: ...y verduras Funcionamiento Puesta en funcionamiento y ajuste de la temperatura Inserte el enchufe del cable de conexi n en una toma de corriente con contacto a tierra Cuando la puerta del compartimento...

Page 43: ...be realizarlo un centro de servicio autorizado solo se deben usar las piezas de repuesto originales 1 Si el aparato tiene una funci n de eliminaci n de escarcha 2 Si el aparato tiene un compartimento...

Page 44: ...se en contacto con el servicio de atenci n al cliente para obtener ayuda Descongelaci n Por qu descongelar el aparato El agua contenida en los alimentos o que entra en el aire dentro del frigor fico c...

Page 45: ...ifique Esta combinaci n est dise ada para ser la configuraci n de mayor eficiencia energ tica Consejos para la refrigeraci n de alimentos frescos No coloque alimentos calientes directamente en el frig...

Page 46: ...n contacto con los alimentos y los sistemas de desag e accesibles En el frigor fico guarde la carne y el pescado crudos en recipientes adaptados para que no entren en contacto con otros alimentos ni g...

Page 47: ...tos preparados etc Se recomienda comerlos el mismo d a o preferiblemente en un plazo m ximo de 3 d as 9 Vino 5 20 Vino tinto blanco espumoso etc OBSERVACIONES Guarde los diferentes alimentos de acuerd...

Page 48: ...erior del aparato es demasiado elevada Las puertas se han estado abriendo demasiado a menudo o durante mucho tiempo Despu s de haber instalado el aparato o si ha estado apagado durante un per odo de t...

Page 49: ...94 95 ES ES Descripci n del aparato Descripci n del aparato A A 94 95...

Reviews: