Section 7
—
Operation
MCP-25/MS
Valco Cincinnati
7-3
MC051 (July 2002)
3. Measure the delay and glue-pattern length on the product.
4. Compare the measurements with the values displayed in the glue-pattern-edit menu.
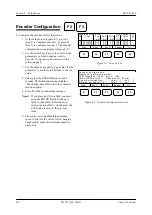
5. If the glue pattern is shorter or longer than the value seen in the glue-pattern-edit menu, check the encoder
configuration setup (see
Section 8—Setup Menu
).
To adjust the glue-pattern position at high speed, follow these steps:
1. While operating the parent machine at high speed (approximately 300 m/min), apply glue to a few prod-
ucts.
2. Stop the parent machine.
3. Measure the delay and glue pattern length on the products.
4. Compare measurements with the values displayed in the glue-pattern-edit menu and with the previous
pattern.
Delay:
If the start of the glue pattern begins later than the value seen in the glue pattern edit menu, increase the
“Ton” value (0.1-25 milliseconds) in the valve setup menu.
If the start of the glue pattern begins sooner than the value seen in the glue pattern edit menu, decrease the
“Ton” value (0.1-25 milliseconds) in the valve setup menu.
Pattern length:
If the pattern is longer than the value seen in the glue pattern edit menu, increase the “Toff” value (0.1-25
milliseconds) in the valve setup menu.
If the pattern is shorter than the value seen in the glue pattern edit menu, decrease the “Toff” value (0.1-25
milliseconds) in the valve setup menu.
5. If necessary, adjust “Ton” and “Toff” values.
Adjusting the Glue Volume
To adjust the glue volume, follow these steps:
1. Operate the parent machine at slow speed (under 10 meters/minute).
2. Press the button on the front panel of the MCP-25/MS.
3. Use the front-panel valve-selection keypad to activate glue valve 1.
4. Observe the glue volume on the product.
5. Use the scroll buttons on the right side of the display to increase or decrease the glue volume by adjusting
the pressure values in the pressure table.
Summary of Contents for MCP-25/MS
Page 1: ...MCP 25 MS Control Manual Number MC051 Release Date June 2004 ...
Page 25: ......
Page 27: ......
Page 28: ......
Page 29: ...3 4 5 1 2 2 4 5 3 1 ...
Page 30: ......
Page 31: ......
Page 33: ...4 8 12 11 10 9 6 7 5 3 2 1 ...
Page 34: ...3 7 9 10 8 5 6 4 1 2 1 4 3 2 ...
Page 35: ...1 3 4 2 ...
Page 36: ...7 9 10 8 3 5 6 4 1 2 ...
Page 37: ...SHD NPN 5 4 3 24V Low Level Detector 0V 1 2 ...
Page 38: ......
Page 39: ......
Page 40: ......
Page 41: ......
Page 42: ......
Page 43: ...3 4 5 6 2 3 1 5 6 4 1 2 ...
Page 44: ......
Page 45: ......
Page 46: ......
Page 47: ......
Page 48: ......
Page 49: ...RODUCT 7 10 9 8 3 5 6 4 1 2 8 10 9 2 5 7 6 3 4 1 ...
Page 50: ......
Page 51: ......
Page 52: ...6 8 10 9 7 1 3 5 4 2 ...
Page 53: ......
Page 54: ......
Page 55: ...6 8 10 9 7 1 3 5 4 2 ...
Page 56: ...VA LC O CI NCIN NA TI INC 513 87 4 6550 5 13 87 4 6550 VALC O C INCIN NATI INC ...
Page 57: ......
Page 58: ......
Page 59: ......
Page 60: ......
Page 61: ......
Page 62: ......
Page 87: ......
Page 99: ...F1 F2 F3 F4 F5 ...

