10
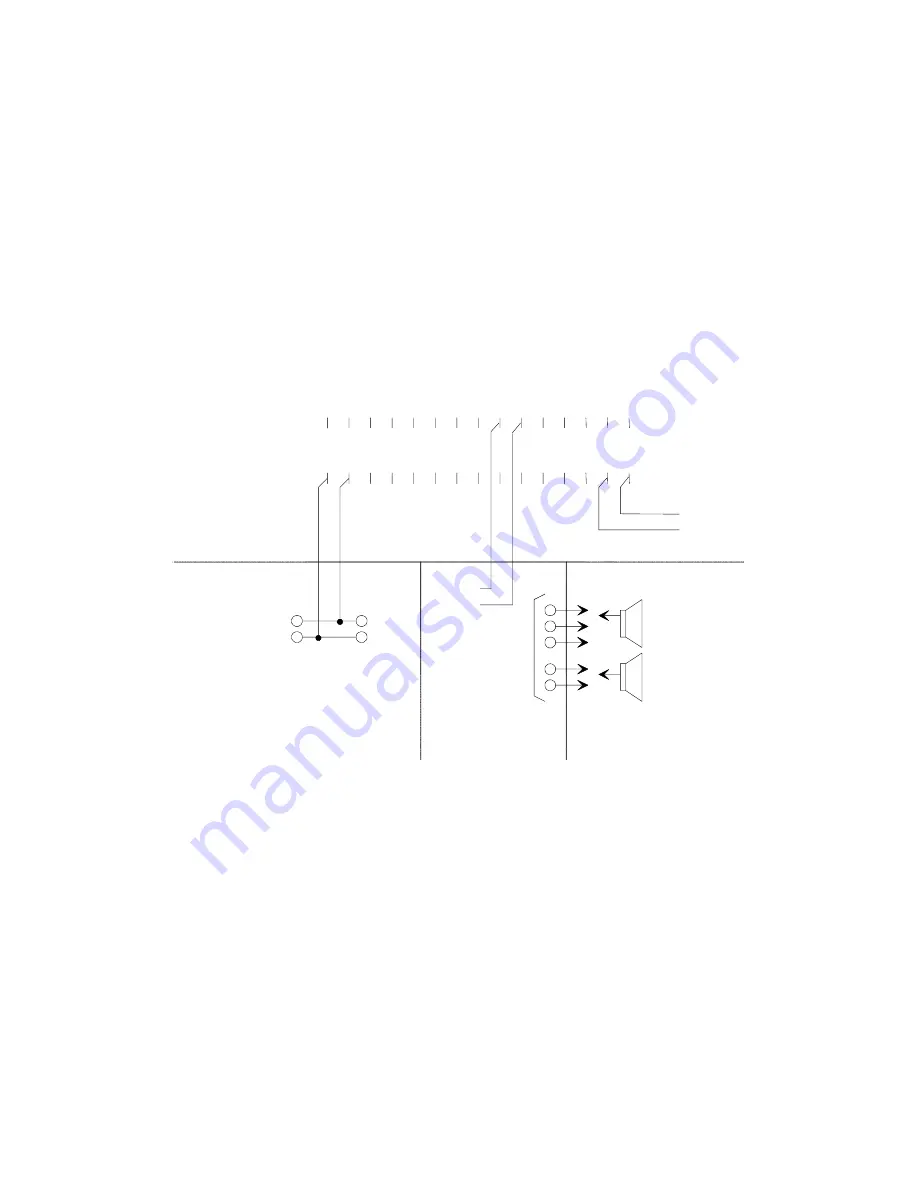
____ 2. Connect Ring of the line to pin 17.
____ 3. Crossconnect pin 6 of the V-9940 to the Tip "WHITE/BLUE" of a Valcom multi-zone dial select
page control unit (such as the V-1109RTVA or V-1109RTHF).
____ 4. Crossconnect pin 7 of the V-9940 to the control unit Ring "BLUE/WHITE".
____ 5. Refer to the Installation Manual supplied with the control unit for speaker and power
connections.
____ 6. Refer to the Installation Manual supplied with the control unit for proper volume adjustment
procedures.
____ 7. Dip Switch Settings: Set dip switches 1 an 8 "ON". Set switches 2 to 7 all "OFF". See Section
titled "Dip Switch Settings" for additional information regarding dip switches.
____ 8. When all connections are complete, replace cover and lock in place using the #6 ½ inch screws
provided. Plug in power supply.
1
2
3
4
5
6
7
8
9
10
11
12
13
14
15
30
29
28 27 26 25 24 23 22 21 20 19 18 17 16
T
R
Centrex Number
or C. O. Line
FIGURE 9
MULTI- ZONE ONE WAY OR HANDSFREE PAGING
CENTREX OR C. O. LINE ACCESS
V-9940 PUNCHDOWN BLOCK
-24VDC
Power Supply
BL/WH
V/SL
SL/V
B Ground (+)
B Battery (-24VDC)
Speakers
(Type depends
on Control Unit)
Zone
Outputs
Valcom Dial Select
Multi-Zone Page Unit
WH/BL
OPERATION
Circuit Description
The V-9940, Station Level Page Adapter, has
three inputs: Tip and Ring from the line, music
and all call; and two outputs: 8 Ohm and 600
Ohm.


