9
10
19
Valcom, Inc.
5614 Hollins Road
Roanoke, VA 24019
USA
P. 540-563-2000
F. 540-362-9800
www.valcom.com
Valcom, Inc.
5614 Hollins Road
Roanoke, VA 24019
USA
P. 540-563-2000
F. 540-362-9800
www.valcom.com
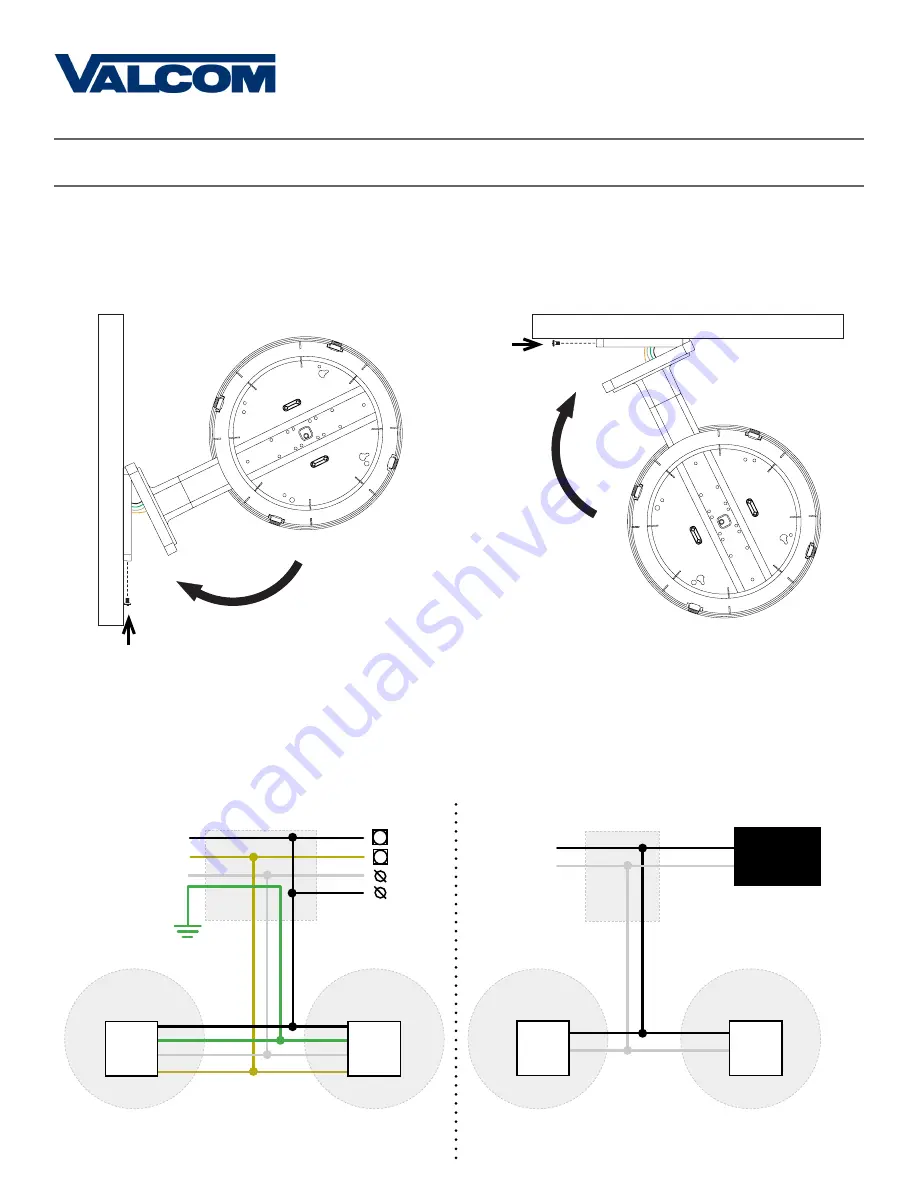
Double Mount Installation
9) Attach the base of the pole to the mounting plate so that the lip is on the top of the base, and the holes
for the screws are on the bottom of the base. Hang the base on the mounting plate, attach the wires
from the bottom of the pole to the wires in the gang box, then screw the other side of the base onto the
mounting plate using the two black screws you set aside before.
10) Attach the power connectors to the wires you threaded through the pole. Consult the diagrams
below for additional help, or see the sections of this manual labeled “3-Wire Synchronous (Sync-Wire)
Communication Wiring Information” or “2-Wire Digital Communication Wiring Information” for additional
details, depending on your system.
1
2
WALL
1
2
CEILING
3-Wire Sync
Yellow
Yellow
Black
Black
White
White
Black
White
Yellow
27/24
26/23
To next
clock
Power
Common
Master Clock
CLOCK 1
CLOCK 2
Gang
Box
Green
Green
Gr
een
Ground
2-Wire Digital
Black
Black
White
White
Black
White
To next
clock
CLOCK 1
CLOCK 2
Gang
Box
V-CCU


