5 6
7 8
7
Valcom, Inc.
5614 Hollins Road
Roanoke, VA 24019
USA
P. 540-563-2000
F. 540-362-9800
www.valcom.com
Valcom, Inc.
5614 Hollins Road
Roanoke, VA 24019
USA
P. 540-563-2000
F. 540-362-9800
www.valcom.com
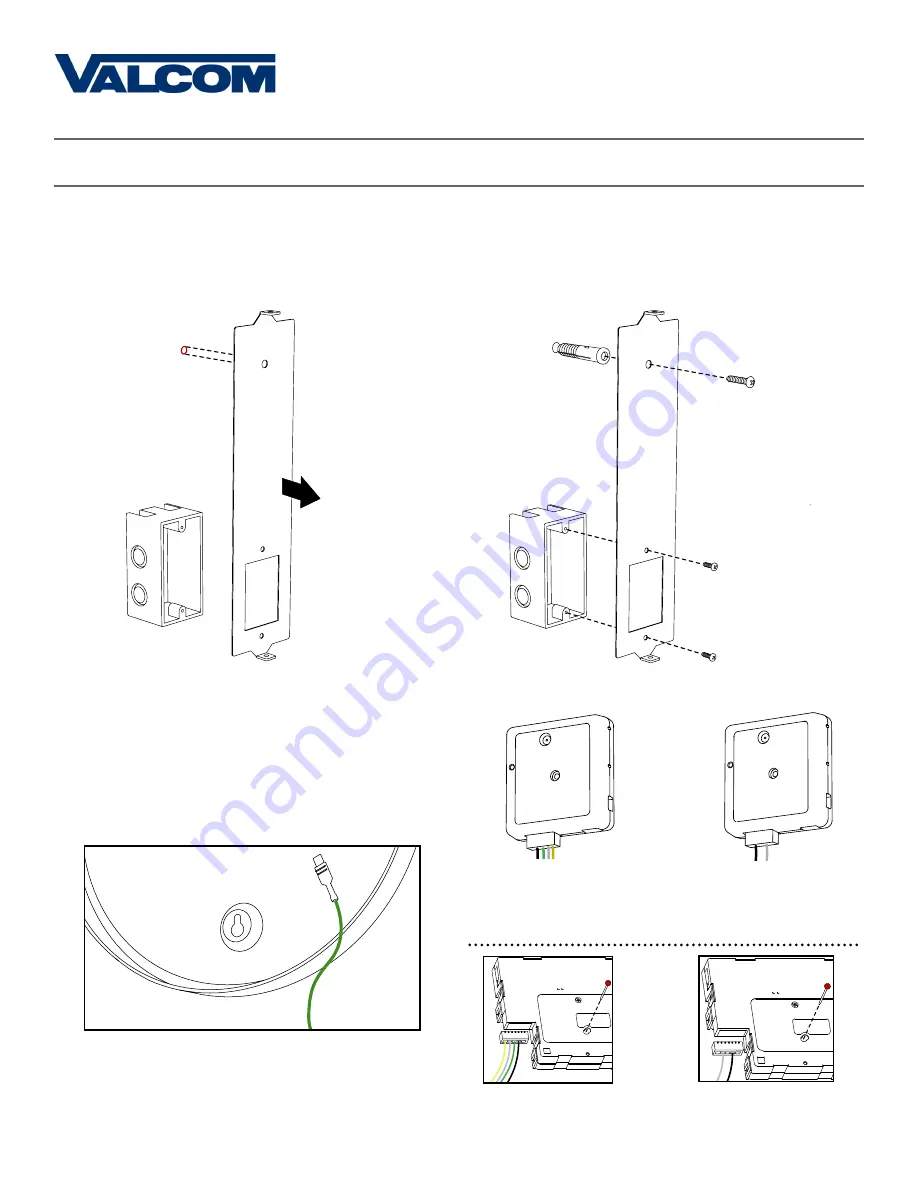
Wall Mount Installation
5) Use the pencil to mark the location of the large,
circular hole at the top of the mounting bracket.
Once finished, remove the mounting piece and drill
a hole at the location you just marked.
7) Remove the gearbox pin, then, if the case is
made of metal, attach the grounding wire to the
grounding tab below and to the right of the
clock movement.
6) Insert the wall anchor into the hole, then reattach
the mounting bracket. This time, also insert the
#10x1.5 through the top of the mounting piece and
into the wall anchor.
8) Attach the Power connector to the port on the
clock movement.
3-Wire Sync
2-Wire Digital
Bla
ck
G
re
en
W
hi
te
Ye
llo
w
Bla
ck
W
hi
te
Ye
llo
w
W
hi
te
G
re
en
Bla
ck
W
hi
te
Bla
ck
3-Wire Sync
2-Wire Digital


