9
10
8
Valcom, Inc.
5614 Hollins Road
Roanoke, VA 24019
USA
P. 540-563-2000
F. 540-362-9800
www.valcom.com
Wall Mount Installation
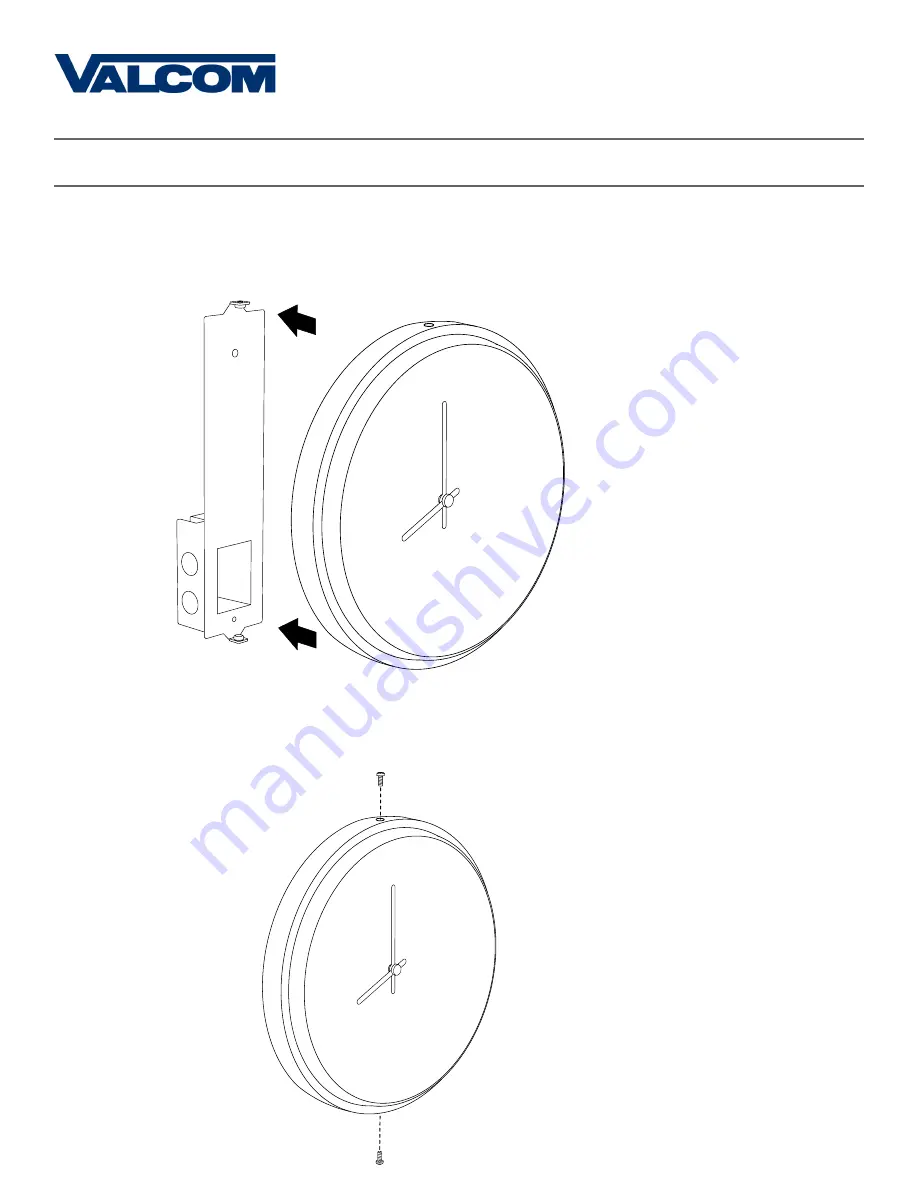
10) Use the two M4-0.5x10 screws to attach the clock to the mounting bracket. The screws should
pass through the top and bottom holes on the clock, followed by the top and bottom holes of the
mounting bracket.
9) Attach the clock to the mounting piece so that the hole at the top of the clock lines up with the hole
at the top of the mounting piece, and the hole at the bottom of the clock lines up with the hole at the
bottom of the mounting piece.


