


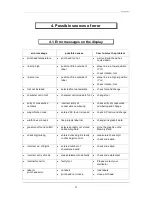

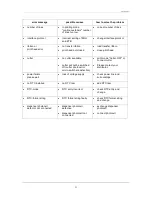


Service manual
26
3.8. Option cutter
3.8.1. Cleaning/ servicing/changing of cutter
Attention:
Danger of injury while working at the cutter!
Switch off printer and plug it out!
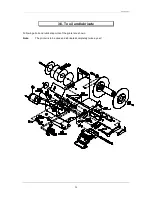
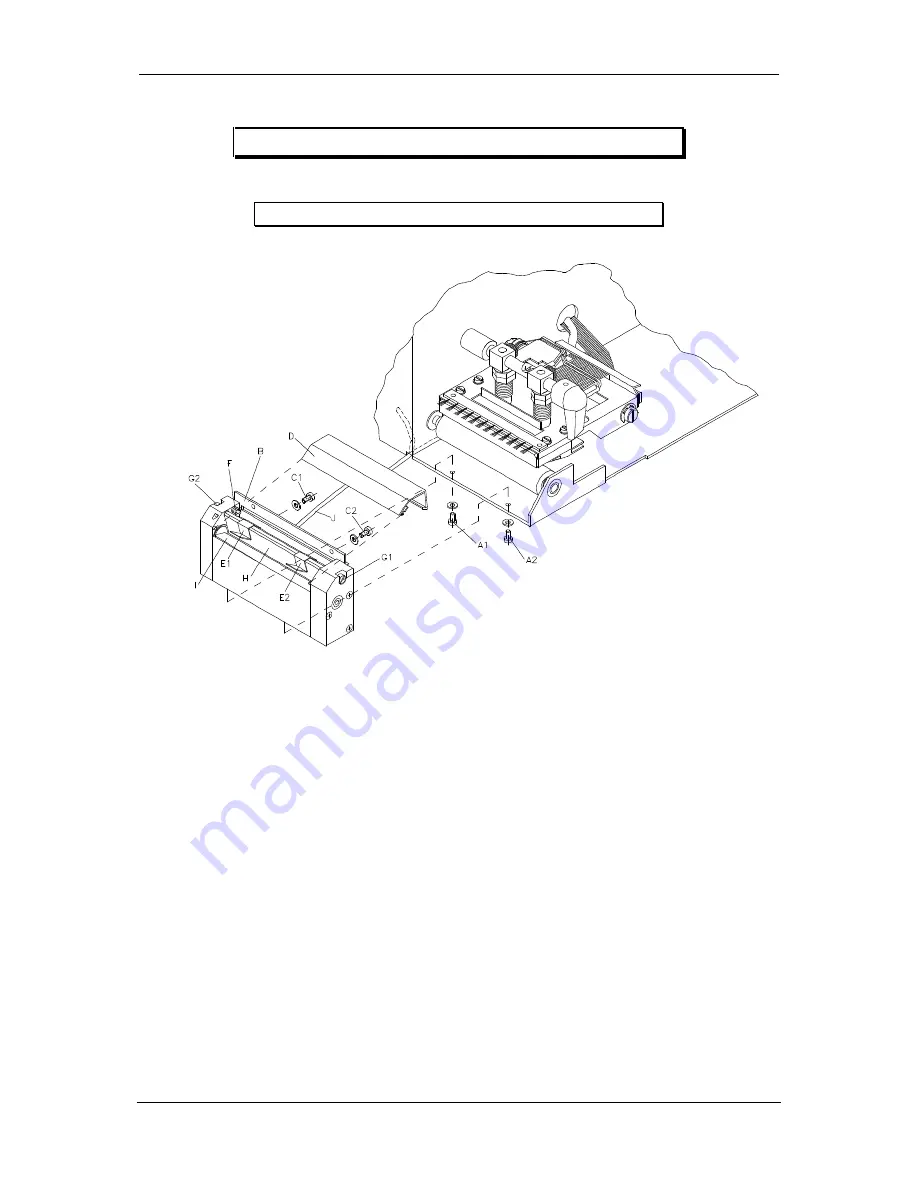
At first remove 2 screws on the bottom of the printer and the lock-in bolts for the right cover at the
top edge of the chassis, then take off left cover.
Plug out JP 25 and JP 26 on the circuit board (see specification on circuit board on the left side of
step motor).
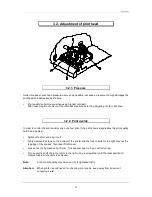
Remove screws (A1, A2). Take off cutter. In doing so guide cable (J) with plugs through the slot
on the bottom of the chassis.
After having removed the screws (C1, C2), take off the angular stay.
Lever the upper cover plate (D) on the back of the cutter by means of a thin screwdriver for slotted
screws over the setting surface and take it off then.
Take off guiding plates (E1, E2). Unhook spring (F) (keep position in mind for correct
reinstallation!)
Release screws (G1, G2) and take off the cutting ledge (H).
Clean cutting ledge and rotation cutter (I) with methylated spirit.
Installation of all cutter parts in opposite order.
Installation of cutter in opposite order.


