


Service manual
27
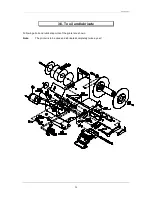
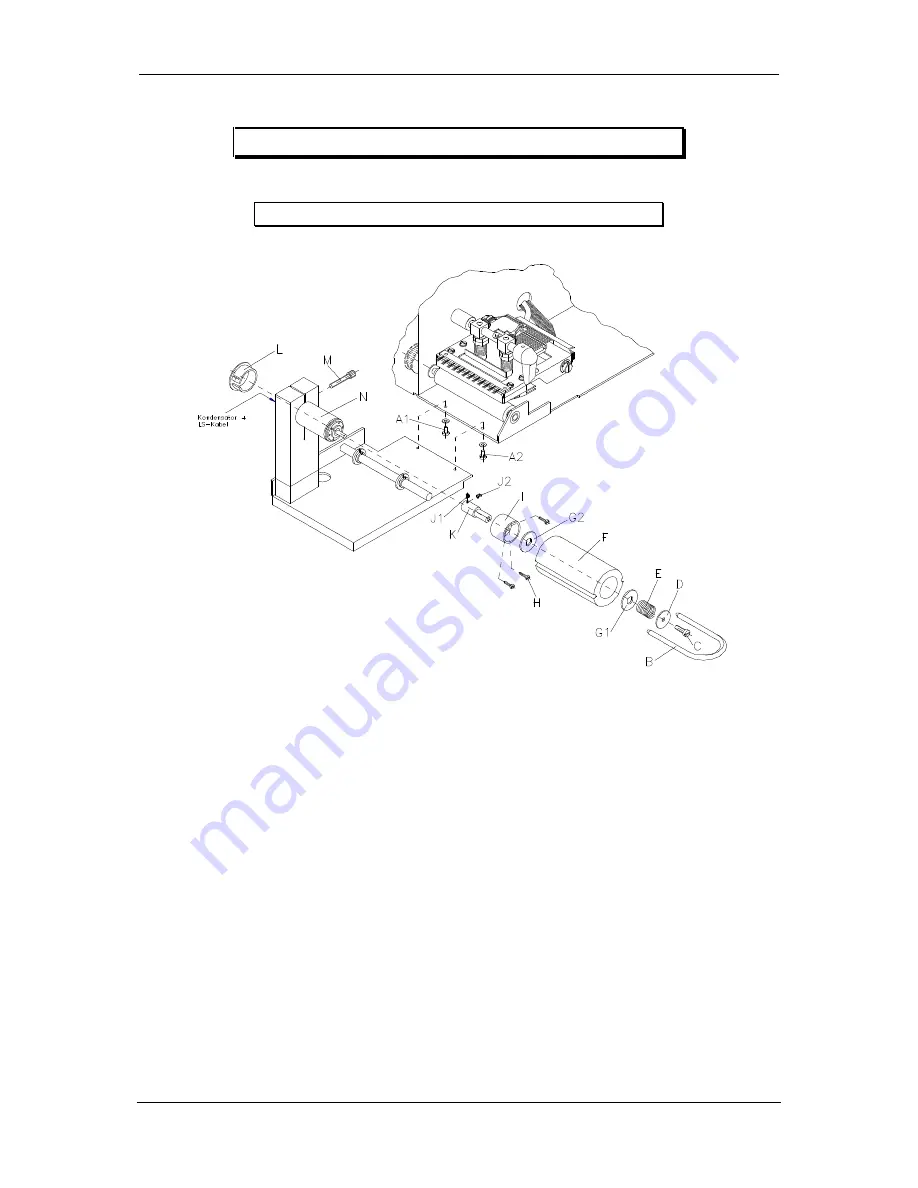
3.9. Options winder PR 25 / PR 26
3.9.1. Exchange motor
Switch off printer and plug it out!
Draw off 2-pin plug of the winder which you will find on the rear panel.
After having removed the screws (A1, A2), take off winder.
Draw off clamp (B), remove screw (C) together with washer (D) and pressure spring (E).
Draw off winder roll (F) with integrated carrier plates (G1, G2) to the front.
Release 3 screws (H) and draw off bearing (I) to the front.
After having released the locking screws (J1, J2), draw off carrier plate (K).
Remove cover cap (L); take off condenser and photocell cable on the back of the motor by using
a gas blow-pipe. Release screw (M) and take off motor (N).
Installation:
Installation of motor and reinstallation of all parts in opposite order.
Lubricate motor (N) and bearing (I) from the outside only, whereas the carrier plates (G) from both
sides.
Strain screw (C) until it stops, release it approx. by 2 turns. In case of need the sliding clutch can
be exactly adjusted by turning screw (C) to the right or to the left.


