16
Проверил: Р.Ч./08.2017г.
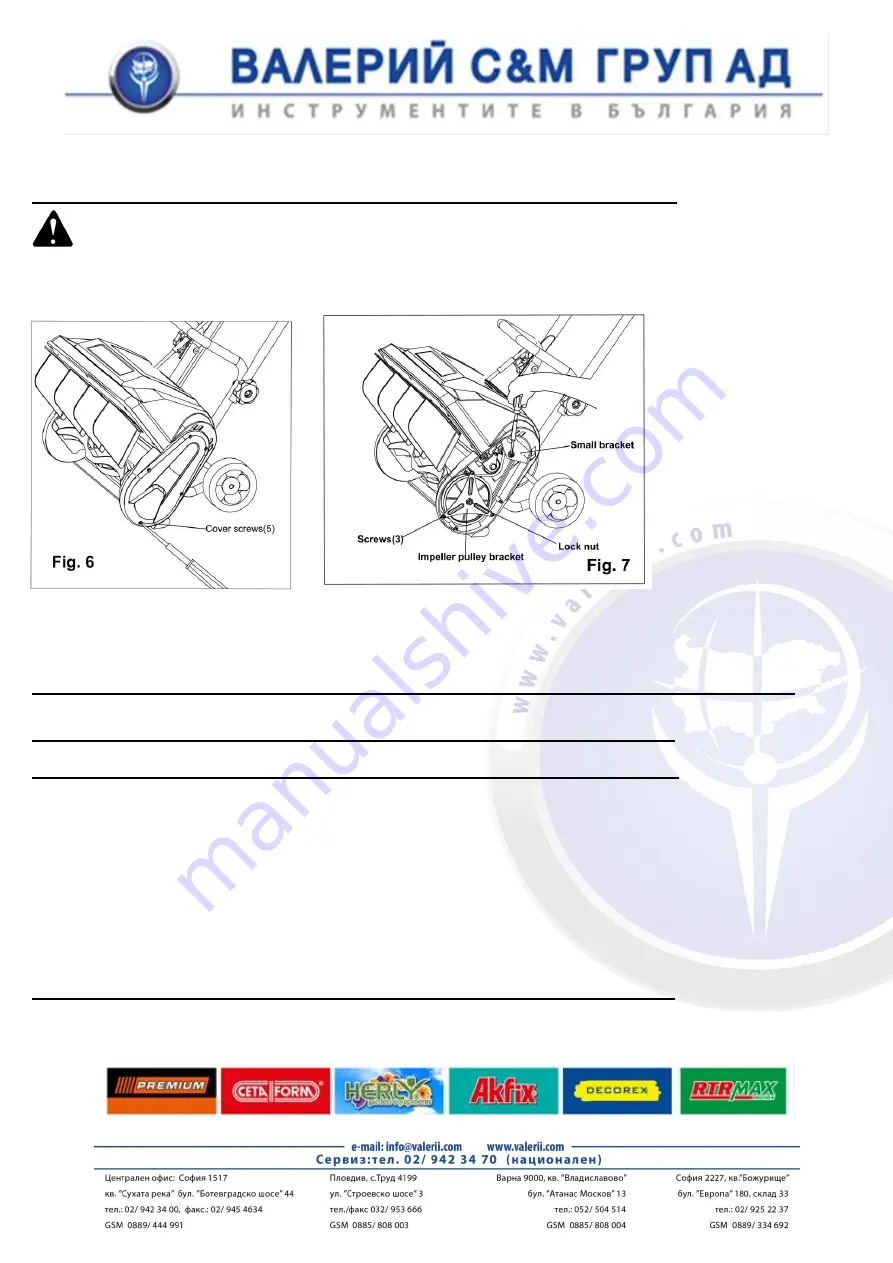
• Remove one screw and the small bracket. (Fig. 7) .
• Remove the lock nut and the three (3) screws (Fig. 7) .
• Remove the impeller pulley bracket using a washer or nut driver (Fig. 7).
W A R N I N G
In order to reduce the risk of electric shock, replace the cover before connecting the Snow Thrower to a power
source.
•
Pull the belt tensioner
(idler arm) away from the
drive pulley. Remove the
damaged or
broken
belt
from
the
impeller pulley and the
drive pulley inside the
housing. Discard the
belt in the proper manner
(Fig. 8).
•
Loop the new belt
around the drive pulley
and the impeller pulley (Fig. 8). Pull the belt
tensioner (idler arm) away from the drive pulley in order to install the belt around the drive
pulley.
NOTE: Verify that the washer is still in place on the impeller pulley shaft before reinstalling the belt cover.
MAINTENANCE
• Reinstall the impeller pulley bracket with the three (3) screws.
• Reinstall the lock nut. Tighten the nut.
• Reinstall the belt cover with the five (5) screws. In order to facilitate the installation,
position the narrow part of the cover into the recess of the housing and install the two top
screws, and then push the rest of the cover down into the recess and over the rotor shaft.
Tighten all five (5) screws.
NOTE: If the flange lock nut is damaged, do not replace it with a standard nut. Use only the manufacturer's original
replacement parts.
Summary of Contents for PREMIUM 0503APESM1430
Page 21: ...21 Проверил Р Ч 08 2017г ...
Page 30: ...30 Проверил Р Ч 08 2017г В Conectați cablul cu ștecherul ...
Page 39: ...39 Проверил Р Ч 08 2017г ...
Page 42: ...42 Проверил Р Ч 08 2017г ...
Page 52: ...52 Проверил Р Ч 08 2017г ...
Page 70: ...70 Проверил Р Ч 08 2017г ...
Page 73: ...73 Проверил Р Ч 08 2017г ...
Page 83: ...83 Проверил Р Ч 08 2017г ...


