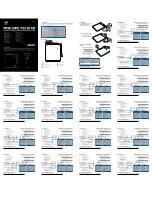
Figure 4: Then connect the black charging lead to the negative pole of the battery.
Figure 5: Once the battery is connected to the charger you can connect the charger to a 220V/50Hz
socket-outlet. It is prohibited to connect the charger to a socket-outlet with any other supply voltage.
Figure 6: The only way to determine the exact condition of the battery(level of charge) is to measure the
acid density with an acidimeter.
Please note: gases are released during the charging
Operating as follows:
Acid density values(kg/at 20
℃
)
1.28 battery charged
1.21 battery half charged
1.16 battery empty
Figure 7: pull the power plug out or the socket-outlet.
Figure 8: first disconnect the black charging lead from the negative pole of the battery.
Figure 9: then disconnect the Ed charging lead from the positive pole of the battery.
Figure 10: screw or press the battery plug back in place.
Overload protection
Figure 11: the flat fuse provides protection from polarity reversal and short-circuiting. A defective fuse
has to be replaced by one of identical.
◆
Please note: at automatic circuit-breaker interrupts the charging in the event of thermal overloading.
The circuit-breaker switches on again automatically after a cooling interval.
Ⅴ、
SERVICING AND CLEANING THE BATTERY AND CHARGER
◆
Make sure that your battery is always fitted securely in the vehicle.
◆
Check that the battery is properly connected to the vehicle’s electric system.
◆
Keep the battery clean and dry. Apply a little acid-free and acid-resistant grease (Vaseline) to the
terminals.
◆
The level of acid in non-maintenance-free batteries should be checked about every 4 weeks. Top up
with distilled water as necessary.


