background image

27


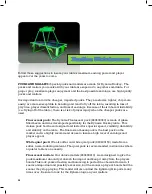
Our pucks and mallets are available from a number of parts distributors as well as 

www.valleydynamoparts.com.  Be sure to specify Dynamo pucks and mallets.  We have 

added our logo to help identify them for you.  

SANDPAPER: 

Adhesive-backed 240-grit sandpaper (980400200) has been included with 

your table. This should be attached to the side or end of the table, or nearby, so players 

can sand the puck when it stops floating properly due to small nicks and abrasions.  Do not 

attach the sandpaper to the back of the metal goal end where it could damage clothing.  

Sandpaper discs (980400200) can be obtained from www.valleydynamoparts.com,  

Dynamo distributors, a hardware store, or from one of the parts companies supplying this 

industry.  Sandpaper, like pucks and mallets, should be replaced when showing excessive 

wear.


CLEANING: 

Excessive dust on the surface of your table will slow the puck significantly.  

To prevent this, the table should be cleaned once a week -- more often if necessary.  We 

highly recommend rubbing alcohol (isopropyl alcohol) to clean the plastic laminate 

surface.  Liquid window cleaners are also acceptable.  Always clean the plastic laminate 

surface with the air on to ensure that the cleaning process does not force the dirt down into 

the air holes.  Use a small amount of the cleaning solution on a clean paper towel to clean 

off the dust and dirt.  Regular cleaning and maintenance of the playing surface can prevent 

the holes from becoming plugged.   
Once a year or so, check the condition of the air holes.  If any debris has been forced 

down into the air holes, it can be removed with the following method: With the air ON, use 

a Dremel Moto-tool or equivalent, with a 1/32" drill bit.  Slowly insert the rotating drill bit 

into the hole.  This will cause the debris to "ride" up the grooves on the drill bit and out 

onto the playing surface.  Never push the debris down into your table.


When cleaning the table surface, do not clean off the side rails where the puck hits.  The 

thin layer of dirt helps the puck bank properly and keeps it on the table. 

NEVER USE SILICONES, WAXES, OR ANY OTHER PRODUCT 

THAT COULD LEAVE A RESIDUE ON THE PLAYING SURFACE. 

THE USE OF THESE PRODUCTS 

WILL

 CAUSE A BUILDUP 

OF DEBRIS IN THE AIR HOLES.

LIQUIDS:  

There should be no drinks placed on the table. Ever.  Any liquid spilled on the 

surface must be wiped up immediately.  Large amounts of any liquid can seep down the 

holes and into the wood, which will warp the playing surface.  We recommend prohibiting 

drinks from being placed on the table at any time.  Side shields are effective in 

discouraging placement of drinks on the table rails. 

LIQUID SPILLS ARE NOT A COVERED WARRANTY FAILURE.

Summary of Contents for Black Hole

Page 1: ......

Page 2: ...1...

Page 3: ...mity 6 Warnings and notices 7 Assembly instructions 13 Overhead instructions 17 Side Shield Installation 18 Black Hole Programming 20 Electronics Layout 23 Selected Parts Listing 24 Rules of Play 26 R...

Page 4: ...er of the unit located inside the Black Hole s CPU ACCESS Door or other proof of purchase such as an invoice or receipt OPERATORS AND END USERS While our Tech Support staff is available to assist with...

Page 5: ...r the duration Dynamo products are made to our exacting standards and known for their durability but are not indestructible and may require periodic maintenance in order to function properly The follo...

Page 6: ...or for liability in tort relating to this product or resulting from its use or possession LIMITATIONS OF IMPLIED WARRANTIES There are no other warranties expressed or implied including but not limite...

Page 7: ...nd or unsafe operation WARNING Plug this game into a properly grounded outlet to prevent shock hazards and assure proper game operation Do not use an adapter plug to defeat the power cord s grounding...

Page 8: ...traps and remove the top portion of the box completely Lower the sides of the box bottom by carefully cutting or tearing vertically at all of the corners Remove all staples from the box top and bottom...

Page 9: ...04910 Bracket Diffuser Leg Hardware kit 4x 870000124 8 32 x 5 8 screws 4x 870046103 Washer 10 12x 870007390 5 16 bolts 12x 800404935 spacers 12x 870050106 Washers 4x 20300110 5 16 nuts 4x 870401000 Le...

Page 10: ...table could land on you and cause injury if you lose your grip while lifting the table from its side With the table on its side you can see the four 5 16 bolts securing the Overhead Display Unit to t...

Page 11: ...nd washer through the leg and thread it into the lowest leg mounting hole on the table s side wall Pressure from the leg will hold the bearing tightly to the table s side wall so take care when moving...

Page 12: ...see photo on the bottom surface of the table Take the Overhead Wire Harness from the Parts Kit Feed the end marked TABLE SIDE A into the leg closest to the CPU Access Door and into the table using th...

Page 13: ...t Use a 106 key to open the FAN DOOR see photos on the bottom surface of the table Take the Overhead AC Harness from the Parts Kit Feed the end marked TABLE SIDE B into the leg closest to the Fan Door...

Page 14: ...unting tube There is a cut out at the top of the tube for the wiring Slide the female tube onto the lower U shaped leg SECOND on the opposite side of the table route the Overhead AC Harness through a...

Page 15: ...s with the first eight leg bolts use the bushings and take care to prevent the bushing from damaging the side decal The overhead bracket will have THREE bolts installed to secure it Align the bracket...

Page 16: ...ts but still leaving the protective cardboard on the fluorescent bulbs One end of the overhead will have a Directional Indicator marker THAT END OF THE OVERHEAD SHOULD BE ORIENTED TOWARD THE COIN DOOR...

Page 17: ...he Camera Bracket as in the side now closest to you that is not already anchored in a groove into the groove You may now connect the USB Extension harness into the marked camera connections Plug in th...

Page 18: ...32 x 1 Black Oxide Hex Bolts 4 Lock nuts 4 10 Black Oxide Washers 8 Tool required Phillips Screwdriver 1 Remove the bolts from the Side Top Rail except for the bolt at the very end of each Rail 2 Inse...

Page 19: ...Display Screens make programming easier than ever for a Dynamo Hockey table no cryptic codes of two digit readouts no microscopic access buttons on the CPU Boards Programming is less complicated more...

Page 20: ...winner tickets 0 100 increments of 1 loser tickets 0 100 increments of 1 attract time 0 5 increments of 1 Audio music On Off music volume 0 100 increments of 1 sound fx On Off sound volume 0 100 incre...

Page 21: ...20 If it ever becomes necessary to troublshoot your Black Hole table s electronics these maps will be a valuable tool...

Page 22: ...21...

Page 23: ...22...

Page 24: ...G LEVELER BLACK HOLE 800404931 TUBE BLACK HOLE LEG SECTION 800404932 TUBE BLACK HOLE MALE OVERHEAD 800404933 TUBE BLACK HOLE FEMALE OVERHEAD 800404915 OVERHEAD MOUNTING BRACKET BLACK HOLE 020407190 PL...

Page 25: ...ABLE When a player offensively strikes the puck and causes it to leave the playing surface that player is guilty of a foul If however the puck leaves the table while a defensive player is blocking a s...

Page 26: ...nterrupt the game MALLETS AND PUCKS Mallets and pucks must meet standards and requirements of the U S Air Table Hockey Association TOURNAMENT PLAY Tournament play shall begin with a coin toss The winn...

Page 27: ...is made of glass filled Lexan and was developed specifically for the Dynamo Hockey table This deluxe puck had been designed and tested for superior speed visibility durability and stability on the tab...

Page 28: ...irt down into the air holes Use a small amount of the cleaning solution on a clean paper towel to clean off the dust and dirt Regular cleaning and maintenance of the playing surface can prevent the ho...

Page 29: ...28...

Page 30: ...en printing and actual purchase The most current and complete troubleshooting technical and parts breakdown information can be found at any time at www valleydynamoparts com For additional assistance...

Page 31: ...od pool table too Dynamo offers programmable pool tables with bill acceptors as well as standard push chute models in three different sizes All Dynamo products are proudly built in Richland Hills TX U...

Page 32: ...31...

Reviews: