13
© Vallox Oy - All rights reserved
INSTALLATION
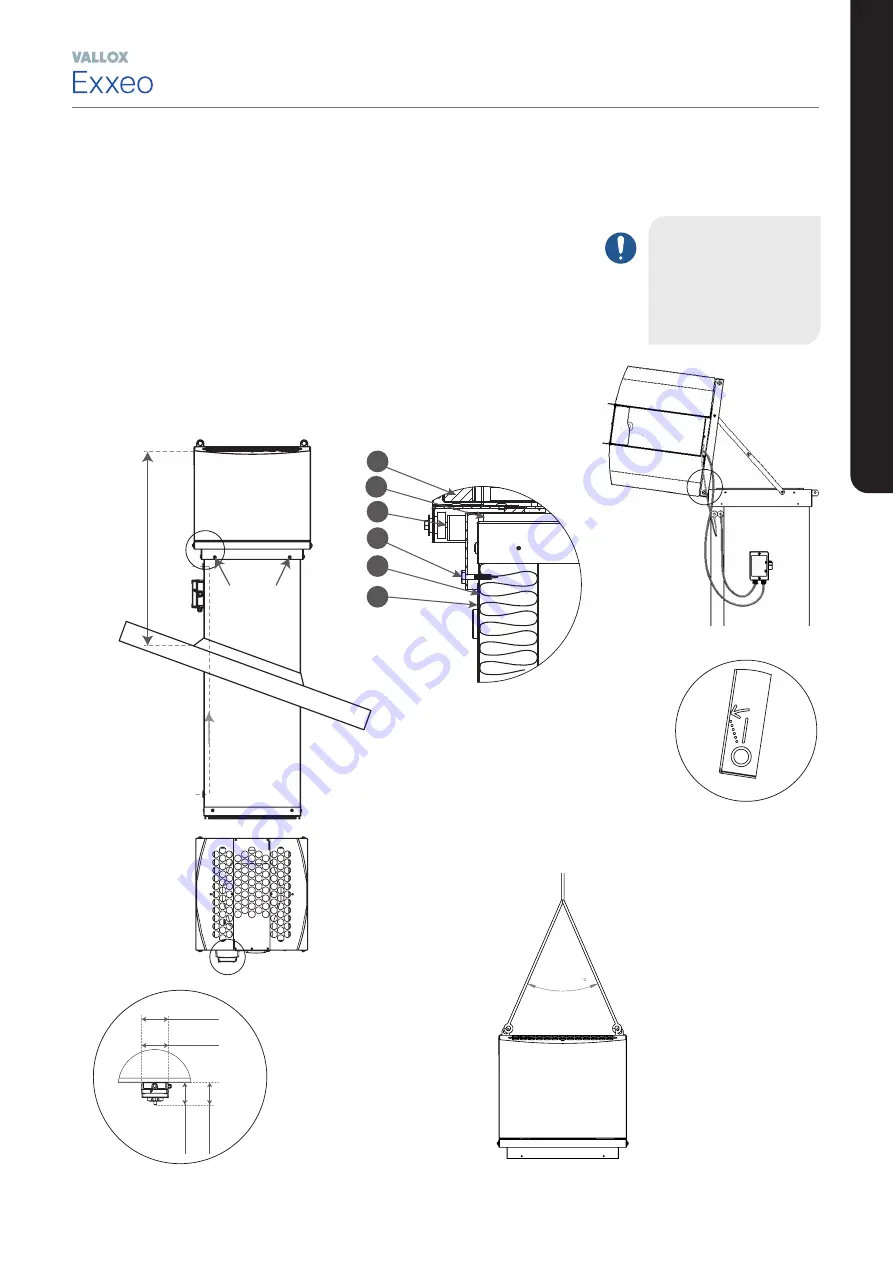
Vallox Exxeo roof fans may be installed on top of a penetration made on
site or by using the factory-made Vallox Exxeo roof penetration part. The
tilting part attached to the fan is equipped with a seal that seals the fan
against the roof penetration. The fan is fastened to the roof penetration
with self-drilling screws. Below is an illustration of the installation of the fan.
Where necessary, the mounting frame delivered with the fan can be
used for installing the fan on top of an existing flue or roof penetration
part.
Lift the fan from
the enclosure lugs.
Pay attention to the
lifting angle of the
sling. The lifting
angle of the slings
should be less than
50°.
MAX 50
A
Mounting of
the fan to the
penetration
Minimum distance from the blow outlets
900 mm
Cable
feedthrough
IMPORTANT
When installing
the safety switch,
ensure that the fan
can be tilted for
cleaning.
A
1
2
3
4
6
5
1. Roof fan
2. Seal
3. Tilting axis of the fan
4. Self-drilling screw 4.2x38 mm
5. Ceiling feed-through
6. Cladding board
INS
TALLA
TION
The pivot point is
marked on the bottom
plate of the fan as
shown in Figure B.
B
B
C
56
110
416U
Katko KSM
616U (DS)
Katko TKM
416U
Katko KSM
616U (DS)
Katko TKM
128
132
C
Dimensions
of the safety
switch are
marked in
Figure C.


