


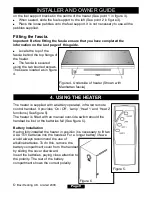


Fitting the heater.
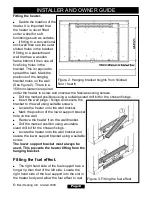
Decide the location of the
heater. It is important that
the heater is never fitted
under a shelf or soft
furnishings such as curtains.
If fitting to a conventional
brick wall then use the outer
slotted holes in the bracket.
If fitting to a plasterboard
wall that has a wooden
frame behind it then use all
five fixing holes in the
bracket. This is required to
spread the load. Mark the
positions of the hanging
bracket holes on the wall
(See figure 2). There is a
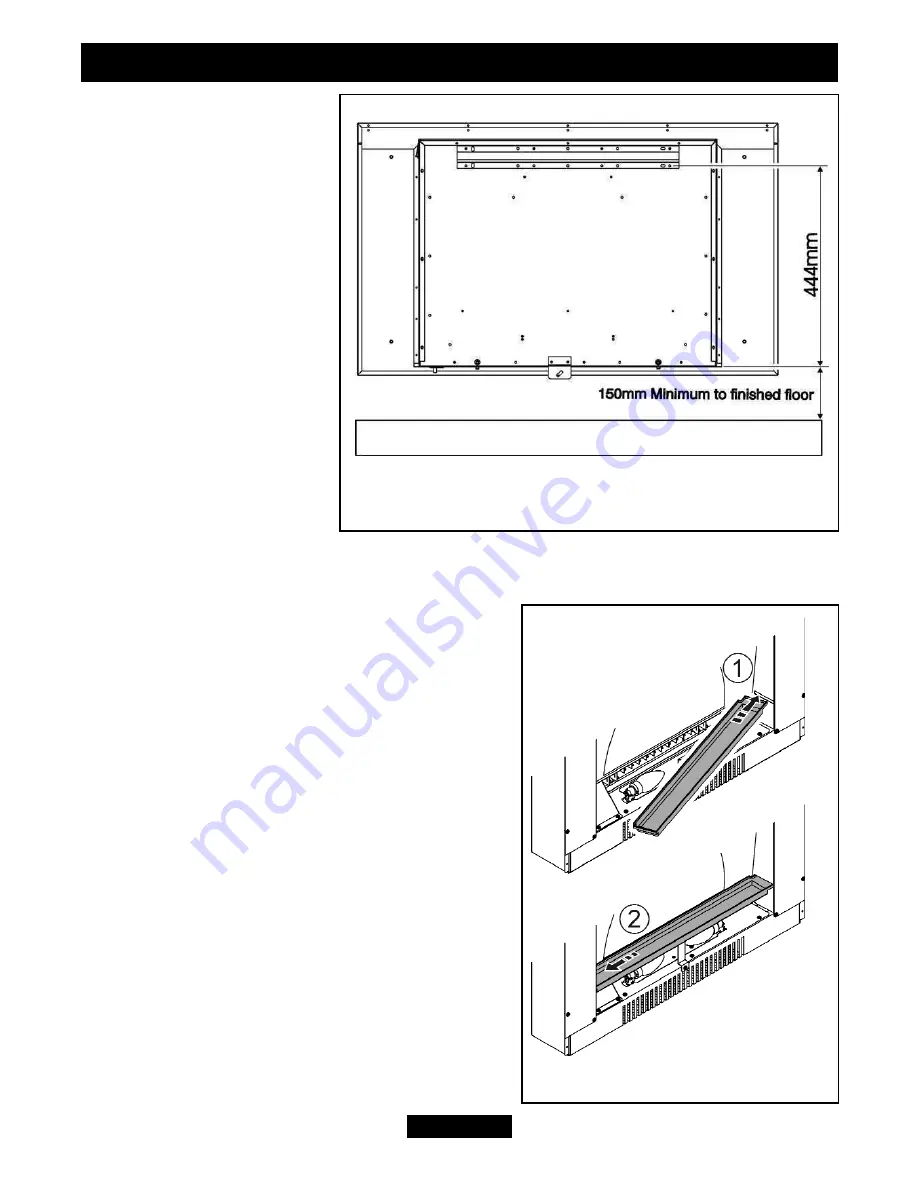
150mm clearance required
under the heater to screw and unscrew the fascia securing screws.
Drill the marked positions using a suitable sized drill bit for the chosen fixings.
Insert the wall plugs / fixings and secure the
bracket to the wall using suitable screws.
Locate the heater onto the wall bracket.
Mark the position of the lower support bracket
hole on the wall.
Remove the heater from the wall bracket.
Drill the marked position using a suitable
sized drill bit for the chosen fixings.
Locate the heater onto the wall bracket and
secure the lower support bracket using a suitable
screw.
The lower support bracket must always be
used. This prevents the heater lifting from the
hanging bracket.
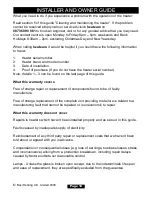
Fitting the fuel effect.
The right hand side of the fuel support has a
longer lip than that of the left side. Locate the
right hand side of the fuel support into the slot in
the heater body and allow the fuel effect to rest
Page 8
INSTALLER AND OWNER GUIDE
©
Baxi Heating U.K. Limited 2008.
Figure 2. Hanging bracket heights from finished
floor / hearth
Figure 3. Fitting the fuel effect


