background image

13

LOW BATTERY INDICATION

HANDSET / RECEIVER MATCH

Remote handset:

 The battery icon          will show 

when the battery needs to be replaced.
Replace with one 9 V 

alkaline

 battery.

Receiver:

 Frequent ‘beeps’ for 3 seconds when the 

valve motor turns indicate the batteries need to be 
replaced. Replace with four 1.5 V 

alkaline

 batteries.

The remote control handset and receiver are program-
med to function together. In case of a replacement of 
the handset or the receiver, you will need to reset the 
receiver to allow them to function together. Contact your 
dealer for details.

CAUTION

DO NOT USE

 a screwdriver or other metallic object 

to remove the batteries from the battery box or the 
handset! This could cause a short circuit.

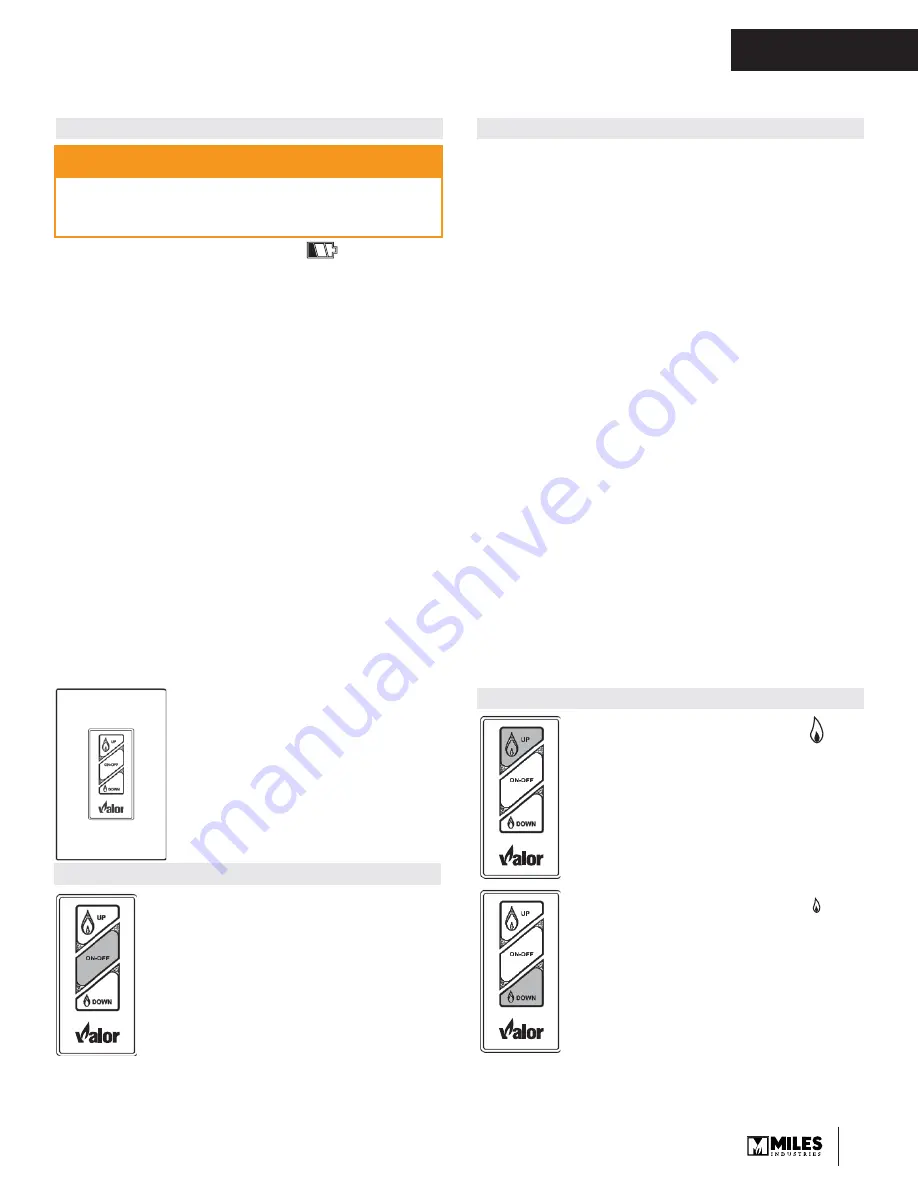
Using the  Wall Switch

  TO TURN APPLIANCE ON and  OFF

TO ADJUST FLAME HEIGHT

•  Press ON-OFF button once to light 

pilot. Press again to shut of pilot.

•  Press and hold large fl ame     

button to gradually increase 
fl ame height.

•  Press and hold small fl ame    

button to gradually decrease 
fl ame height.

The Wall Switch can be used to 
control your fi replace. You can 
turn the pilot on or off  and you can 
increase or decrease the fl ame 
height. 

Note that the thermostat and 
programming functions are not 
available with the wall switch.

Using the Remote Control

OWNER’S 
INFORMATION

Summary of Contents for 1100JN

Page 1: ...future reference Please read this manual BEFORE installing and operating this appliance INSTALLATION OWNER S MANUAL Do not store or use gasoline or other ammable vapors and liquids in the vicinity of...

Page 2: ...r Fireplace Cannot Be Turned ON Inadvertently 7 Using the Remote Control 8 Using the Wall Switch 13 Kits Accessories 14 Lighting Instructions 15 Servicing Maintenance 16 Servicing Your Fireplace 16 An...

Page 3: ...rom furniture and draperies Clothing or ammable material should not be placed on or near the appliance This unit must be used with a vent system as de scribed in this installation manual No other vent...

Page 4: ...sk individuals in the house Install an approved after market safety gate to keep toddlers young children and other at risk individuals a safe distance from the replace Keep the remote control handset...

Page 5: ...rrier screen provided with the trim or a gate to reduce the risk of severe burns Keep the remote control handset out of reach of children Hot wall surfaces The wall directly above the replace is very...

Page 6: ...uctions on page 15 of this manual Introduction Thank You For purchasing a Valor by Miles Industries Your new radiant gas heater is a technical appliance that must be installed by a quali ed dealer Eac...

Page 7: ...ating that the valve has received the signal from the remote control As well familiarize yourself with the gas shut o valve location in your house As indicated below the gas is running when the handle...

Page 8: ...control system for the rst time the receiver and the handset must be synchronized See the section Initialize Remote Control on page 65 of this manual Set scrolls through modes and settings OFF return...

Page 9: ...sh after either Installing the battery or Simultaneously pressing the large ame and small ame buttons Press large ame button to set the hour Press small ame button to set the minute Press OFF or simpl...

Page 10: ...he set temperature every 30 seconds NOTE 8 seconds after the fan has been set the handset will automatically go into temperature control mode The fan starts 4 minutes after the gas opens from OFF or f...

Page 11: ...e The Programs P1 and P2 must be set in the following order during a 24 hour cycle and The icon indicates the beginning of the period ON and the icon indicates the end of the period OFF If or the prog...

Page 12: ...s no communication between the receiver and the handset for a period of 6 hours the appliance goes into pilot mode No change in ame height If there is no change in ame height for a period of 6 hours t...

Page 13: ...Contact your dealer for details CAUTION DO NOT USE a screwdriver or other metallic object to remove the batteries from the battery box or the handset This could cause a short circuit Using the Wall Sw...

Page 14: ...ims 4005514 Optional Accessories Gas Conversion Kits 1100 and 1150 units 1100PGK Conversion to propane gas 1100 units only 1100NGK Conversion to natural gas 1100 units only 1150PGK Conversion to propa...

Page 15: ...ear the oor If you smell gas STOP Follow B in the safety information above on this label If you don t smell gas go to the next step 3 AUTOMATIC IGNITION MAN knob 2 in ON position Ensure Flame Adjustme...

Page 16: ...ion of the ame safety system Pilot or Flame recti cation device 4 Inspect and ensure the lighting of the main burner occurs within 4 seconds of the main gas valve opening Visual inspection should matc...

Page 17: ...loth Most paper towels and synthetic materials are abrasive to ceramic glass and should be avoided Our dealers have had good results from the products listed below We cannot however guarantee the resu...

Page 18: ...insert their tabs behind the front face of the trim Hot Glass Warning Plate WARNING Failure to install the window correctly can leak carbon monoxide a ect the performance of the replace damage compon...

Page 19: ...nel plinth as indicated ii Push the screen against the steel front panel i i ii tabs at the bottom i ii tabs at the bottom b 1140 trims The barrier screen has tabs at the bottom which rest on the edge...

Page 20: ...burner ames should be made Check after the re has been on for at least 30 minutes The pilot ame must cover the tip of the thermocouple probe The main burner ame pattern will vary from appliance to ap...

Page 21: ...usage Removing the batteries in the o season will extend the battery life To replace the batteries The battery compartment is located next to the wall switch in the vicinity of the replace Its front p...

Page 22: ...N and 1150JLN are used with natural gas Heater engines 1100JP and 1150JLP are used with propane gas The supply pressure must be between the limits shown in the Ratings section The supply connection is...

Page 23: ...h h Any wall nishes applied over non combustible board must be also non combustible C Combustible mantels a are ok provided they conform to chart on p p p p p p p p pag g g g g g g g g ge 25 Combustib...

Page 24: ...be reduced if positioning the unit forward of the framing to accomodate thickness of non combustible material over top of non combustible board 1 5 8 40 mm 4 3 8 4 110 mm 10 16 1 2 to front of stud 1...

Page 25: ...Height from Bottom of Unit Ceiling 65 Min to Ceiling 49 47 45 43 41 4 minimum to combustible floor or hearth See Hearth Requirements section of this manual Mantel Hearth Clearances Combustible Mantel...

Page 26: ...hed Wall Shading denotes allowable location for combustible mantel legs FIREPLACE Depth 1 2 3 4 5 6 or greater Clearance 3 4 5 6 7 8 Note Right Side Clearances are the same Combustible Sidewall Mantel...

Page 27: ...r other combustible material other than wood ooring the appliance shall be installed on a metal or wood panel extending the full width and depth of the appliance WARNING SAFETY WARNING The H5 is a ver...

Page 28: ...mal break 2 Minimum hearth projection is determined by a combination of the height of the hearth above the surface of combustible oor or carpet and the distance between the hearth and the bottom of th...

Page 29: ...should be set back 1 2 behind front face of framing otherwise topface of shims may be visible Surface of Combustible Floor or Carpet Bottom of fireplace ood is Allowed directly below fireplace ny shi...

Page 30: ...on combustible Rear Vent 16 1 2 Top Vent 17 1 2 20 when using LDK HeatShift May be reduced by thickness of additional non combustible wall finish applied on top of 1 2 non combustible board when using...

Page 31: ...ents Minimum Non Combustible Board Dimensions Minimum coverage area of non combustible board Any wall nish applied to shaded area must be non combustible We recommend extending the non combustible boa...

Page 32: ...les around vertical vent pipe Approx 9 1 4 235 mm from back surface of wall finish to front surface of appliance case w no vent offset 13 3 4 349 mm PARTIAL SHELF top outlet 1 2 thick non combustible...

Page 33: ...enting Considerations Horizontal Takeo Notes ALL venting considerations Dimensions of venting are based on using Dura Vent elbows Elbow curve radius dimensions will vary when using other brands In gen...

Page 34: ...up to 8 inches in thickness A non combustible wall can be of any thickness up to the maximum horizontal run of vent pipe allowed for the particular installation Framing Vent in Combustible Walls Ceili...

Page 35: ...ION 2 PIECE WALL THIMBLE PIPE LENGTH PIPE LENGTH PIPE LENGTH PIPE LENGTH 2 2 CEILING FIRESTOP ATTIC FIRESTOP ATTIC INSULATION SHIELD FLASHING STORM COLLAR VERTICAL TERMINATION Co axial Venting Typical...

Page 36: ...th roof termination is 6 feet 4 Any combination of rise and run can be used as long as they are within the allowable limits shown on the chart below 5 A maximum of 4 x 90 degrees elbows or equivalent...

Page 37: ...epends on the vertical rise in the venting system and to a lesser degree the horizontal run and number of elbows The amount of restriction is based on laboratory tests The ideal restrictor position ma...

Page 38: ...located within 15 feet 4 6 m below the terminal 36 90 I Clearance to service regulator vent outlet 36 90 J Clearance to non mechanical air supply inlet to the building or the combustion air inlet to...

Page 39: ...d chimney The appliance must not be connected to a chimney ue serving a separate solid fuel burning appliance Requires the Valor Co Axial to Co Linear appliance Adapter 1156CLA two lengths of 2 ply on...

Page 40: ...linear adapter Dimensions shown are with Valor 1156 co linear adapter Installation For installation of the adapter to the appliance see the instructions supplied with the 1156CLA Co linear Venting 11...

Page 41: ...djust aeration settings 18 Install the remote control handset wall holder 19 Instruct the homeowner on the operation and maintenance of the replace 20 Finish the wall around the replace 21 Install the...

Page 42: ...page 43 Be aware that a trim is always required and that the wall nish thickness must be taken into account for all installations other than the Fixed Framing Kit 1130 All the other trims 1135 1140 1...

Page 43: ...rcent of its weight in water and may shrink as much as 1 8 over a 48 length when drying from a saturated condition Running the replace for an extended period before nal nishing will help drive out moi...

Page 44: ...ck Appliance Beware of sharp edges Wear gloves 1 Remove the cardboard wrapping and the wood pallet from the appliance and discard 2 Unpack any loose items from around the appliance 3 Verify that you h...

Page 45: ...ow towards the top Using your nger pull the lever towards you and unhook it from the window frame bracket 2 Gently pull the top of the window outward 3 Lift the window out of its bottom railing and se...

Page 46: ...are then applied over top of the anges and butted up to the frame of the 1130 Install Appliance for 1130 Fixed Framing Kit Appliance Depth in Framing with 1130 Fixed Framing Kit 1130 Fixed Framing Kit...

Page 47: ...ttom of the appliance See Hearth Requirements section of this manual The non combustible hearth in front of the appliance if within 4 of the bottom of the appliance must include the 1 2 Micore insulat...

Page 48: ...3 nuts 4 On the appliance install the side panels as indicated 3 screws per side 5 Install the upper panel as indicated 2 screws 6 Slide the appliance into the framing and x it to the studs on each si...

Page 49: ...iance for 3 and 4 Sided Trim or Doors Appliance Depth in Framing with 3 and 4 Sided Trims Doors 3 and 4 Sided Trims Doors adjustable position wall nish thickness up to 3 4 1 2 non combustible board tr...

Page 50: ...Without hearth In the case where there is no hearth the bottom of the appliance must be raised at least 4 inches 102 mm above any combustible oor in front With hearth The bottom of the appliance must...

Page 51: ...consideration to the height of the hearth or combustible flooring When setting the position of appliance within framing the front surface of the prositioning bracket indicated should always be ush wit...

Page 52: ...General Requirements The optional 1195CFK kit includes a three prong grounded plug to plug into a grounded receptacle also included with the kit to be installed within the replace enclosure by a quali...

Page 53: ...lve during any pressure testing of the gas supply pip ing system at test pressures equal to or less than 1 2 psig 3 5 kPa Failure to either disconnect or isolate the appliance during pressure testing...

Page 54: ...e side panel anchor to hold the panel in place 3 Place the rear panel against the back of the rebox behind the rail retainers at bottom and behind the side panel already installed Note If you are inst...

Page 55: ...f the rebox for natural gas re The log covers both holes Propane gas re Place the log s front peg in the hole closest to the left side wall for propane gas res Installation 2 Place the right log on th...

Page 56: ...Vacuum area after installation Installation 4 Carefully spread shale in the cavity of the ceramic burner You can also add some shale on the edge outside of the burner plate cavity NOTE Ensure the are...

Page 57: ...Glass Murano kit which contains 1 glass platform 2 platform retainers 1 glass square 1 pilot cover 1 bag of clear 1 2 reglass Gloves recommended to manipulate glass Installation Carefully unpack the k...

Page 58: ...tal tray over the ceramic burner 2 Remove the existing pilot shield 2 screws 3 Place the pilot cover on top of the metal tray spanning over the pilot cut out Installation 4 Carefully ll the metal tray...

Page 59: ...Closing this gap generallly produces a taller rear ame while opening up this gap can help eliminate tall stringny ames hitting the roof panel As the vent height a ects the rear ame appearance this ga...

Page 60: ...as indicated 4 Place the left hand base log on the platform locating it on the key as indicated 5 Place the center base log locating its notch on the key in the ember bed as indicated 6 Place the rig...

Page 61: ...d Rest the front end of the log on top of the left base log as indicated 8 Place the right hand cross log locating its notch on the key on the top of the rear log as indicated Rest the front end of th...

Page 62: ...ion is not covered by the Valor warranty DANGER The window unit must be correctly installed fastened and sealed after servicing or serious bodily injury and or damage to the appliance may result To en...

Page 63: ...in position with Velcro bands 1 Pull out the receiver from its location to connect the battery holder and wall switch 2 Feed the white connector end of the harness as sembly through side holes in repl...

Page 64: ...of battery cover assembly 12 Position battery holder to rear face and secure to gether with cable tie note clearance is required for battery snap connection 13 Make the snap connection load 4 AA alka...

Page 65: ...rp object press and hold the receiver s reset button until you hear one short and one long beeps Release the reset button after the second beep 4 Within the subsequent 20 seconds press the small ame b...

Page 66: ...ore transparent and blue showing more ceramic e ects glow Decreasing aeration will cause the ames to appear more yellow or orange showing less ceramic e ects glow Too little aeration may result in bla...

Page 67: ...his holder is not required in all installations but is provided as an optional feature for those customers who wish to mount the remote handset to the wall To install the holder to the wall nd a conve...

Page 68: ...68 Wiring Diagram Wall Switch Kit GV60 Wiring Diagram Remote Battery Holder 4 AA Batteries 5 pin connector 9 Volt connector Optional Fan 1195CFK Control Module QUALIFIED INSTALLER...

Page 69: ...HUVDO GDSWHU OH RXSOHU 70 R OLQHDU OH RQQHFWRU 9 R D LDO WR R OLQHDU GDSWHU 9 70 R OLQHDU WR R D LDO GDSWHU 9 70 7 7 9 WR 9HQW GDSWHU 9 9 OXPLQXP OH LEOH LQHU RU GLDPHWHU 127 SO OLQHU DSSURYHG WR 1 8...

Page 70: ...ORRU 6XSSRUW 9 6 7 6 70 6 69 63 69 6 WWLF 5DGLDWLRQ 6KLHOG LUHVWRS 70 6 6 6 DOO 6WUDS 9 6 7 6 70 6 6 9LQ O 6LGLQJ 6WDQGR 9 966 7 96 70 966 69 96 96 6 OERZ 6WUDS 2 VHW 6XSSRUW 9 6 7 26 70 26 7HUPLQDO...

Page 71: ...operational or environmental conditions ii Inadequate ventilation in the area or competition for air from other household equipment or appliances iii Chemicals dampness condensation or sulphur in the...

Page 72: ...attery operated carbon monoxide detector with an alarm shall be installed 2 APPROVED CARBON MONOXIDE DETECTORS Each carbon monoxide detector as required in accordance with the above provisions shall c...

Page 73: ...d with the appliance or equipment installation instructions and 2 The special venting systems shall be Product Approved by the Board and the instructions for that system shall include a parts list and...

Page 74: ...iption Part Number 1 Heat shield 4004460 2 45 degrees anged elbow 0945JM 3 Elbow gasket 4002999 4 Top stand o s 2 4004469 5 Restrictor plates 2 4001222 6 Take o cover 2 4003046 7 Frame xing brackets 2...

Page 75: ...lor Red Brick 4003264 Ledgestone 4003246 Fluted Black 4003258 Black 4004748 Glass 4004280 Herringbone 4006184 82 LH side panel Valor Red Brick 4003262 Ledgestone 4003244 Fluted Black 4003256 Black 400...

Page 76: ...39c 39d 41 16 15 17a 17b 17c 17d 30 27 28 18 19 24 25 26 29a 29b 29c 36 40 46 45 47 43 42 44 1 2 3 4 4 5 6 6 7 7 8 9 10 10 11 11 12 13 14a 14b 14b 86 85a 85b 85c 85d 85e 85f 85g 85h 85i 85 48 87 49 S...

Page 77: ...77 50 59 51 52 53 54 55 56 57 58 61 60 62 63 64 65 66 67 68 Traditional Logs 1150 1101DWK 74 75 76 78 82 77 79 80 81 1105RGL 1104DGS 69 70 71 71 72 1103DGM 73 83 84 Spare Parts OWNER S INFORMATION...

Page 78: ......

Page 79: ...l be used for customer records only Online Warranty registration at www valor replaces com Cut out page ll information and mail to Miles Industries Ltd Fireplace Information Model Number 1100 JN or JP...

Page 80: ...Shut Thank you for choosing a Valor Product Postage needed Miles Industries Ltd 190 2255 Dollarton Highway North Vancouver BC V7H 3B1 Canada Fold here Online Warranty registration at www valor replace...

Reviews: