26
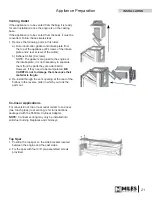
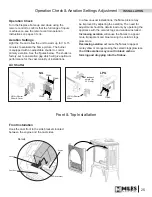
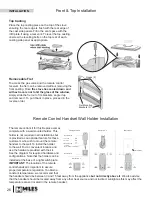
Top Casting
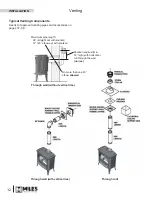
Place the top casting piece on the top of the stove
ensuring the rear edge is
fl
ush with the rear edge of
the cast side panels. Fill in the vent space with the
in
fi
ll plate if using a rear vent. To level the top casting,
unscrew the levelling bolts on the top rear of each
casting side panel as appropriate.
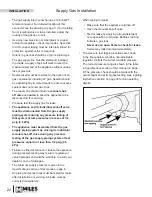
Remote Control Handset Wall Holder Installation
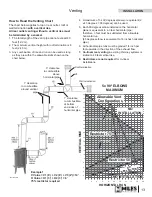
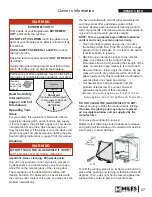
Packing Contents:
1 Wall Bracket A
2 Screws B
1 Screw C
2 Wall Anchor D
1 Spacer E
(detach before assembly)
1 Wall Bracket F
Switch Plate
Alternative 1
Alternative 2
Alternative 3
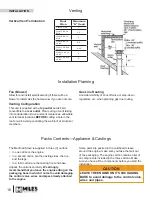
Front & Top Installation
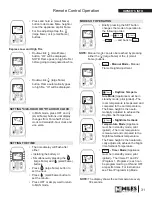
The remote ontrol kit for this
fi
replace comes
complete with a wall-mounted holder. This
holder is not required in all installations but
is provided as an optional feature for those
customers who wish to mount the remote
handset to the wall. To install the holder
to the wall,
fi
nd a convenient location and
use the hardware provided with the kit.
See the diagram for required hardware and
con
fi
gurations. Note that the holder can be
installed at the base of a light switch plate.
IMPORTANT:
The location of the remote
control handset is important to assure
proper temperature regulation. To obtain a
constant temperature, we recommend that
the handset should be between 3 and 15 feet away from the appliance
but not directly above it
. We also advise
that the handset should be located away from any other heat source and not in direct sunlight as this may affect the
temperature sensor located in the remote handset.
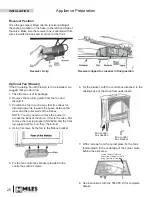
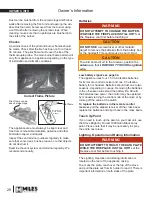
Removeable Fret
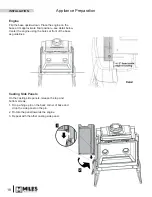
To access the gas valve and the remote control
receiver, the fret can be removed without removing the
front casting. Once
the stove has cooled down and
with extra care not to hit the glass of the window,
simply slide the fret out of its brackets, angle it up
and remove it. To put it back in place, proceed in the
reverse order.
Hooks (2)
Fret Mounting
Brackets (2)
INSTALLATION

