background image

Summary of Contents for SD-906W

Page 1: ...USER MANUAL MOBILE MULTIMEDIA SYSTEM WITH 7 WIDE TOUCH SCREEN LCD MONITOR Model SD 906W...

Page 2: ...ion 36 Troubleshooting 37 Specifications 38 I _ DVD Region Management Some DVD discs can be played only in certain playback modes according to the intentions of the software Therefore some functions m...

Page 3: ...t view video while the vehicle is moving Find a safe place to park and engage the parking brake 9 If you experience problems during installation consult your nearest dealer 10 If the unit malfunctions...

Page 4: ...mounting sleeve into opening bending tabs to secure Connect wiring harness and antenna as shown on pages 5 6 Consult a qualified technician if you are unsure Certain vehicles may require an installati...

Page 5: ...Installation Wiring Diagram L rj B lue_ Black 11l _ Bla ck er VlI White Black H Red Gray Black H L Gray Green with White Stri IL P in k__ reen BIack White Rear Groen VlaIet 5...

Page 6: ...k Securely fasten the Ground wire to grounded metal part of the car s chassis If you cannot find an existing bolt or screw to fasten it to drill a hole in the metal and secure it with a screw To ensur...

Page 7: ...ties of the unit Two separate AudioNideo inputs allow the connection of a DVD player or game console The rear zone DVD output provides both audio and video for rear seat entertainment while the video...

Page 8: ...l Chapter Track Down Stop Play Patse t9 Fast Forward Fast Reverse Mode Power MuteNolume This model incorporates a motorized moving monitor Before final installation make sure the monitor will not obst...

Page 9: ...ress to move the monitor forward and backward Safety Notes The DVD video display of the in dash unit will not operate while the vehicle is moving This is a safety feature to prevent driver distraction...

Page 10: ...Next Chapter Number Key Stop Band Hang up Previous Chapter Audio Select Subtitle Enter Play Volume Up Audio Fast Forward Volume Down Angle Fast Reverse Setup Repeat Mode Direction Key Up Title Power D...

Page 11: ...ure PARKING will show on the display when the vehicle s parking brake is not engaged DVD AV1 and AV2 audio can still be heard even though the vehicle is in motion The video display of the in dash unit...

Page 12: ...lect between RADIO DVD AVX inputs or other functions that available Mode operation are indicated on the OSD On Screen Display or on the secondary LCD With the monitor open press the screen to display...

Page 13: ...lock Set With the monitor closed 1 Press DISP button 4 to display the clock 2 Press and hold DISP button 4 until a confirmation beep is heard then release 3 Press or T to adjust the hours and or to ad...

Page 14: ...way between 12 24 AM PM Press Reset in display to reset the second count to Zero Press Iii in display to complete setting time and go back to menu display Press the OSD Language menu bar in display a...

Page 15: ...ass Cent frequency from 60Hz 80Hz 100Hz 200Hz Press Bass Q Value to activate the Bass Q Value bar and select wanted value by using IIIl or It will turn into yellow when activated To select On Off by u...

Page 16: ...item to display audio setup menu Press II on Display Mode menu bar on screen to select the display aspect of 16 9 or 4 3 Press II on Video Input menu bar on screen to select from AUTO PAL and NTSC Pr...

Page 17: ...d FM3 bands in display Press SCAN in display to start scanning broadcasting stations in the current band And the unit will scan the strongest top 10 ratios to be stored in the list on the right side o...

Page 18: ...screen Storing Station 1 Select a band if needed then select a station 2 Press to hold 1 0 buttons in remote control or 1 10 of station listed on rightside in display Press on the list to choose the...

Page 19: ...nal function limits the selection to stations broadcasting regional programs To turn REG off on touch REG in screen When switching to RBDS mode AF is flickering and on as a default When AF is on if th...

Page 20: ...RBDS Operation TA Volume Clock Tune TA Option TA Retune You can select volume between 0 39 Select On when you drive to different place clock can adjust automatically Seek I Alarm Long I Short 20...

Page 21: ...utton 13 in remote control or lIon screen to pause and press again to play again Track list will be displayed at right side of screen When moving track press to move to previous next track and press t...

Page 22: ...of disc Repeat All will displayed Press third time to go back normal play Off will displayed Press NEXT E I in display to play all tracks on the disc in random displaying Random on screen Press again...

Page 23: ...er operation section for the instruction about these functions After MP3IWMA disc SO card inserted or USB connected UMP3 or WMA and its information displays on screen and the file in disc will be play...

Page 24: ...and ENT button to select menu and operate it or press the desirable menu on screen to play it 3 If you want to go back to the DVD root menu in the middle of playing video press MENU button in remote...

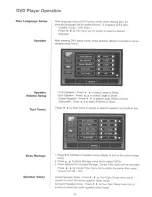
Page 25: ...39 in remote control or NEXT REPEAT on screen to select Repeat Single Repeat All Off Press NEXT 0 in screen for zooming in screen You can select the desired track directly 1 Press GOTO butlon 43 in r...

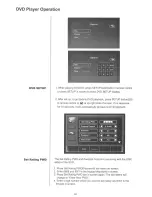
Page 26: ...side of screen If no response for 10 seconds it will automatically go back to DVD playback The Set Rating PWD and Parental Control is concering with the DISC setup of the DVD 1 Press Set Rating PWD P...

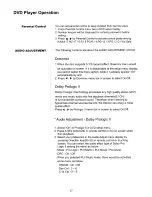
Page 27: ...On Off Dolby Prologic II Dolby Prologic II technology processes any high quality stereo 2CH movie and music audio into five playback channels 5 1 CH of full bandwidth surround sound Therefore when li...

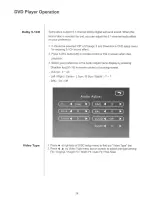
Page 28: ...5 1 CH sound effect 2 Press A SEL button 26 in remote control or EQ in screen when disc playback 3 Select your preference in the Audio Adjust menu display by pressing Direction key 30 33 in remote con...

Page 29: ...arge or Small Center Speaker Press II to select Large Small or None Subwoofer Press II to select Present or None Press 4 by Test Tones in screen to select a speaker and perform test 1 Press at rightsi...

Page 30: ...speaker s volume effect Front Right Channel Gain Center Gain Rear Left Channel Gain Rear Right Channel Gain Subwoofer Gain 1 Press Tat leftside of Speaker setup display to turn to the third page menu...

Page 31: ...s below A B D C E F Touch A area launcher MENU will appear rs J M K RLU TOOIH SD eAM SETUP AUXIN Tounch B area SETUP MENU will be showned 26 Touch C area DVD Menu will be showned Page24 and 25 Touch D...

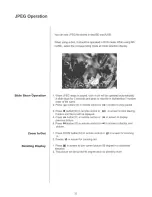
Page 32: ...le name 2 Press II button 13 in remote control or II in screen to play pause 3 Press button 35 in remote control or in screen to stop playing Folders and file list will be diplayed 4 Press I button 11...

Page 33: ...6 or press the current mode icon at up left of screen to go to mode selection display and press USB SD card mode icon According to the source stored in USB or SD card you can play it The source types...

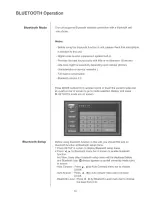
Page 34: ...mote control or touch the current mode icon at up left corner of screen to go to mode selection display and press BLUETOOTH mode icon in screen Before using bluetooth function in this unit you should...

Page 35: ...ers in Dial Pad in screen or by using remote control on screen means erasing a number just entered 2 Press Pick Up in screen or Obutton 34 in remote control for calling 3 Talk through the supplied mic...

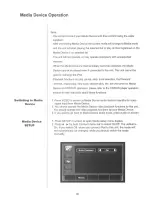
Page 36: ...rse repeat play intra scan random play etc are the same for Media Device and CD DVD operation please refer to the CD DVD player operation section for the instruction about these functions Switching to...

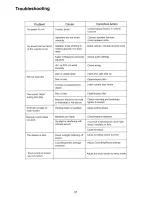
Page 37: ...ormat nol supported by Insert correct disc fonnal player The sound skips Disc is dirty Cleanlinspect disc during disc play Receiver mount is not solid Check mounting and backstrap or backstrap is not...

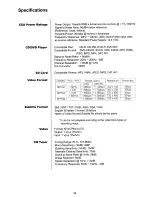
Page 38: ...SC USB SO MPEGl MPG 4Mbps 1 5Mbps 352 x 240 30fps OAT 4Mbps 1 5Mbps 352 x 240 30fps MPEG2 VOB 4Mbps 1 5Mbps 720 x 480 30fps MPEG 4Mbps 1 5Mbps 720 x 480 30fps MPEG4 25Mbps 1 5Mbps 720 x 480 30fps Comp...

Page 39: ...Response 50Hz 2kHz 3dB Screen Size 7 Measured diagonally 16 9 Widescreen 7 145mm H x 3 5 89mm W Screen Type TFT Liquid Crystal Display LCD Active Matrix DVD Player 480 H x 234 W X 3 RGB Back Light CC...

Page 40: ......

Page 41: ...VilLOR MULTIMEDIA Valor Warranty Validation Dept 18061 ArenthAve City ofIndustry CA 91748 Place Postage Here V lLOR MULTIMEDIA ONE YEAR LIMITED WARRANTY...

Page 42: ...ed through alteration improper installation mishan dling misuse neglect accident or by removal or defacement of the factory serial number bar codelabel s The opinion of Valor Multimedia with respect t...

Reviews: