background image


Service and Installation Manual


10


For warranty service, call 1-888-VALPRO8 / 1-813-502-0300                                         


MAINTENANCE                                                                                                                                     


The unit must be turned OFF and disconnected from the power source whenever 

performing service, maintenance functions or cleaning the refrigerated area. 


Refrigerators and Freezers 

The interior and exterior can be cleaned using soap and warm water. If this isn't sufficient, try ammonia and 
water or a nonabrasive liquid cleaner. When cleaning the exterior, always rub with the "grain" of the stainless 
steel to avoid marring the finish. 

Do not use an abrasive cleaner because it will scratch the stainless steel and plastic and can damage the 
breaker strips and gaskets. 

Cleaning the Condenser Coil


The condenser coil requires regular cleaning and it is recommended every 90 days. In some instances, you 
may find that there is a large amount of debris and dust or grease accumulated prior to the 90 day time 
frame. In these cases the condenser coil should be cleaned every 30 days. 

If the build up on the coil consists of only light dust and debris, the condenser coil can be cleaned with a 
simple brush. Heavier dust build-up may require a vacuum or even compressed air to blow through the 
condenser coil. 

If heavy grease is present, there are de-greasing agents available for refrigeration use and specifically for 
the condenser coils. The condenser coil may require cleaning with the de-greasing agent and then blown 
through with compressed air. 

Failure to maintain a clean condenser coil can initially cause high temperatures and excessive run times. 
Continuous operation with dirty or clogged condenser coils can result in compressor failures. Neglecting the 
condenser coil cleaning procedures will void any warranties associated with the compressor or cost to 
replace the compressor. 

Never use a high pressure water wash for this cleaning procedure as water can damage 

the electrical components located near or at the condenser coil. 


In order to maintain proper refrigeration performance, the condenser fins must be cleaned of dust, dirt and 
grease regularly. It is recommended that this be done at least every three months. If conditions are such that 
the condenser is totally blocked in three months, the frequency of cleaning should be increased. Clean the 
condenser with a vacuum cleaner or stiff brush. If extremely dirty, a commercial-grade condenser cleaner 
may be required. 

Stainless Steel Care and Cleaning


To prevent discoloration of rust on stainless steel several important steps need to be taken. First, we need to 
understand the properties of stainless steel. Stainless steel contains 70-80% iron which will rust. It also 
contains 12-30% chromium which forms an invisible passive film over the steels surface which acts as a 
shield against corrosion. As long as the protective layer is intact, the metal is still stainless. If the film is 
broken or contaminated, outside elements can begin to breakdown the steel and begin to form rust of 
discoloration. Proper cleaning of stainless steel requires soft cloths or plastic scouring pads. 
 

NEVER USE STEEL PADS, WIRE BRUSHES OR SCRAPERS! 


DANGER

DANGER

DANGER

Summary of Contents for VP19F-HC

Page 1: ...nd Care Manual Please read this manual completely before attempting to install or operate this equipment Notify carrier of damage Inspect all components immediately IMPORTANT INFORMATION READ BEFORE USE PLEASE SAVE THESE INSTRUCTIONS ...

Page 2: ...ty messages will alert you to potential hazards advise to reduce the chance of injury and let you know what can happen if the instructions are not followed If the supply cord is damaged it must be replaced by the manufacturer its service agent or similarly qualified persons in order to avoid a hazard This appliance is not intended for use by persons including children with reduced physical sensory...

Page 3: ...ng or increasing the risk of a leak L opération le mouvement et l utilisation du réfrigérant ou le congélateur doivent éviter les dommages du tuyau réfrigérant ou le rique de la fuite Caution Risk of Fire or Explosion due to Flammable Refrigerant Used Follow Handling Instructions Carefully in Compliance with U S Government Regulations Component parts shall be replaced with like components and that...

Page 4: ...e must be inspected before accepting shipment Valpro assumes no responsibility for damage while intransit Care should be taken during unloading so the equipment is not damaged while being moved into the building 1 Merchandise must be inspected prior to carrier leaving your premises and damage noted at this time with the carrier Any claim for damages must be made by consignee directly with the carr...

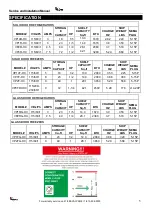
Page 5: ...60 1 49 1 28 1 3650 568 5 15P VP19R HC 115 60 1 3 18 1 5 13 0 1670 2 82 220 5 15P VP19F HC 115 60 1 5 18 1 2 13 0 2000 3 53 225 5 15P VP3R HC 115 60 1 7 5 72 1 2 42 1 3200 5 29 669 5 15P GLASS DOOR REFRIGERATORS MODEL V Hz Ph AMPS STORAG E CAPACIT HP SHELF CAPACITY Sq ft BTU CHARGE OZ SHIP WEIGHT LBS NEMA PLUG VP1RG HC 115 60 1 3 23 1 5 14 0 1670 3 0 350 5 15P VP2RG HC 115 60 1 4 5 49 1 4 28 1 238...

Page 6: ...mended that the unit be installed no closer than 2 from any wall with at least 12 of clear space above the unit Leveling A level cabinet looks better and will perform better because the doors will line up with the frames properly Use a level to make sure the unit is level from front to back and side to side Units supplied with legs will have adjustable bullet feet to make the necessary adjustments...

Page 7: ...will run at any time when the evaporator coil temperature is below 54 F They will also keep running when door is open but cycle off during a defrost period The door switch will activate the lights when opened 1 Every 6 hours the unit will turn off and electric heater will turn on to defrost The controller now displays the defrost symbol When the coil temperature reaches 45 F or after 20 minutes of...

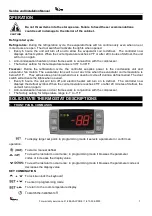
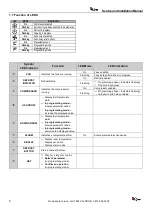
Page 8: ...rowse parameter codes In programming mode increase the displayed value DOWN ARROW Display last temperature alarm In programming mode browse parameter codes In programming mode decrease the displayed value ALARM Indicates a temperature alarm On A temperature alarm happened DISPLAY Display room temperature Display set points Display alarm codes DEFROST BUTTON Start a manual defrost SET Display a tar...

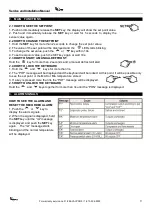
Page 9: ... 3 HOW TO START A MANUAL DEFFROST Hold the key for more than 2 seconds and a manual defrost will start 2 4 HOW TO LOCK THE KEYBOARD 1 Hold the and keys for more than 3s 2 The POF message will be displayed and the keyboard will be locked At this point it will be possible only to see the set point or the MAX or Min temperature stored 3 If a key is pressed more than 3s the POF message will be display...

Page 10: ...to maintain a clean condenser coil can initially cause high temperatures and excessive run times Continuous operation with dirty or clogged condenser coils can result in compressor failures Neglecting the condenser coil cleaning procedures will void any warranties associated with the compressor or cost to replace the compressor Never use a high pressure water wash for this cleaning procedure as wa...

Page 11: ...is can cause them to become brittle and prevent proper seals Do not use sharp tools or knives to scrape or clean the gasket which could possibly tear the gasket and rip the bellows Gaskets can easily be replaced and don t require the use of tools or authorized service technicians The gaskets are Dart style and can be pulled out of the grove in the door and replaced by pressing the new one back int...

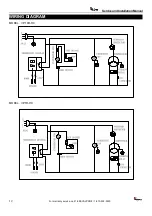
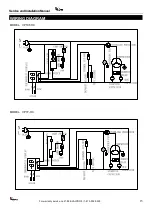
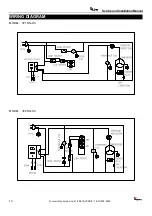
Page 12: ...Service and Installation Manual 12 For warranty service call 1 888 VALPRO8 1 813 502 0300 WIRING DIAGRAM MODEL VP19R HC MODEL VP1R HC ...

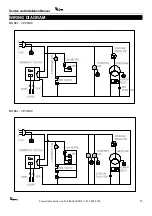
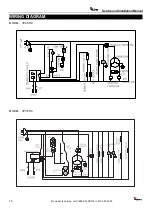
Page 13: ...Service and Installation Manual For warranty service call 1 888 VALPRO8 1 813 502 0300 13 WIRING DIAGRAM MODEL VP2R HC MODEL VP3R HC ...

Page 14: ...Service and Installation Manual 14 For warranty service call 1 888 VALPRO8 1 813 502 0300 WIRING DIAGRAM MODEL VP1RG HC MODEL VP2RG HC ...

Page 15: ...Service and Installation Manual For warranty service call 1 888 VALPRO8 1 813 502 0300 15 WIRING DIAGRAM MODEL VP19F HC MODEL VP1F HC ...

Page 16: ...Service and Installation Manual 16 For warranty service call 1 888 VALPRO8 1 813 502 0300 WIRING DIAGRAM MODEL VP2F HC MODEL VP3F HC ...

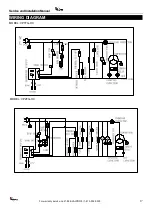
Page 17: ...Service and Installation Manual For warranty service call 1 888 VALPRO8 1 813 502 0300 17 WIRING DIAGRAM MODEL VP1FG HC MODEL VP2FG HC ...

Page 18: ...Service and Installation Manual 18 For warranty service call 1 888 VALPRO8 1 813 502 0300 WIRING DIAGRAM MODEL VP19R HC ...

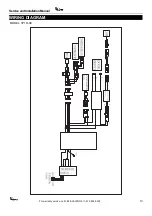
Page 19: ...Service and Installation Manual For warranty service call 1 888 VALPRO8 1 813 502 0300 19 WIRING DIAGRAM MODEL VP1R HC ...

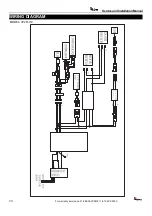
Page 20: ...Service and Installation Manual 20 For warranty service call 1 888 VALPRO8 1 813 502 0300 WIRING DIAGRAM MODEL VP2R HC ...

Page 21: ...Service and Installation Manual For warranty service call 1 888 VALPRO8 1 813 502 0300 21 WIRING DIAGRAM MODEL VP3R HC ...

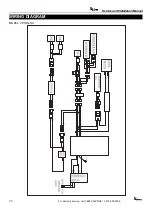
Page 22: ...Service and Installation Manual 22 For warranty service call 1 888 VALPRO8 1 813 502 0300 WIRING DIAGRAM MODEL VP1RG HC ...

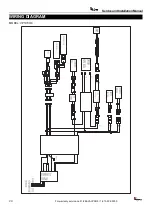
Page 23: ...Service and Installation Manual WIRING DIAGRAM MODEL VP2RG HC For warranty service call 1 888 VALPRO8 1 813 502 0300 23 ...

Page 24: ...Service and Installation Manual 24 For warranty service call 1 888 VALPRO8 1 813 502 0300 WIRING DIAGRAM MODEL VP19F HC ...

Page 25: ...Service and Installation Manual WIRING DIAGRAM MODEL VP1F HC For warranty service call 1 888 VALPRO8 1 813 502 0300 25 ...

Page 26: ...Service and Installation Manual WIRING DIAGRAM MODEL VP2F HC 26 For warranty service call 1 888 VALPRO8 1 813 502 0300 ...

Page 27: ...Service and Installation Manual WIRING DIAGRAM MODEL VP3FDV HC For warranty service call 1 888 VALPRO8 1 813 502 0300 27 ...

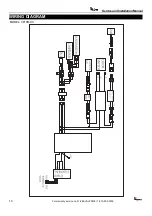
Page 28: ...Service and Installation Manual WIRING DIAGRAM MODEL VP1FG HC ...

Page 29: ...Service and Installation Manual For warranty service call 1 888 VALPRO8 1 813 502 0300 29 WIRING DIAGRAM MODEL VP2FG HC ...

Page 30: ......
Page 31: ...Valpro Commercial Refrigeration 203 Kelsey Ln Building G Tampa Florida 33619 Email info valpromail com http www valprorefrigeration com ...

Reviews: