VAL
S
TEAM
ADCA
Produced in accordance with Sound Engineering Practices of the European PED - Pressure Equipment Directive.
IMI P130.08 E 00.20
23
3.
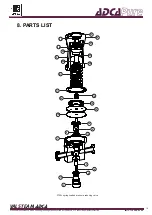
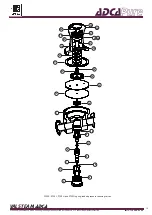
Remove washer (17) and complete diaphragm assembly (14, 15, 16, 18, 19, 20).
4. Thoroughly clean the inside of the valve body (1) and cover (2).
5. Disassemble the diaphragm assembly by holding the pusher disk (14) in a vise and
unscrewing the nut (19).
6. Renew the serrated lock washer (20), upper diaphragm (16) and lower diaphragm
(15). For self-relieving regulators replace the O-ring (13).
7. Clean reusable parts and reassemble the diaphragm assembly (14, 15, 16, 18,
19, 20). Hold the pusher disk (14) in a vise and tighten the nut (19) until the lower
diaphragm (15) just starts to deform.
8.
Place the diaphragm assembly (14, 15, 16, 18, 19, 20) onto the body (1) followed by
the washer (17). Fit the O-ring (32) if the regulator is dome-loaded and adjustment
spring (21) if spring-loaded.
9.
Apply a suitable lubricant on the cover (2) thread and screw it into the valve body
(1) tightening with the recommended torque – see section 9.4 – Tightening torques.
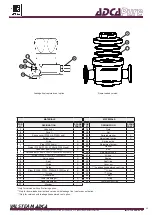
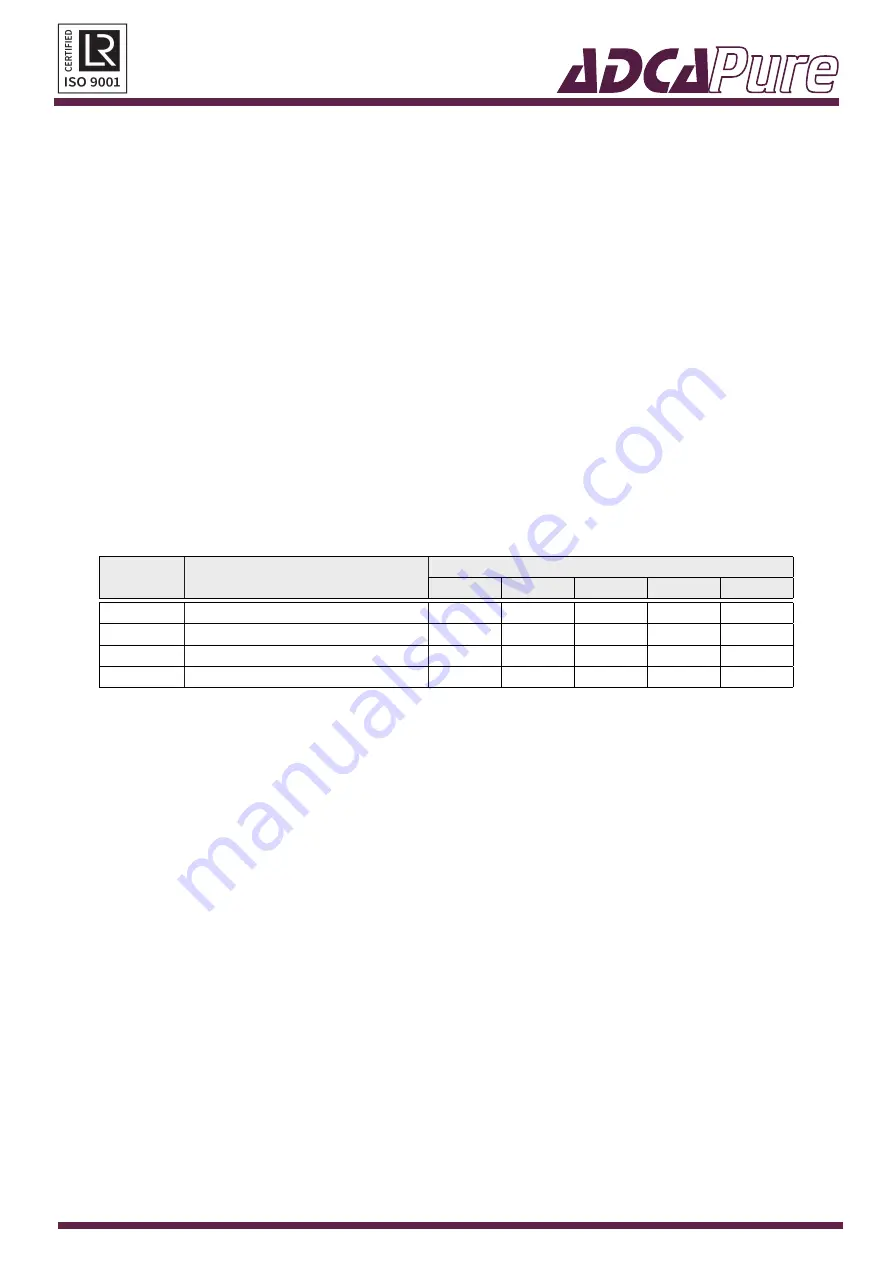
9.4. Tightening torques
POS. Nº
DESIGNATION
TORQUE (Nm)
P130L
P130J
P130K
P130H
P130G
2
Cover
40
50
50
70
70
2A
Spring cover
–
–
–
35
35
3
Bottom cover
30
35
35
40
40
9
Seat
25-30
–
–
–
–

