Model
Code
Page
13. Repair
131.1
1.8.2005
2
N91c---N111c
N91h---N141h
N121LS, N141LS
40
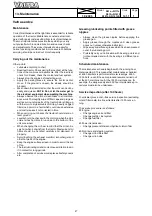
Handling of heavy components
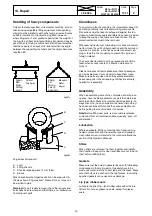
Unless otherwise specified, all removals should be accom-
plished using adjustable lifting equipment. All supporting
slings must be parallel to each other and as near vertical as
possible in relation to the object being lifted. However,
where slings are of a far greater capacity than the weight of
the load to be fitted, a triangular lifting arrangement may be
used. When removing a component at an angle, remember
that the capacity of an eyebolt is reduced when the angle
between the supporting members and the object becomes
less than 90
˚
.
Oikein
Rätt
Right
Richtig
Giusto
Väärin
Fel
Wrong
Falsch
Sbagliato
Correct
Teisingai
Mauvais
Netei-
singai
fig001c
B
C
D
A
fig002c
Forged eyebolt support
A. Load
B. Lifting shackle
C. Shackle retaining plate ( 3 mm thick)
D. Sleeve
When necessary the forged eyebolt can be supported in
the way shown in figure above. Sleeve D may or may not
be welded to plate.
Warning!
If a part resists removal, check that all nuts and
bolts have been removed and that there is no interference
from adjacent parts.
Cleanliness
To ensure long life of a machine, it is important to keep dirt
and foreign material out of its vital working components.
Precautions must be taken to safeguard against this. En-
closed compartments, seals and filters have been provided
to keep the supply of air, fuel and lubricant clean. These
protective devices must not be removed.
Whenever hydraulic, fuel, lubricating oil or lines are discon-
nected, clean the point of disconnection and the surround-
ing area. As soon as a line has been disconnected, cap,
plug or tape the line or opening to prevent the ingress of
foreign material.
The same cleaning and covering precautions should be
taken when access covers or inspection plates are re-
moved.
Clean and inspect all parts. Make sure that all passages
and holes are clear. Cover all parts to keep them clean.
Make sure parts are clean when they are reassembled.
Leave new parts in their wrapping until they are actually
needed for reassembly
Assembly
When reassembling a machine, complete each step in se-
quence. never partially assemble one part then start to as-
semble another. Make all recommended adjustments. Al-
ways check the job on completion to ensure that nothing
has been overlooked. Recheck the various adjustments
before putting the machine back into service.
Note!
Before fitting new parts, remove rust preventative
compound from all machined surfaces (usually ”peel---off
substances).
Lubrication
Where applicable, fill the compartments of repaired or re-
newed components with the quantity, type and grade of
clean lubricant recommended in the routine maintenance
section of the Operator’s Manual.
Shims
When shims are removed, tie them together and identify
their location. Keep shims clean and take care not to bend
them before refitting them.
Gaskets
Make sure that the holes in gaskets line up with lubricating
oil passages in the mating parts. If gaskets have to be
made, use material of the correct type and thickness. Make
sure that holes are punched in the right places. Incorrectly
punched gaskets can cause serious damage.
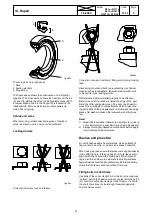
Lip type rubber seals
Lubricate the lips of lip---type rubber seals with oil before
fitment. Do not use grease on seals, except for grease
seals.
Summary of Contents for N82h
Page 4: ...2 Find manuals at https best manuals com...
Page 6: ...4 Find manuals at https best manuals com...
Page 18: ...Model Code Page 11 General 111 3 1 8 2005 10 N91c N111c N91h N141h N121LS N141LS 1 9 2006 16...
Page 30: ...Model Code Page 12 Layout 120 1 8 2005 2 N91c N111c N91h N141h N121LS N141LS 28...
Page 32: ...Model Code Page 12 Layout 121 1 1 8 2005 2 N91c N111c N91h N141h N121LS N141LS 30...
Page 38: ...Model Code Page 12 Layout 121 4 1 8 2005 8 N91c N111c N91h N141h N121LS N141LS 36...
Page 40: ...Model Code Page 13 Repair 130 1 8 2005 2 N91c N111c N91h N141h N121LS N141LS 38...
Page 44: ...Model Code Page 13 Repair 131 1 1 8 2005 4 N91c N111c N91h N141h N121LS N141LS 42...
Page 46: ...Model Code Page 13 Repair 131 2 1 8 2005 6 N91c N111c N91h N141h N121LS N141LS 44...
Page 48: ...Model Code Page 14 Maintenance 140 1 6 2008 2 N91c N111c N91h N141h N121LS N141LS 1 8 2005 46...
Page 50: ...Model Code Page 14 Maintenance 141 1 1 8 2005 2 N91c N111c N91h N141h N121LS N141LS 48...
Page 51: ...This as a preview PDF file from best manuals com Download full PDF manual at best manuals com...

