MS-350 NP Operating Instructions Ver 3.01E
21
●
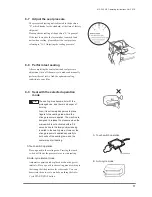
After the parts replacement is complete...
1
Completely close the seal levers by pushing the
upper lever with your hand. Install the pressure
adjusting nut to the sealer referring to “11-1
Adjusting the seal pressure.” Please make sure
to tighten a pressure adjusting nut fixing screw
after the pressure adjustment.
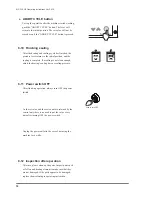
2
Return a control unit box to the initial position.
3
Install a frame cover between the white plastic
nut and body frame, and fix the cover with the
nut.
●
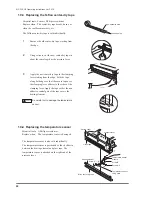
Before replacing parts...
When replacing parts, lift up the pressure lever for
easier replacement.
How to lift up the pressure lever
1
Loosen the M5x10 frame cover fixing screws,
and remove the frame cover.
2
Loosen the pressure adjusting nut fastening
screw (do not completely remove it), and turn
the pressure adjusting nut counterclockwise to
remove it. Now you can remove the small lever,
pressure rubber, and 12.7mm spacer.
3
Remove the white screw and put down the
control unit base.
Please refer to “10-8 Replacing the control
unit.”
When installing the pressure adjusting nut,
please refer to
Attention
of “11-1 Adjusting the
seal pressure.”
10-1 Preparation
10-2 After the replacement
Small lever
Pressure rubber
12.7mm spacer
Pressure adjusting nut
Pressure adjusting nut
fastening screw
Pressure lever
Switch pin
Warning
When the pressure lever is lifted up,
you can activate the microswitch by
clicking it with a thin stick, etc. Do
not activate the microswitch as it
will start heating and may result in
fire if the plug is not unplugged.
Please refer to warning of “10-9
Replacing the microswitch.)


