MS-350 NP Operating Instructions Ver 3.01E
28
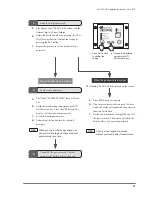
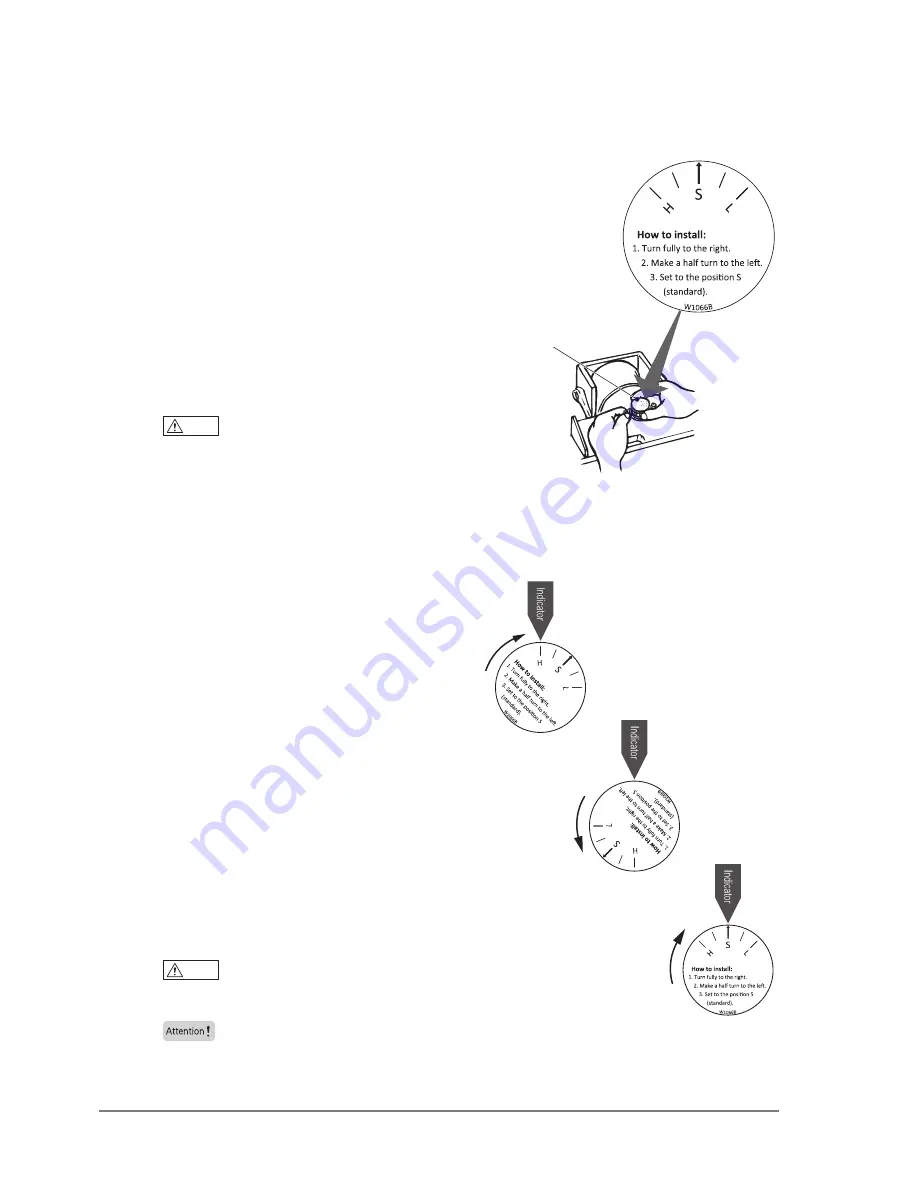
Seal pressure is adjusted at the time of factory shipment
so the optimum seal pressure can be achieved at the
position of S (standard). “H” on the lable indicates
“high”, and L is for “low”.
1
Remove a frame cover. Completely close seal
levers by pushing the upper lever with your
hand.
2
Install a pressure adjusting nut with shaft to the
hole and turn it clockwise until it stops. You will
have to turn it about 4 to 5 full turns.
Caution
If the pressure adjusting nut is not fully
screwed in, it may cause sealing failure or
cause the pressure lever to remain at the
lowered position due to the solenoid suction
strength dropping and the microswitch not
being activated.
3
The pressure adjusting nut will stop roughly at
the position of H as in the right illustration.
4
Then return the nut about a half turn
counterclockwise.
5
Again turn the nut clockwise and set it to the
position S (standard). Once the adjustment is
made, always use the securing screw to secure
the pressure adjusting nut.
11 Adjusting each part
11-1 Adjusting the seal pressure
Pressure adjusting nut
Caution
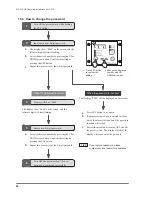
If the pressure is set excessively high (to the
direction of H), it will increase the sound of
the pressure lever movement.
Attention
If the pressure is set excessively high (to the
direction of H), a solenoid may make a
chattering noise. In that case, turn the
pressure adjusting nut to the direction of S.


