General Information
General Information
General Information
General Information
General Information
3
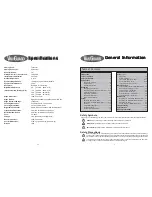
Table of Contents
Introduction
........................................................ 2
Table of Contents
.............................................. 3
Safety Information
............................................. 3
Components
Microscope Diagram.................................. 4-7
Included Parts................................................ 8
Optional Accessories...................................... 8
Assembly
Unpacking Components................................. 9
Head & Reflected Illuminator Assembly.... 9-10
Objective Installation..................................... 10
Stage Plate Installation.................................. 10
Condenser Installation.................................. 11
Power Cord Installation................................. 11
Setup
Reflected Illumination Setup................... 12-13
Reflected Field Diaphragm Alignment..... 13-14
Eyecups........................................................ 14
Interpupilliary Adjustment.............................. 14
Focus Adjustment.......................................... 15
Focus Tension Adjustment............................. 15
Setup
(continued)
Stage Limit...................................................... 15
Diopter Adjustment......................................... 15
Transmitted Illumination Setup................. 16-17
Kohler Illumination Setup......................... 17-18
Trinocular Camera Port Setup........................ 18
Microscope Use
Focusing & Mechanical Stage Mechanisms.... 19
Abbe Condenser Swing-In Lens..................... 19
Colored Filters - Transmitted.......................... 20
Colored Filters - Reflected............................. 20
Polarizer/Analyzer - Transmitted..................... 20
Polarizer/Analyzer - Reflected........................ 20
Maintenance
Replacing the Transmitted Illuminator Lamp... 21
Replacing the Reflected Illuminator Lamp...... 21
Replacing the Fuse......................................... 22
Caring for your 1442MMi Microscope............. 23
Troubleshooting
........................................ 24-25
Specifications
................................................. 26
Warranty Information
..................................... 27
Attention -
possible injury or product damage if instructions are not followed
Safety Symbols
Anytime you see the following symbols used in this manual pay special attention and follow the safety precautions.
Hot Surface -
potential for burns if contact with hot surfaces are made
Shock Hazard -
failure to follow instructions could lead to electrical shock
Safety Precautions
Before replacing the lamp or fuses always turn off the power switch and disconnect the power cord. Always
use the correct type and rated fuses. Using incorrect fuses could result in damage to the microscope and
electrical shock. Only use the supplied power cord and ensure that you are using a properly grounded outlet.
It is normal for the illuminator housing to get hot during use. Be careful to avoid touching the illuminator
housing until the unit has had sufficient time to cool after switching off.
Specifications
Specifications
Specifications
Specifications
Specifications
26
Viewing Head:
Trinocular
Viewing Head Type:
Seidentopf
Head Inclination:
30°
Sliding Prism for Trinocular Port:
100/0 Split
Interpupillary Adjustment:
55-75mm
Dioptric Adjustment:
-5 to +5
Eyepiece Magnification:
10X High Eyepoint, Ultra-Widefield
Eyepiece Field Diameter:
22mm
Nosepiece:
Quintuple, reverse facing
Brightfield Objectives:
5X
[0.12 N.A., 26mm W.D.]
(Plan Achromatic, Infinity, LWD)
10X
[0.25 N.A., 20mm W.D.]
20X
[0.40 N.A., 9mm W.D.]
40X
[0.60 N.A., 4mm W.D.]
Stage Dimensions:
140mm x 210mm
Stage Motion:
Right-Hand Coaxial Control/Rack & Pinion Drive
Stage Movement Range:
752x 63mm
Focusing Movement:
Coaxial Coarse & Fine Controls
Focusing Graduation:
2 microns Per Division
Brightfield Condenser:
0.85 N.A. Abbe Condenser with Iris Diaphragm
Transmitted Illumination:
30W, 12V Variable Quartz Halogen
Reflected Illumination:
50W, 12V Variable Quartz Halogen
Fuse:
3A, 250V
Voltage:
110V [Standard], 220V [Optional]
Base Dimensions:
280mm x 250mm
Overall Dimensions:
470mm (L) x 250mm (W) x 520mm (H)
Weight:
10kg


