25799 Jefferson Ave.
Murrieta, CA 92562
1-800-VANIMAN (826-4626) USA
www.vaniman.com
sales@vaniman.
SANDSTORM PRESTIGE- 05/21 Page 6
SANDSTORM PRESTIGE
8. Press the foot pedal to start the flow of air and blasting media. Release the foot pedal to stop
the flow.
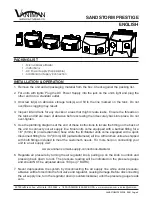
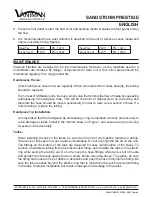
9. It is recommended that a dust collector is attached to the unit to remove excess media and
improve visibility during blasting.
ENGLISH
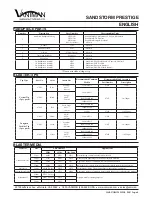
MAINTENANCE
Vaniman blasters are designed to be low maintenance. However, as the materials used in a
microblaster are abrasive by design, components do wear out. A few minor areas should be
maintained regularly for a long product life.
Handpieces Hoses:
Check handpiece hoses for wear regularly. When hose feels thin or holes develop, the tubing
should be replaced.
On the rear of IO/Master units, there is a pinch valve that controls the flow of media by squeezing
andreleasing the handpiece tube. This will be the point of highest wear on the tubing and
therefore the hose should be moved periodically in order to wear a new section of hose. If a
hole develops, replace the tubing.
Handpiece Tip Installation:
It is imperative that the handpiece tip and sealing o-ring be installed correctly and securely to
avoid damage or leaks. Install in the manner shown in Figure 1 and ensure the tip and o-ring
sit evenly in the assembly.
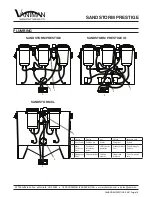
Tanks:
When installing the lids on the tanks, be sure the lid is rid of any blasting material or debris.
If the tank or lid begins to wear, replace immediately. Do not over-tighten the lid on the unit.
The fittings on the bottom of the tank are designed for easy maintenance of the hoses. To
remove a handpiece tubing from quick disconnect fitting, push toward the tank on the plastic
ring while pulling the tubing out. Do not remove the hose fittings while tank is full of media
and upright; turn the tank upside down or empty before removing hoses. To replace, be sure
the fitting and hose are free of debris or abrasives and push the hose firmly into the fitting. Be
sure the tube reaches beyond the black o-ring that is just above the quick disconnect fitting
in the tank. Improper installation will result in leakage and damage to the tanks.
SandVac
120V
PN: 10211
StoneVac II
120V
PN: 10201
SandVac
220V
PN: 10212
StoneVac II
220V
PN: 10209


