PAGE
REVISION:
DATE:
VAN'S AIRCRAFT, INC.
PAGE
REVISION:
DATE:
2
RV-ALL
05-12
04/15/13
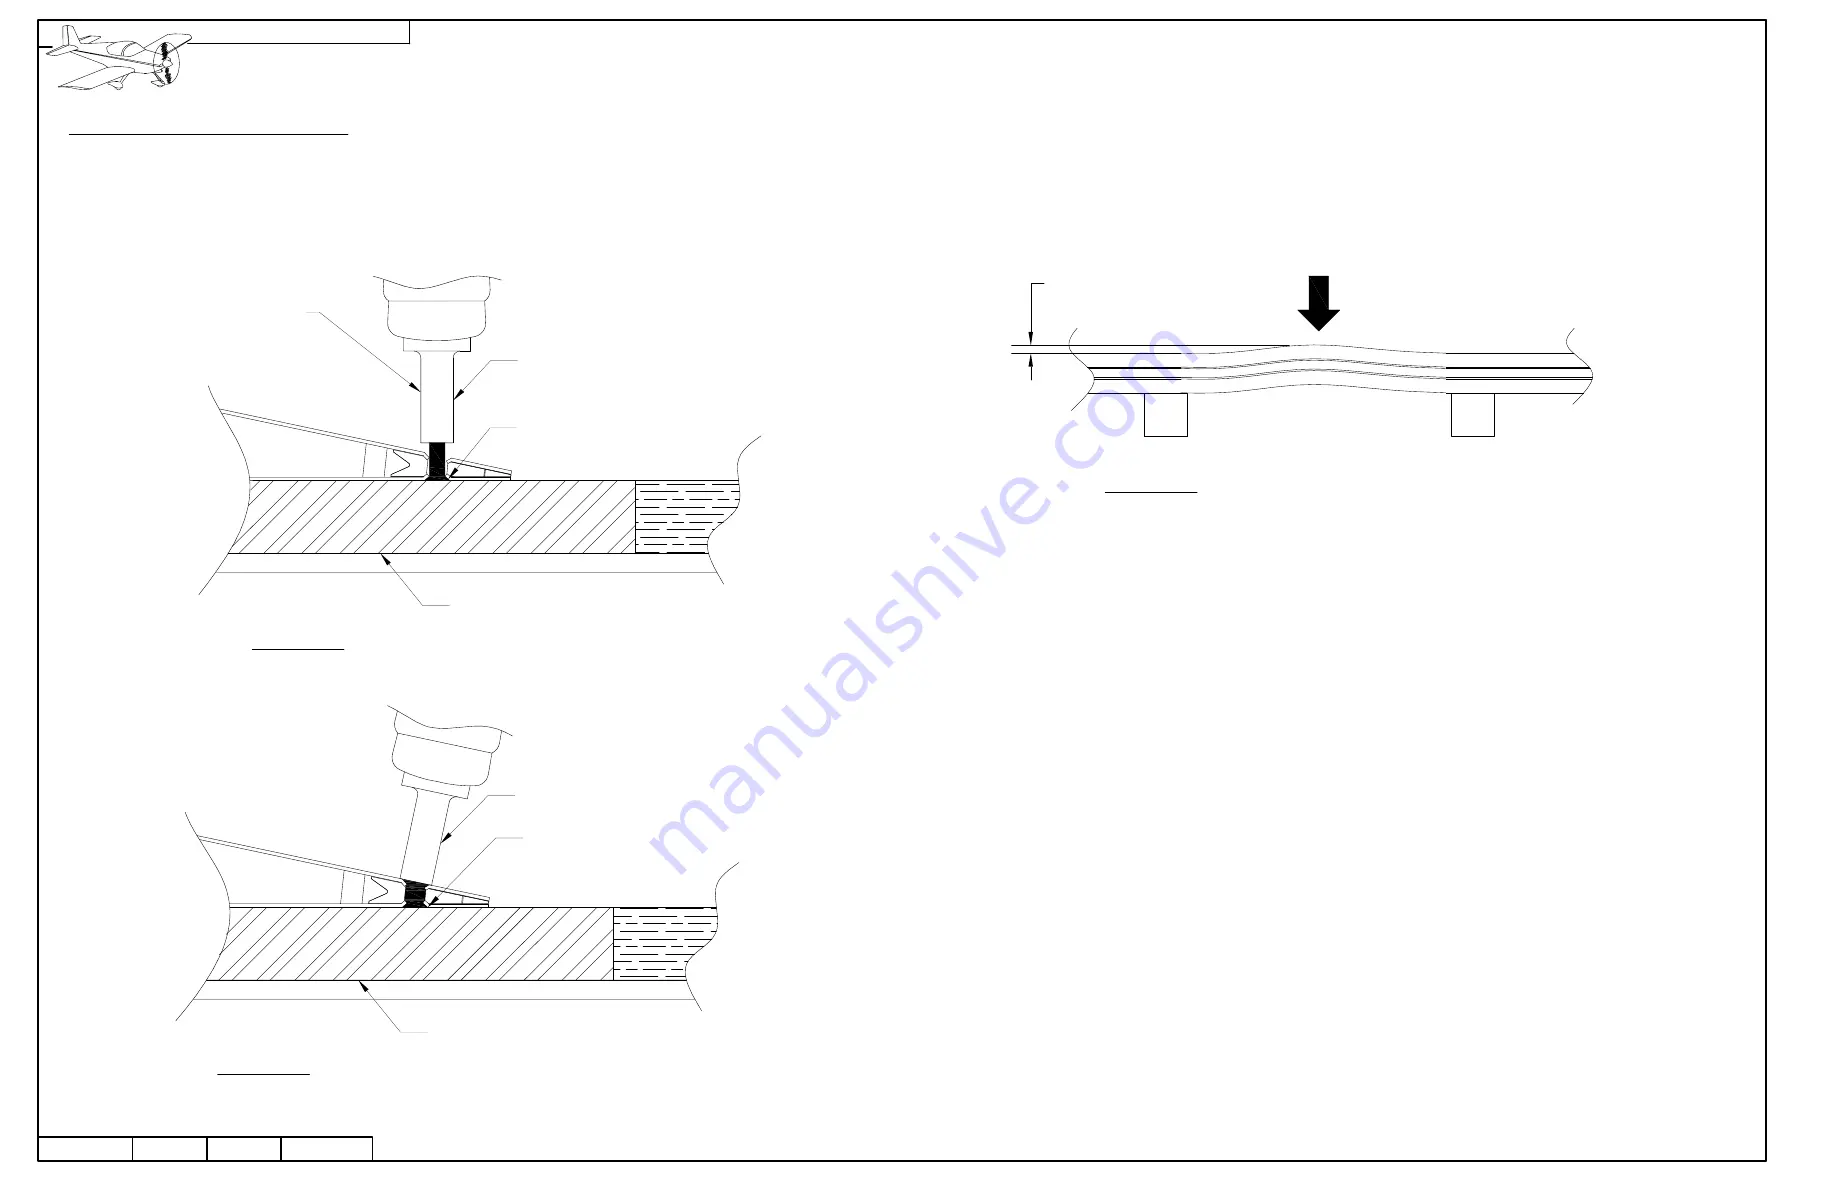
FIGURE 1: RIVETING THE TRAILING EDGE, INITIAL
FIGURE 2: RIVETING THE TRAILING EDGE, CONTINUED
RIVET GUN PARALLEL TO RIVET SHANK
STEEL PLATE INSET IN TABLE
MANUFACTURED HEAD
RIVET GUN PERPENDICULAR
TO SKIN
STEEL PLATE INSET IN TABLE
MANUFACTURED HEAD
FLAT FACED NARROW
DIA RIVET SET
(C-FRAME RIVET SET
WILL ALSO WORK.
SUPPORT BOTTOM
WITH FREE HAND)
5.8 RIVETED TRAILING EDGES (continued)
Set the rivet gun pressure low (it should take about three seconds to fully set a rivet). This will allow time to vary the angle of the rivet
gun while driving the rivet. Start with the rivet set parallel to the rivet shank and tilt it to set the rivet flush to the skin as the rivet sets.
Repeat the initial pattern until the rivets are completely set. See Figures 1 and 2.
Check constantly for any deformation of the trailing edge. If deformation over 1-2 in. [2.5-5 cm] in length is observed place blocks
near the curved area and lightly bend the trailing edge back down. Take your time and work as precisely as possible. An excessively
wavy or bowed trailing edge will affect the flying qualities of the airplane. Strive to build a trailing edge that does not vary more than
the dimension called out in Figure 3.
FIGURE 3: STRAIGHTENING THE TRAILING EDGE
NO GREATER THAN 0.1 (2.5 mm)


