

Copyright © 2015 Vantec Thermal Technologies. All Right Reserved. | All Registered Trademarks Belong To Their Respective Companies.
Model: NST-520S3-BK
Information in this document is subject to change without notice.
Reproduction of these materials in any manner whatsoever without written permission is strictly forbidden.
Printed in China
Printed on Recycled Paper.
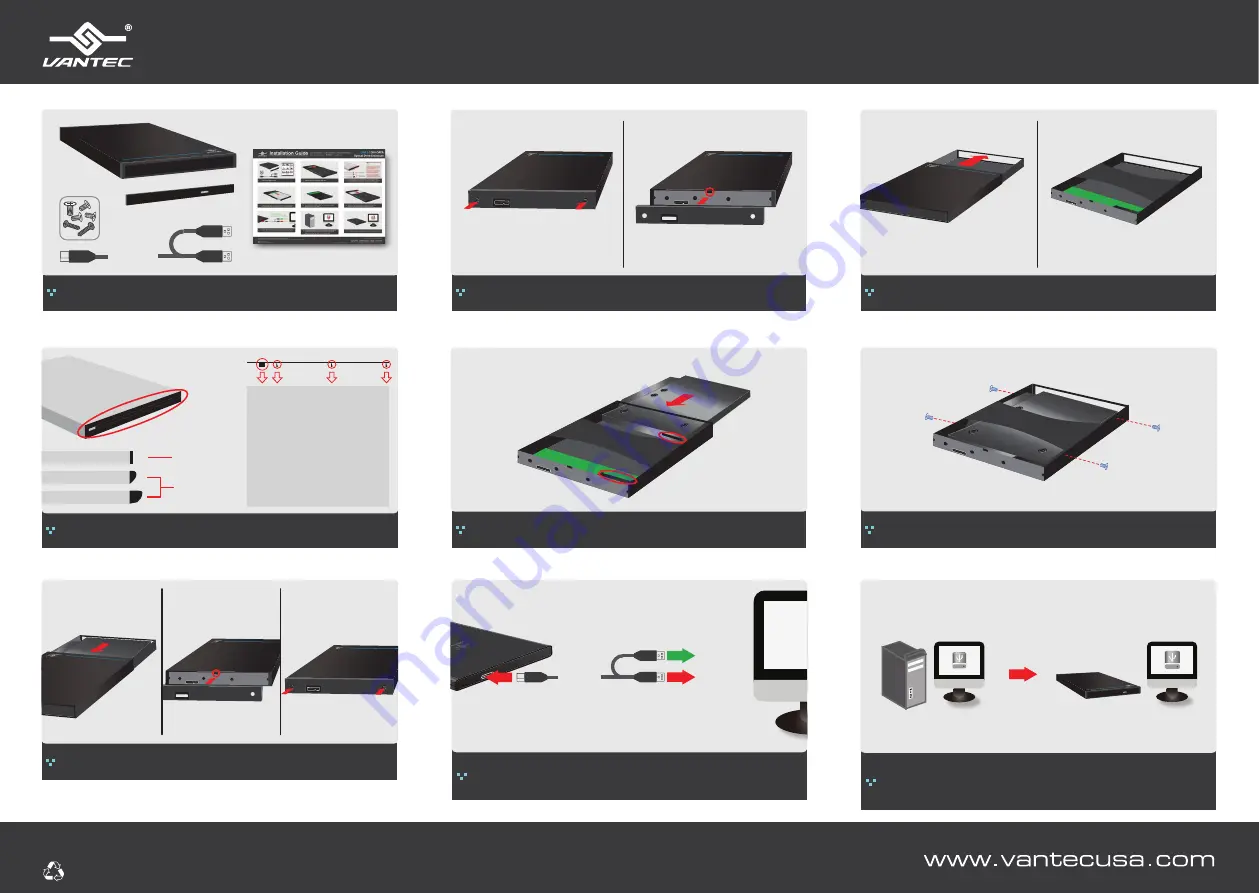
Installation Guide
For NST-520S3-BK
(
12.7mm only
)
. For NST-510S3-BK
(
9.5mm
)
see back page.
USB 3.0
Slim SATA
Optical Drive Enclosure
If the Front Plate of your Optical Drive is using a Protruding or Curve
Front Plate, please use the provided Front Plate oto replace it. Follow
the picture showing the hook to remove and replace.
4.
Flat Front Plate
Side View
Protruding or
Curve Front Plate
1) Eject the Optical Tray by inserting a
paper clip into the eject hole on the
front of the Optical drive.
2) Note the location and direction of
the hooks on the provided Flat Front
Plate, unhook each hook slowly.
3) Replace it with the provided Flat
Front Plate back onto your Optical
drive. Note the location of the 4 hooks.
Connect the USB cable to the Optical unit and your system
USB port. The Optical unit is bus powered. It will draw
power from the USB port.
8.
USB 3.0 Cable
USB 3.0 Port
Optional USB
Power Connection
*Optional USB Power Connection:
If your Optical Drive need more power than 1 USB 3.0
port can provide. please use the additional USB power
connection to your system, If you are not sure connect both.
Verify the package contents.
1.
USB 3.0 Cable
Front Plate
The Operating System will detect USB Mass storage device
connected and load the necessary drives built into the
Operating System. No other drives are needed. Once the
drives are installed the Optical drive is ready for use.
9.
OK
?
Slide the Optical drive on the Tray until the Slim SATA interface on the
Optical drive dock completely wuth the Tray Slim SATA interface.
5.
Secure the Optical Drive to the Tray using the provided
small screws on both sides.
6.
Remove the two screws holding the back plate and peel
away the back plate held by a latch shown.
2.
Slide the tray into aluminum housing and secure the back plate with
two provided screws.
7.
Slide out the Tray for mounting the Optical Drive.
3.


