


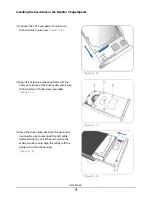


Installation
8
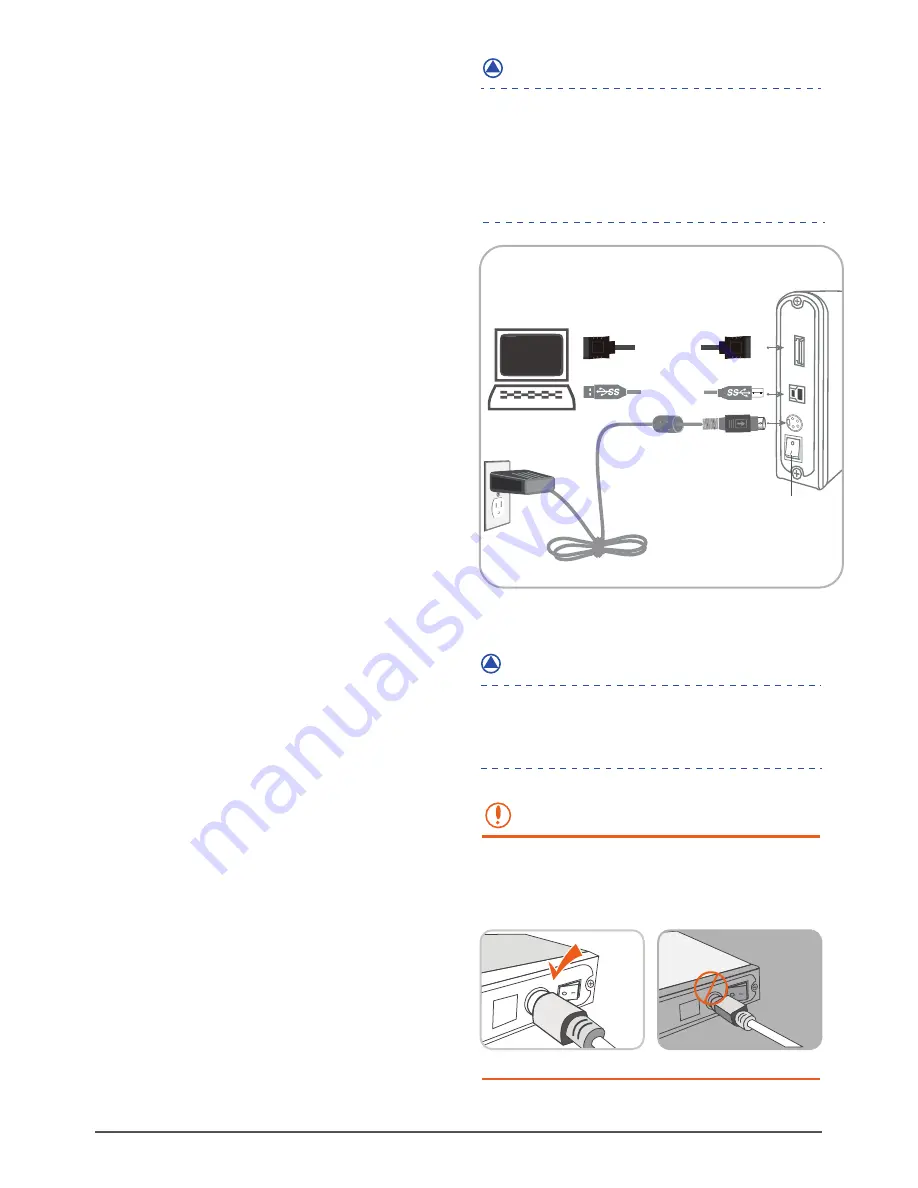
Connecting the NexStar 3 to your computer:
( figure 5.1-E )
( figure 5.1-E )
Connect the type (B) USB connector to the
NexStar 3 SuperSpeed and the type (A) USB
connector to an available USB port on your
system.
Connect the power cable to the NexStar 3
SuperSpeed and plug the cable into an
available outlet.
Turn on the NexStar 3 SuperSpeed via the
power switch.
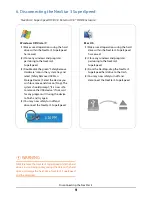
Your operating system should detect the
NexStar 3 SuperSpeed and automatically install
the necessary drivers. Once your operating
system finishes setting up the NexStar 3, it will
mount your hard drive. On Mac OS systems, the
new volume should appear on desktop. On a
Windows PC, the new volume will appear
under My Computer.
Your NexStar 3 SuperSpeed External Hard Drive
is now ready for use.
(1)
(2)
(3)
(4)
(5)
(1)
(2)
(3)
(4)
(5)
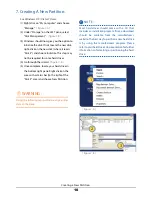
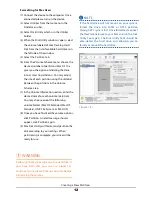
If you can see the USB icon in the system tray ,
but there is no any disk appear in your computer,
please confirm your hard disk is partitioned.
Please be careful and plug the power adapter
to your enclosure properly.
See figures below.
( figure 5.1-F, figure 5.1-G )
WARNING :
( figure 5.1-F )
( figure 5.2-G)
(1)
(2)
(3)
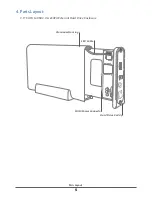
( figure 5.1-E )
USB 3.0 Cable
NOTE :
For new hard drives, you will need to initialize and
partition your hard drive before it will appear in
Windows Explorer or on your Mac desktop. Please
refer to your hard drive manufacturer's documen-
tation or read the"Creating a New Partition" section
of this manual.
eSATA
USB 3.0
eSATA Cable
eSATA
USB
Connect the eSATA to the NexStar and to an
available eSATA port on your system.
Connect the power cable to the NexStar 3
SuperSpeed and plug the cable into an
available outlet. ( figure 5.1-E )
Turn on the NexStar 3 SuperSpeed via the
power switch. ( figure 5.1-E )
Your operating system should detect the
NexStar 3 SuperSpeed and automatically
install the necessary drivers. Once your
operating system finishes setting up the
NexStar 3, it will mount your hard drive. On
Mac OS systems, the new volume should
appear on desktop. On a Windows PC, the new
volume will appear under My Computer.
Your NexStar 3 SuperSpeed External Hard
Drive is now ready for use.
NOTE :


