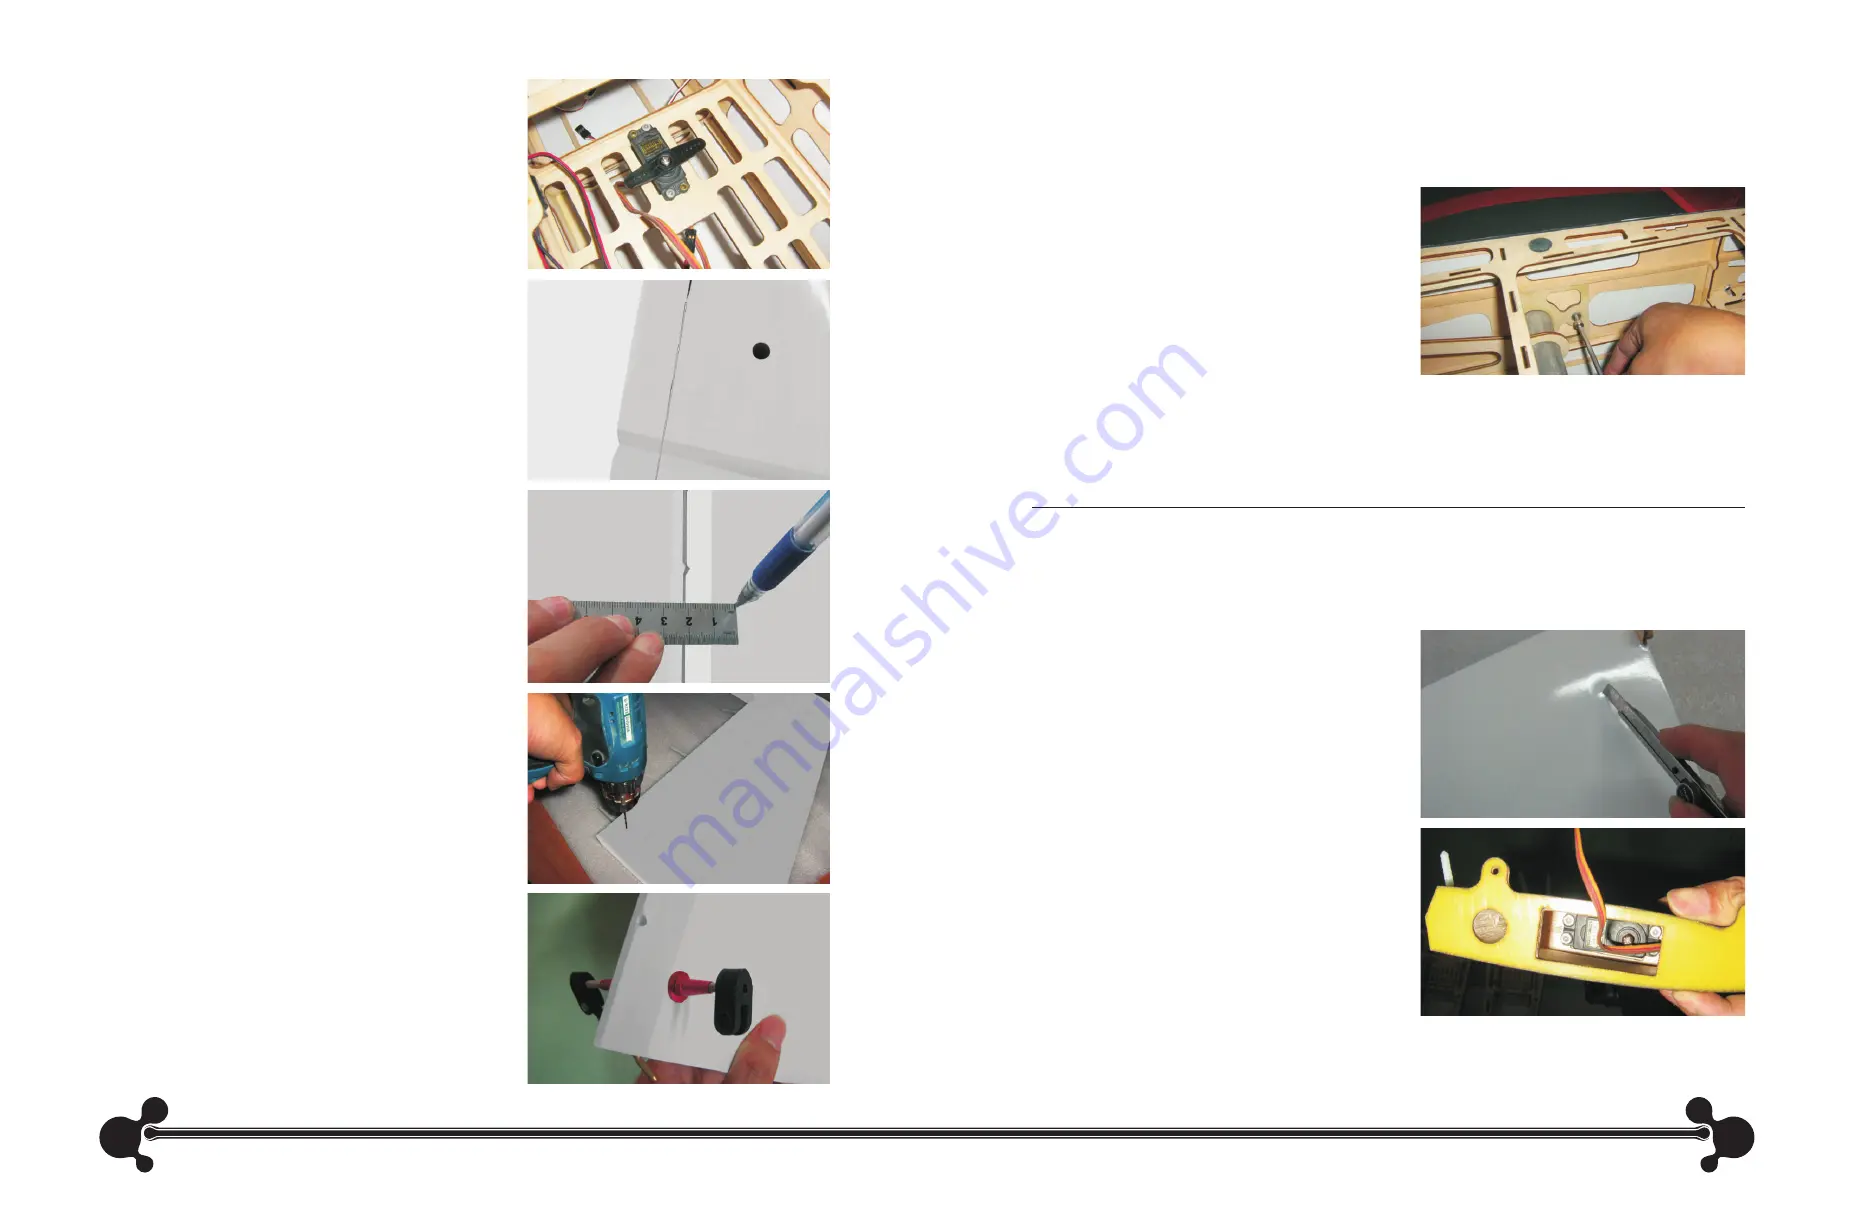
Step 2
Install the rudder servo on the right position of servo
tray in the fuselage. Attach the servo arm to the servo.
Make sure the servo arm is perpendicular (90
°
) to the
centerline of the fuselage when the servo is at the
neutral position.
Step 3
Put the fuselage on its side with rudder virtually
connecting. Using the provided rudder cable, measure
a straight line from the rudder servo arm to the opening
in Step 1, and mark the extension line on the rudder with
a pen.
Step 4
Measure rearward 10mm (3/8”) from the edge of the
rudder bevel and make another mark using a
pen. The intersection of the line from Step 3 and
this line will be the position for the rudder
control horn.
Step 5
Carefully drill through the rudder at the marked position,
perpendicular (90
°
) to the rudder centerline at the
marked position. Be especially careful when penetrating
through the backside of the rudder.
Step 6
Put the threaded rod of the rudder control horn through
the hole and secure it with the provided nuts. Adjust the
position of the rod so that it has the same length on both
sides of the rudder. Screw the molded swivel link with
linkage onto the threaded rod at the right position so
that the rudder cable in operation will not hit the opening
of the fuselage.
Step 3
Carefully slide the remaining wing panel onto the wing tube that projects from the fuselage. The fit
may be tight; use caution when inserting the wing panels onto the wing tube and fuselage.
Step 4
Make sure both wings fit well with the fuselage and
there is no gap between them. Secure the wing
panels using the provided wing screws.
Section 6 – Stabilizer Installation
12
9
Required Parts
• Stabilizer (left and right)
• Fuselage
• Stabilizer tube
Step 1
Locate the opening for the elevator servo arm at the
bottom of the stabilizer. Carefully remove the
covering from the opening using a hobby knife.
Step 2
Install the elevator servo using the hardware
provided with the servo as shown.


