4
17
Required Parts
• Wing panel (
right )
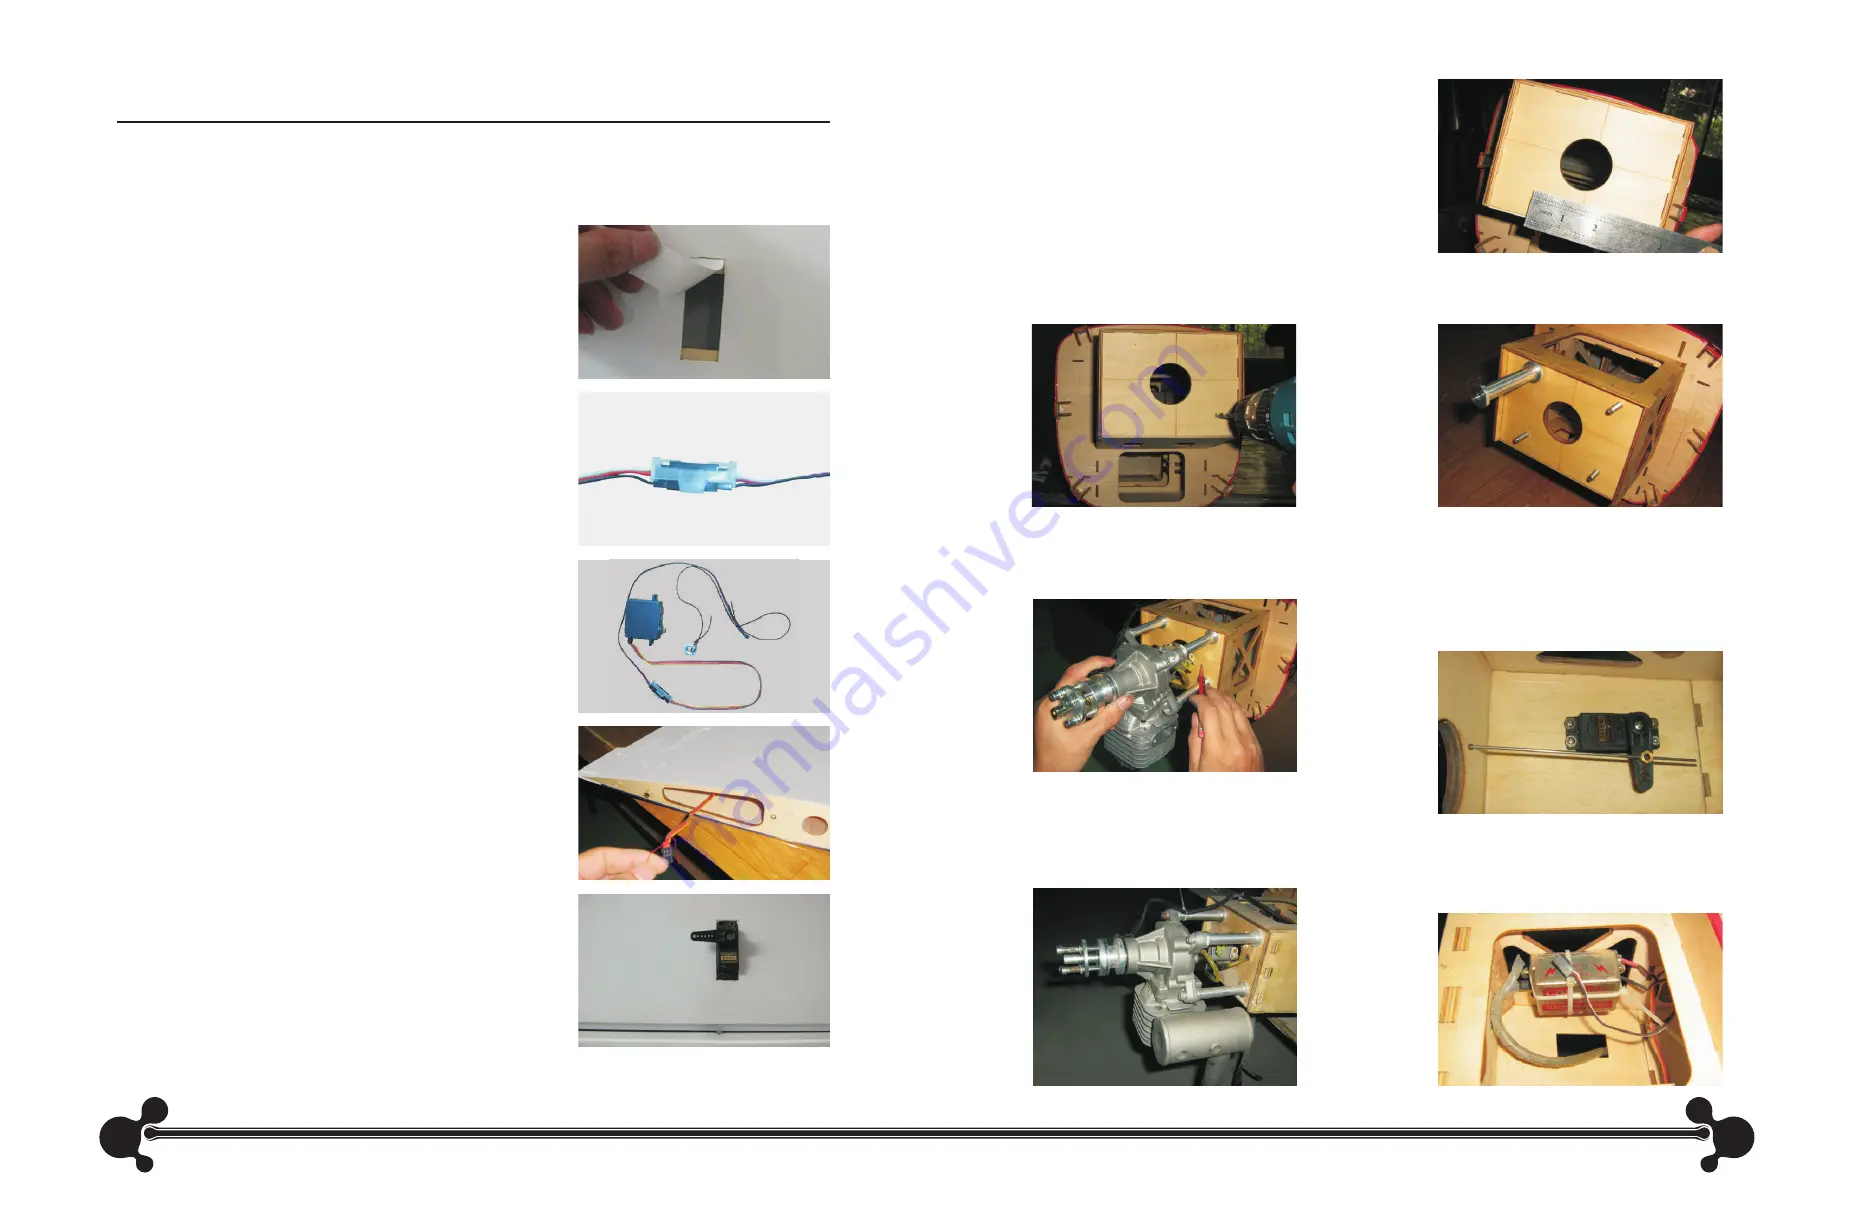
Step 1
Locate the opening for the aileron servo at the bottom of the
aileron. Carefully remove the covering from the opening using
a hobby knife.
left and
Step 2
Plug a servo extension onto the servo. Tie the servo leads
together by using a secure connector, or using a ribbon to
prevent them from coming loose during flight.
Step 3
Tie a weight to a piece of string. A wheel collar works great in
this application. Tie the other end of the string to the servo
extension.
Step 4
Lower the weight into the wing from the aileron servo opening.
Let the weight drop out through the wing root for the servo. Use
the string to pull the servo lead through the wing.
Step 5
Secure the servo using the hardware provided with the servo.
Attach the servo arm to the servo. Make sure the servo arm is
parallel with the hinge line when the servo is at the neutral
position.
Step 6
Repeat Steps 1 through 5 for the remaining wing panel.
Section 1 – Aileron Servo Installation
Step 2
The vertical and horizontal base lines are pre-marked
on the firewall. Measure and mark the same distance
from the lines for the four engine standoff screws. The
firewall is already mounted correctly to provide right
offset for the engine when the engine standoff center is
on the intersection of the above lines.
Step 4
Install four screws from the back side of the
firewall. You may apply epoxy glue here.
Step 6
Install throttle servo with servo arm to the
provided throttle servo mount. Drill a hole
in the firewall for the throttle linkage to
pass. Attach the linkage to the servo arm
and throttle.
Step 7
Install the exhaust pipe to the engine.
Step 8
Secure the ignition module to the engine box.
Make the connections between the ignition
box and engine at this time.
Step 5
Install engine using four machined aluminum
standoffs, screws and lock washers.
Step 3
Drill the holes in the firewall for mounting the engine.


