background image

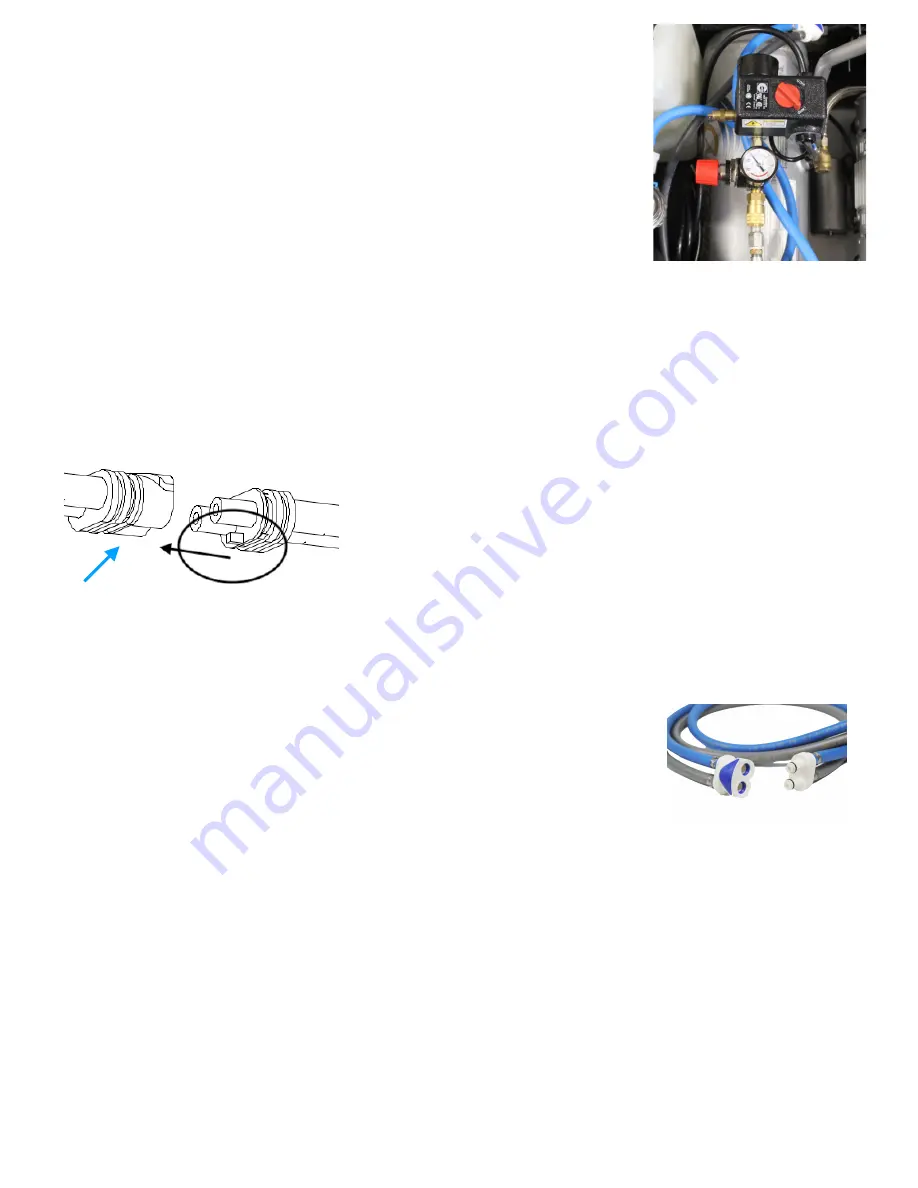
Switch On The Air Compressor. (FIG 4) 

1. Turn the power switch from “OFF” to “AUTO”.

2. Use the pressure knob to set the Correct Air Pressure for the 

VaporFlame units desired. (SEE VaporFlame Unit manuals for 
correct pressure settings.)

Connect Air/Water Hoses and Prime the System  

(FIG 5) 

1. Use VaporFlame Air/Water hoses, (sold separately) to 

connect The Engine to the VaporFlame e

ects units.

2. Prime the water pump & clear air from the water line.  
Using the Water Bleeder Valve, bleed the air from the 
water line. This is best done into a container as water 
will most likely come out with the air.  Once the water 
runs as a steady stream without pockets of air, 
disconnect the Bleeder Valve.

3. Connect the Air/Water hose to the VaporFlame e

ect 

units. 

Set up your VaporFlame E

ect unit  

1. Power up the VaporFlame e

ect and lighting fixture per their 

manuals. 

Drain remaining water from the unit before 

storage. 

1. Disconnect the VaporFlame e

ects units from the Air/Water 

hoses.

2. Connect the Air/Water Blow O

 Valve in-line directly after the The Engine, and 

before the hoses.  

3. Move the valve lever to the Air (Gray) hose.  This sends air through the water line to 

clear the water from the hose.

4. Connect the Bleeder Valve at the end of the Air/Water hose line.  This allows the 

water to be blown out of the water line to prepare it for storage.

5. Once the water has been cleared from the hoses, the hoses may be disconnected 

and stored.

6. NOTE: Release the residual air pressure in the air AND water hoses by depressing 

the male connectors.  A pu

 of air will result. Neat huh? 

Page   of 

8

11

Rev. 1.0 4/21

Quick Release

Connector

FIG. 5

FIG. 6

FIG. 4

Summary of Contents for VFE-L

Page 1: ...VFE L Manual Page of 1 11 Rev 1 0 4 21 ...

Page 2: ... Orientation FIG 1 7 Fill The Water Tank with Clean Potable Water 7 FIG 2 7 Power the Engine FIG 3 7 Switch On The Air Compressor FIG 4 8 Connect Air Water Hoses and Prime the System 8 FIG 5 8 Set up your VaporFlame E ff ect unit 8 Drain remaining water from the unit before storage 8 5 A Few More Thing s 9 Draining the Air Compressor 9 Air Water 9 Warranty 10 Tips and Tricks 11 Page of 2 11 Rev 1 ...

Page 3: ...and cannot be run o ff a rheostat variable resistor or dimmer circuit even if the rheostat or dimmer channel is used solely for a 0 to 100 switch The VFE L Engine requires an input voltage of 110 VAC 60Hz Be sure the input voltage applied to the fi xture matches these speci fi cations Irreparable damage may occur if the incorrect is voltage supplied Getting A Hold of Us If you need more informatio...

Page 4: ...r tubes In the event of an unpleasant odor the Engine and Water Hoses must be cleaned immediately It is RECOMMENDED to add 2oz of white vinegar to every tank of water to maintain clean internal water hoses ALWAYS bleed remaining water and air from The Engine before storing The Engine must be installed in a location with adequate ventilation The Engine MUST be in a lid up orientation for running Us...

Page 5: ... unit immediately NEVER try to repair the unit yourself Repairs carried out by unskilled people can lead to damage or malfunction Please contact the nearest authorized technical assistance center Always use the same type spare parts NEVER connect The Engine to a dimmer pack Make sure the power cord is never crimped or damaged Caution There are no user serviceable parts inside the unit Do not open ...

Page 6: ...e door on the side for power in and air water out The VFE L uses a paired valved connector for delivering air and water to the VaporFlame e ff ect units These valved connectors prevent air and water leaks when used correctly Dimensions of the case are 20 w x 15 d x 20 h and features a tilt and roll pull out handle The VFE opens from the top to access the water tank and the air tank The VFE L water...

Page 7: ...k out of the road case Check to ensure there is no debris or sediment in the tank 3 Fill the water tank with clean potable water There should be no sediment or debris in the water tank 4 Add 1oz white vinegar to each full tank to maintain a clean VaporFlame system 5 Replace the water tank and reconnect the quick release connector Power the Engine FIG 3 1 Connect The Engine directly to an appropria...

Page 8: ...rFlame e ff ect units Set up your VaporFlame E ff ect unit 1 Power up the VaporFlame e ff ect and lighting fi xture per their manuals Drain remaining water from the unit before storage 1 Disconnect the VaporFlame e ff ects units from the Air Water hoses 2 Connect the Air Water Blow O ff Valve in line directly after the The Engine and before the hoses 3 Move the valve lever to the Air Gray hose Thi...

Page 9: ...ngine In short if you can drink it so can the VFE L Debris in the water line can clog and damage the VaporFlame units We have installed a fi lter for debris on the water supply line Regularly check to see of debris has accumulated in this fi lter The clear cover can be removed to clear debris from the fi lter FIG 9 Unpleasant odors can occur if water is left in the unit for extended periods of tim...

Page 10: ... ship back to owner at VaporFlame s expense If VaporFlame determines the fi xture is not under warranty VaporFlame will ship the fi xture back to the owner at the owners expense If VaporFlame determines the fi xture is not under warranty but the owner would like VaporFlame to correct the issue the owner will be charged time and materials VaporFlame will provide an estimate to the owner to correct ...

Page 11: ... correctly connected to an air and water supply 4 Use the blow o ff valve to clear the water from the water line This may also clear debris int he water line Re set up the system per this manual I am getting a plume of air water vapor but it is minimal or low and wide 1 Adjust the air to water ratio on the e ff ect unit Too much air in relation to water can cause a wide low plume 2 Check air press...

Reviews: