background image

21

ENglIsh

Regulations 

All local regulations, including those that refer to national and European standards, 
must be complied with during fitting, e.g. the Danish building regulations for small 
houses, BR­S 98, published by the National Agency for Enterprise and Construction. 

Minimum distance to combustible materials, such as floors, walls or furniture


Varde In­Line 47: Behind: 30 cm Side: 30 cm Above the floor: 30 cm In front: 105 cm
Varde In­Line 55: Behind: 35 cm Side: 35 cm Above the floor: 30 cm In front: 110 cm
Varde Front­Line 55: Behind: 35 cm Side: 35 cm Above the floor: 30 cm In front: 110 cm

Floor materials

If there is a floor made of combustible material by the fireplace insert, this must 
naturally be covered by a panel of non­combustible material such as a steel plate, glass 
sheet, Dutch brick or artificial slate. The floor panel must extend at least 15 cm from 
the sides of the insert and at least 30 cm from the front. We recommend however 50 
cm at the front. 

Fresh air intake

A supply of fresh air must be available in the room in which you install the fireplace 
insert, e.g. via ventilation grills in the walls. It must not be possible to block these 
grills. You should also be aware that any extraction ventilators (cooker hoods or the 
like) in the same room as the insert may cause problems in relation to the chimney 
updraught. 

Damper


In some cases it may be necessary to install a damper in the chimney, so that the 
updraught can be adjusted. This can be especially useful on very windy days. There 
must always be at least 20 cm

2

 of free passage via the chimney. Consult your dealer or 

chimney sweep for advice.

The fireplace insert is suitable for connection to a flue gas collector.

Always ensure that the flue gas connector and chimney can be cleaned. Consult your 
dealer or chimney sweep for advice. 

Nominal operation and a room temperature of 20˚C provides: 

Varde In­line 47: Smoke mass flow: 6.6 g/sec Flue gas temperature: 271°C
Varde In­Line 55: Smoke mass flow: 6.8 g/sec Flue gas temperature: 274°C
Varde Front­Line 55: Smoke mass flow: 6.8 g/sec Flue gas temperature: 274°C

important information

Summary of Contents for FRONT-LINE 55

Page 1: ...1 VARDE Varde IN line 47 Varde IN line 55 VARDE FRONT LINE 55 Monteringsmanual Fitting instructions Einbauanleitung Instructions de montage VARDE Front Line 55...

Page 2: ...2 In Line 55...

Page 3: ...3 VARDE Varde IN line 47 Varde IN line 55 VARDE FRONT LINE 55 Monteringsmanual Dansk 4 Fitting instructions English 14 Einbauanleitung Deutsch 24 Instructions de montage fran ais 34...

Page 4: ...n f eks hvilken type r gr r der skal anvendes ved montering Bem rk Der er anmeldelsespligt til den lokale skorstensfejer Deres lokale skorstensfejer skal syne og godkende Deres monterede pejse indsats...

Page 5: ...bl a vaterpas Pejseindsatse fra Varde Ovne kan indbygges p forskellige m der afh ngig af pejsens udformning Hvis De har brug for en specialfremstillet frontramme kontakt Deres forhandler vre og nedre...

Page 6: ...kan v re en stor hj lp ved senere montering af flexr ret Vigtigt vrige regler for renselem skal altid overholdes Klarg ring 1 Murv rk F r montering af pejseindsatsen skal De s rge for at pejsen er kla...

Page 7: ...len der angiver r gretningen gennem r ret Isoler rundt om flexr ret med isoleringsbatts Lad de verste 2 3 cm v re fri til efterf lgende fastst bning af flexr ret se pkt 8 3 Flexr r N r flexr ret er fa...

Page 8: ...est Fastg r r ret i pejseindsatsen ved at ombukke pladeflapperne s r ret sidder fast i pejseindsatsen Montering 5 Placering Pejseindsatsen er nu klar til montering Tag vermikulitpladerne og bundstenen...

Page 9: ...satsen st r i vater Fastg r evt indsatsen i bunden af pejsen med et par karmskruer betonskruer el lign gennem de 2 store huller i bunden 7 Justering 8 F rdigg relsen Inden pejseindsatsen er klar til b...

Page 10: ...ens ydre m l h jde 58 5 x bredde 77 cm Varde In Line 55 Varde Front Line 55 Nominel varmeydelse 7 kW 4 9 kW Rumopvarmningsydelse 30 100 m2 V gt 102 kg R gafgang 15 cm Pejseindsatsens ydre m l h jde 54...

Page 11: ...eres skal De s rge for at der er tilstr kkelig frisklufttilf rsel Dette kan f eks etableres ved ventilationsriste i v ggene Disse luftriste m ikke kunne blokeres Samtidig m De v re opm rksom p at evt...

Page 12: ...e for r gudslag Ilttilf rslen kan justeres under forbr nding vha luftspj ldet som vist Opt nding Opt nding i pejseindsatsen er meget nemt takket v re 2 trinsgrebet T nd op luk l gen og s t grebet i op...

Page 13: ...orringes kraftigt Juster l gen efter behov for at sikre optimal udnyttelse af pejseindsatsen L gen p In Line 47 og 55 kan nemt vendes s den passer til omgiv elserne Tag l gen af og flyt h ngsler og lu...

Page 14: ...uired to notify your local chimney sweep if a fire place insert has been fitted Your local chimney sweep must inspect and approve your fitted fireplace insert before it is used You may wish to consult...

Page 15: ...lip Fireplace mortar Insulation batts Tools e g spirit level Varde fireplace inserts can be built in various ways depending on the design of the fireplace the upper and lower edge of the wall has to b...

Page 16: ...tall the flexible tubing Important Other regulations for the installation of access hatches must always be observed Preparation 1 Brickwork Before fitting your fireplace insert make sure that the fire...

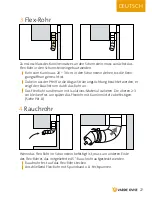
Page 17: ...Notetheflowarrowindicatingthedirectionofthesmokethroughthetubing Apply insulation batts to insulate the tubing Leave the top 2 3 cm uncovered tofacilitatethesubsequent walling inofthetubing seepoint...

Page 18: ...t Fasten the tubing in the fireplace insert by folding up the flaps so that the tubing is held firmly in place Fitting 5 Positioning You can now fit the fireplace insert Remove the vermiculite plates...

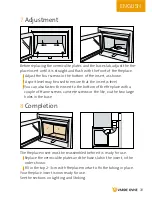
Page 19: ...an also fasten the insert to the bottom of the fireplace with a couple of frame screws concrete screws or the like via the two large holes in the base 7 Adjustment 8 Completion The fireplace insert mu...

Page 20: ...55 Nominal heat output 7 kW 4 9 kW Heats up to 30 100 m2 Weight 102 kg Smoke outlet 15 cm Exterior dimensions height 54 5 x width 68 x depth 42 cm Exterior dimensions of front frame height 66 5 x widt...

Page 21: ...dhowever50 cmat thefront Freshairintake Asupplyoffreshairmust beavailableintheroominwhichyouinstallthefireplace insert e g viaventilationgrillsinthewalls It must not bepossibletoblockthese grills Yous...

Page 22: ...being produced and there is thereby a risk of smoke downdraught The air supply can be adjusted while the fire is burning using the air inlet as shown Lighting Opt nding i pejseindsatsen er meget nemt...

Page 23: ...djust the door as necessary to ensure the optimum efficiency of the fireplace insert The fireplace insert s door can on In Line 47 and 55 easily be reversed to suit the surroundings Remove the door an...

Page 24: ...ndet werden muss Achtung Es besteht eine Meldepflicht bei Ihrem Schornsteinfeger vor Ort Ihr zust ndiger Schornsteinfeger muss den eingebauten Kaminein satz von Inbetriebnahme genehmigen Bitte beraten...

Page 25: ...tel Isolations Material Werkzeug u a Wasserwaage Kamineins tze von Varde Ovne k nnen in Abh ngigkeit von der Form des Kamins unterschiedlich eingebaut werden die obere und die untere Kante der Mauer m...

Page 26: ...gute Hilfe sein Wichtig Die sonst geltenden Vorschriften f r Reinigungs ffnungen sind jederzeit einzuhalten Vorbereitung 1 Mauerwerk Vor Einbau des Kamineinsatzes m ssen Sie sicherstellen dass der Ka...

Page 27: ...htung beachtet werden er zeigt den Rauchstrom durch das Rohr an Das Flex Rohr rundherum mit Isolations Material isolieren Die oberen 2 3 cm bleiben frei um sp ter das Flexrohr mit Kaminm rtel zu befes...

Page 28: ...Kamineinsatz durch Umbiegen der Blechstreifen befestigen damit das Rohr fest im Kamineinsatz sitzt Einbau 5 Platzierung Jetzt kann der Kamineinsatz eingebaut werden Vermiculit Platten und Bodenstein w...

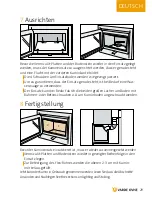
Page 29: ...Der Einsatz kann bei Bedarf durch die beiden gro en L cher am Boden mit Rahmen oder Betonschrauben o am Kaminboden angeschraubt werden 7 Ausrichten 8 Fertigstellung Bevor der Kamineinsatz einsatzbere...

Page 30: ...H he 58 5 x Breite 77 cm Varde In Line 55 Varde Front Line 55 Nennw rmeleistung 7 kW 4 9 kW Raumheizverm gen 30 100 m2 Gewicht 102 kg Rauchrohr 15 cm Au enma e des Kamineinsatzes H he 54 5 x Breite 6...

Page 31: ...mussf rausreichendeFrischluftzu fuhrgesorgt werden Dieskannz B durchdenEinbauvonLuftgitternindenW ndenerfolgen DieseLuftgitterd rfennicht blockiert werdenk nnen Gleichzeitigist zubeachten dass m glich...

Page 32: ...ennung kann die Sauerstoffzufuhr mit der Luftklappe wie gezeigt geregelt werden Anz nden Das Anz nden im Kamineinsatz ist dank des 2 Phasen Griffs ganz einfach Anz nden T r schlie en und den Griff auf...

Page 33: ...T r bei Bedarf aus um eine optimale Leistung des Kamineinsatzes zu garantieren Die T r des Kamineinsatzes In Line 47 und 55 l sst sich ganz leicht umbauen damit sie zur Einrichtung passt T r herausne...

Page 34: ...de fum e utiliser Remarque Vous tes tenu de d clarer votre insert aupr s de votre ramoneur local Celui ci doit inspecter et approuver l insert que vous avez mont avant son utilisation Demandez ventue...

Page 35: ...r foyer Isolant en nattes Outils par ex un niveau Les inserts de Varde Ovne peuvent tre encastr s de maintes fa ons selon la forme du foyer L ar te inf rieure et l ar te sup rieure du mur doivent fair...

Page 36: ...rer tr s utile lors du montage ult rieur du conduit flexible Important Toutes les autres r gles relatives aux portes de nettoyage doivent toujours tre respect es Pr paration 1 Ma onnerie Avant de mont...

Page 37: ...fum e dans le conduit Isolez le conduit flexible l aide de nattes isolantes Laissez les 2 3 cm du dessus libres pour pouvoir sceller ensuite le conduit flexible cf point 8 3 Conduit flexible Lorsque l...

Page 38: ...e de l insert Attachez le conduit dans l insert en repliant les rabats de fa on fixer correctement le conduit Montage 5 Positionnement L insert est maintenant pr t tre mont Sortez les plaques de vermi...

Page 39: ...e l insert est bien horizontal Fixez ventuellement l insert dans le fond du foyer l aide de vis b ti vis b ton ou autres dans les deux grands trous du fond 7 Ajustement 8 Mise au point Avant d tre pr...

Page 40: ...t hauteur 58 5 x largeur 77 cm Varde In Line 55 Varde Front Line 55 Puissance nominale 7 kW 4 9 kW Puissance de chauffe 30 100 m2 Poids 102 kg Conduit de fum e 15 cm Dimensions ext rieures de l insert...

Page 41: ...vant Arriv ed airfrais Danslapi ceo l insert est mont veillez assurerunearriv ed airfraissuffisante Parexemple l aidedegrillesd a rationdanslesmurs Cesgrillesnedoivent enaucun cas treobstru es Enoutre...

Page 42: ...de retour de fum e L arriv e d oxyg ne peut tre ajust e durant la combustion l aide du registre comme indiqu Allumage La poign e deux temps facilite largement l allumage dans l insert Allumez fermez l...

Page 43: ...rte selon les besoins afin de garantir une exploitation optimale de l insert La porte de l insert In Line 47 et 55 peut tre facilement invers e afin de l adapter aux conditions d utilisation tez la po...

Page 44: ...Varde Ovne A S Kongevej 246 Tiset DK 6510 Gram Denmark Tel 45 74 82 00 03 Fax 45 74 82 00 05 www vardeovne dk VARDE...

Reviews: