959D Leak Detector
3-16
DRAFT
9/13/02
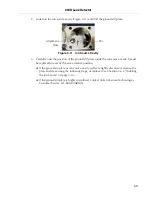
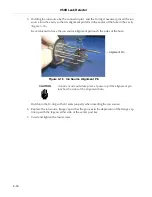
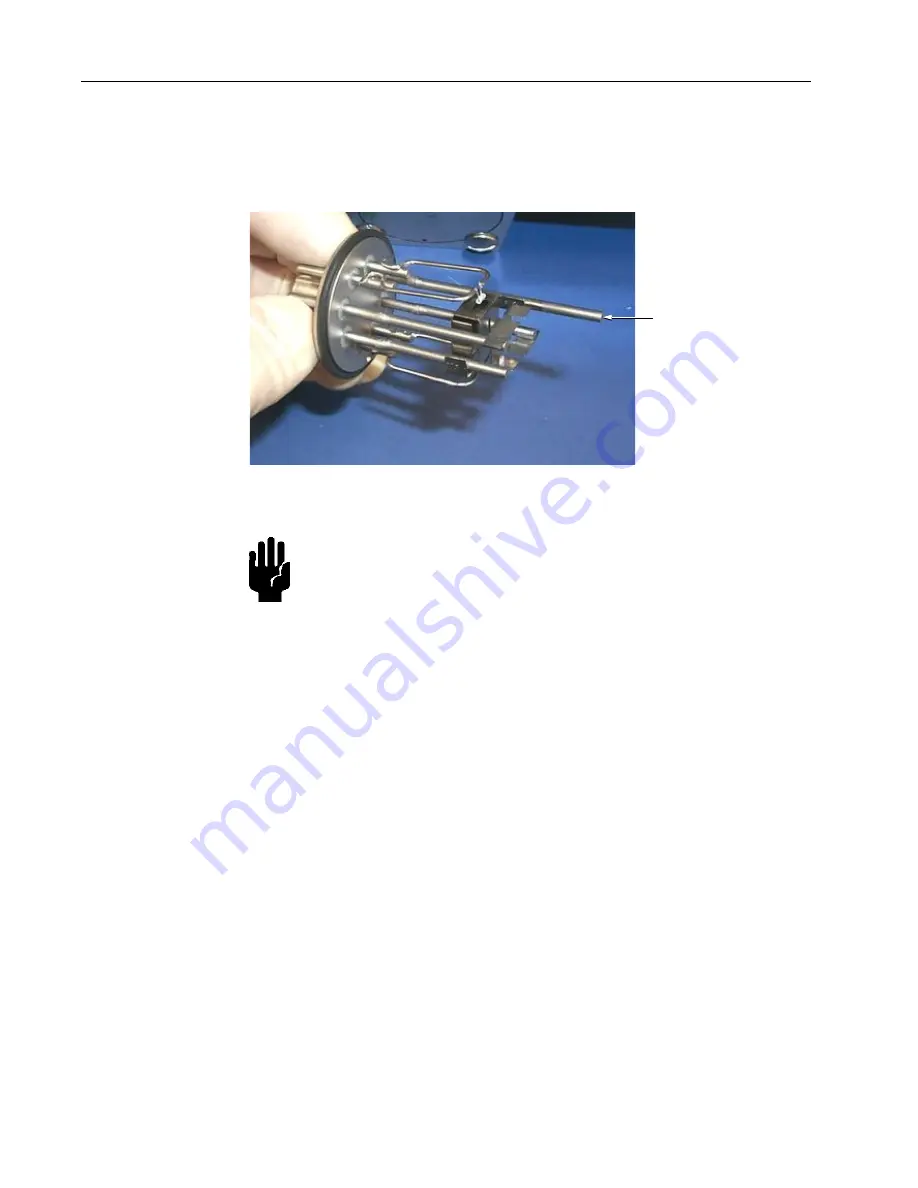
5. Holding the ion source by the connector pins, and the O-ring if necessary, insert the ion
source into the cavity so that its alignment pin
falls in the center of the hole in the cavity
(Figure 3-16).
Be careful not to have the ion source alignment pin touch the sides of the hole.
Figure 3-16
Ion Source Alignment Pin
CAUTION
A short circuit could take place at power up if the alignment pin
touches the sides of the alignment hole.
Hold onto the O-ring so that it seats properly when inserting the ion source.
6. Replace the ion source flange cap so that the grooves in the depression of the flange cap
line up with the legs on either side of the center post key.
7. Insert and tighten the four screws.
Alignment Pin
Summary of Contents for 959D
Page 16: ...959D Leak Detector 1 2 D R A F T 9 1 3 0 2 Figure 1 1 Model 959D Leak Detector ...
Page 28: ...959D Leak Detector This page intentionally left blank D R A F T 9 1 3 0 2 ...
Page 48: ...959D Leak Detector This page intentionally left blank D R A F T 9 1 3 0 2 ...
Page 68: ...959D Leak Detector This page intentionally left blank D R A F T 9 1 3 0 2 ...
Page 78: ...959D Leak Detector This page intentionally left blank D R A F T 9 1 3 0 2 ...
Page 81: ......

