M
AINTENANCE
1061 Injector
CP-3800 GC Getting Started Manual
65
Remove the
Glass Insert
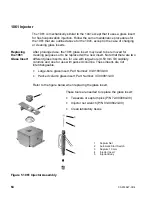
Follow these steps to remove the glass insert from the 1061 Injector.
1
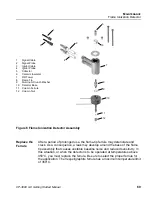
Use the injector nut wrench to remove the injector nut (Item 1). Place
the nut on a clean surface (e.g., clean tissue).
WA R N IN G :
B U R N H A ZA R D
The injector nut may be hot. Lower the injector
temperature to 50
°
C and permit the injector nut to cool
before proceeding.
Note: If the GC is equipped with an 8200 AutoSampler, push the carrousel
release button and swing the carrousel out to access the injector nut.
2
With tweezers or a septum pick, lift the edge of the septum. Remove
the septum.
Note: Replace the injector septum each time the glass insert is
replaced.
3
Use tweezers to grasp the glass insert and remove it from the
injector.
Note: The glass inserts can be cleaned and reused.
Replace the
Glass Insert
Follow these steps to replace the glass insert in the 1061 Injector.
1
Pick up the new insert with tweezers and place it in the injector
carefully.
2
Use tweezers to place a new septum in the injector.
Note: If the septum has a Teflon face, place the Teflon face toward
(down) the column.
3
Place the injector nut on the injector and tighten by hand until you
feel some resistance, then tighten an extra 1/2 to full turn using the
injector nut wrench.
Note: After the injector nut has been replaced check the head
pressure (EFC status on display or manual pressure gauge on
pneumatics panel) increases to its normal value. If this does not
happen there is an indication of a leak.
4
Condition the insert by setting the 1061 Injector temperature to
300
°
C and allowing the system condition for 30 minutes.

