Installation
1-2
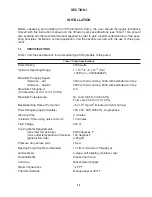
Heater circuit resistance (ohms)
2200 watts
120V
6.5
208V
19.6
240V
26.1
Clearance (for heater removal)
6 inches minimum
Materials
Body, flanges, foreline baffle
Stainless steel
Jet Assembly
Stainless steel
Body Cooling Coils
Copper
Quick Cooling Coil
Stainless steel
Cold cap
Nickel-plated copper
Shipping Weight
75 pounds
1-2
INSTALLATION
1-2-1
Unpacking
a
Inspect the pump to ensure that no damage has occurred during shipping. Do not discard any
evidence of rough handling; any damage should be reported to the carrier and to Varian with-
out delay.
b
Diffusion pumps are factory-packed to permit prolonged storage in suitably protected areas
without special precautions.
c
Remove flange covers and protective plugs from water connections. Be careful not to scratch
the O-ring seal surface on the inlet and foreline flanges.
d
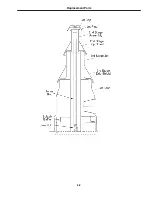
Inspect the internal jet assembly. It should be concentric and firmly seated on the bottom of
the diffusion pump. Using a flashlight, check to ensure that the ejector nozzle is directly in line
with the foreline. The location of the jet is controlled by an indexing pin located on the bottom
of the pump.
e
The pump requires no initial cleaning if the required vacuum level is above 10
-6
Torr (.000133
Pa). For pressure below 10
-6
Torr (.000133 Pa), follow the cleaning procedure in the
Maintenance section. Then charge the pump with the diffusion pump oil shipped with the
pump.
1-2-2
Pump Oil Installation
a
The recommended oil charge for the VHS-6 diffusion pump is 500 cc.
b
The oil is normally poured into the pump inlet or the foreline or by removing the fill plug and
pouring it into the fill and drain assembly.
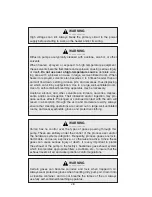
WARNING
_____________
Utility failure can cause damage to the equipment, overheating, and
explosions. Designers of the equipment using diffusion pumps must
take appropriate system design action to protect personnel and prop-
erty from possible hazards. Read the safety section at the beginning
of this manual.
Summary of Contents for VHS-6
Page 27: ...Replacement Parts 5 2 ...
Page 28: ...Replacement Parts 5 3 ...


