4
6. Vertical Balance -
Now you can check the vertical balance of the FlowPod to see if you need to
add, remove, or adjust the position of the counterweights. Use as few weights as possible, and
start with the weights at the top of the shaft. When vertically balanced, the FlowPod should not
lean or sway when moved around.
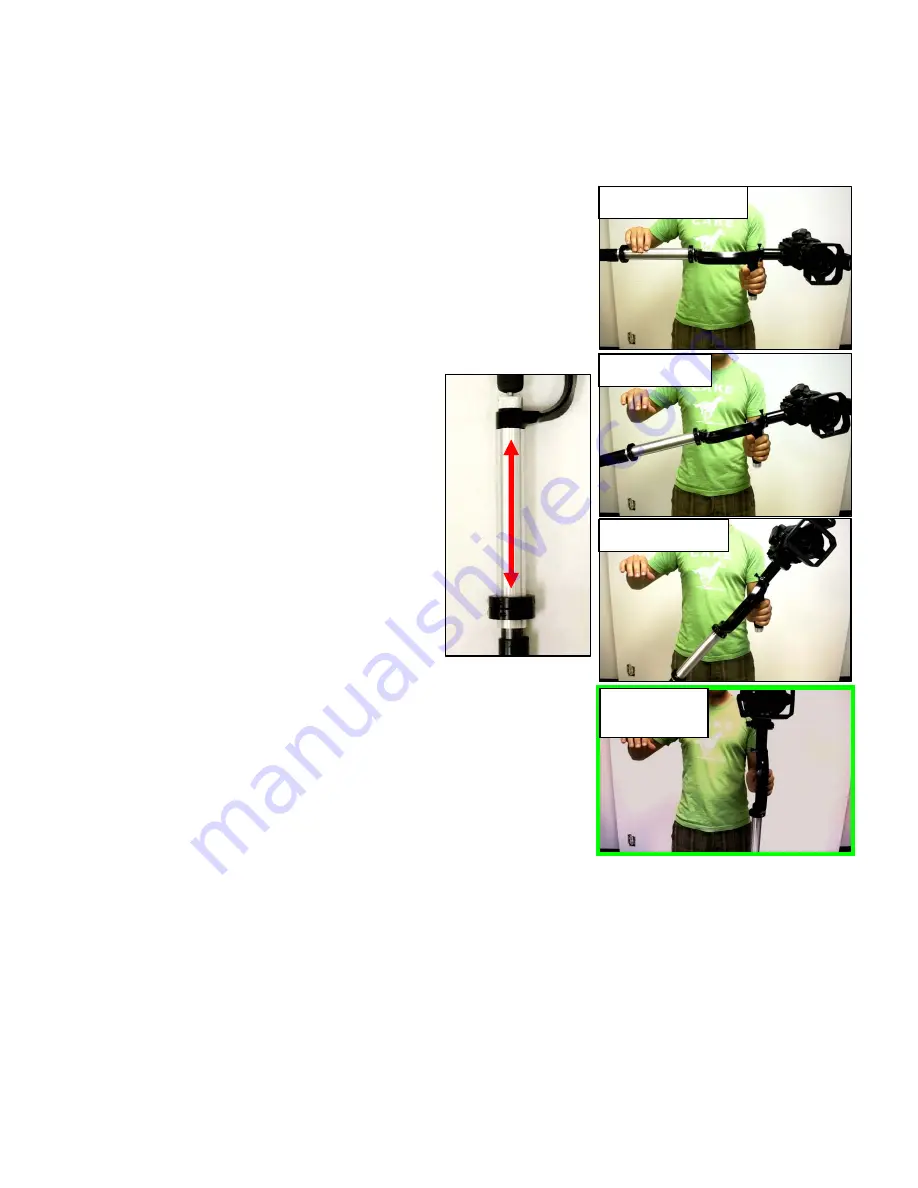
“The Drop Test”
To test the vertical balance, hold the unlocked grip straight up
and turn the FlowPod on its side to a horizontal position
(picture below), then let it fall back to the vertical position (the
“Drop Test”). It should fall gradually, taking 2-3 seconds to go
from horizontal to vertical. Note that it will swing past the
vertical position – you are only counting the time it takes to go
90 degrees (from horizontal to vertical).
If it does not swing down, slide your weights
down one at a time and retry the Drop Test.
If that doesn’t help, add another weight and
retest. If the FlowPod swings down too
fast, you should remove weights or slide
them upward, as necessary.
Vertical Balance should be fine-tuned
until the FlowPod stays completely
vertical when you move it around
without any significant swaying, so your
drop time may vary slightly depending
on how you fine-tune.
NOTES:
-
With some very small cameras, you may need to add a weight above the gimbal to achieve a
good balance (attach weights to the ‘neck’).
–With some heavier cameras (over 5 lbs or so) you may need more than 3 counterweights on
the counterweight shaft. The FP1 extra weight kit is available for a nominal charge.
7.
After setting your counterweight, you may want to fine-tune the X-Y adjustments. Once you have
achieved a good balance, you are ready to begin practicing with the FlowPod. There are
two
important things
to keep in mind at this point:
(1)
The FlowPod is designed to be operated with
two hands and
(2)
it requires practice to master (but it only gets easier with time).
Start = 0 Seconds
Finish =
2-3 seconds
Counting . . .
. . .still counting


