5
8. You can adjust the drag on left-right movement by slightly tightening the round thumbscrew brake
just above the handle, or you can leave it completely loose and steer with your free hand. Keep
the handle unlocked for operation, and we recommend using your free hand to steer and aid in
stabilizing the unit. Using your thumb and forefinger, lightly grasp the ‘neck’ of the FlowPod body
(next to the brake) to control the left-right movement. Practice walking with the unit and try to hold
it close to your body. Move deliberately and carefully – the FlowPod cannot compensate for
drastic movements.
Spend some time practicing to determine what works best for you. Operator
skill is critical for success with a handheld stabilizer. We recommend
shooting at the widest angle possible, and you may find that a wide-angle
lens adapter adds to the overall effect. You will also probably want to shoot
at a fixed focus point (manual focus) to prevent the ‘hunting effect’ caused by
autofocus constantly adjusting on a mobile camera.
MONOPOD MODE
1. To use the FlowPod in monopod mode, you should lock the handle in place and tighten the brake.
2. To extend the leg sections of the monopod pull out on the hinges and slide each section out, then
lock the hinges back in place.
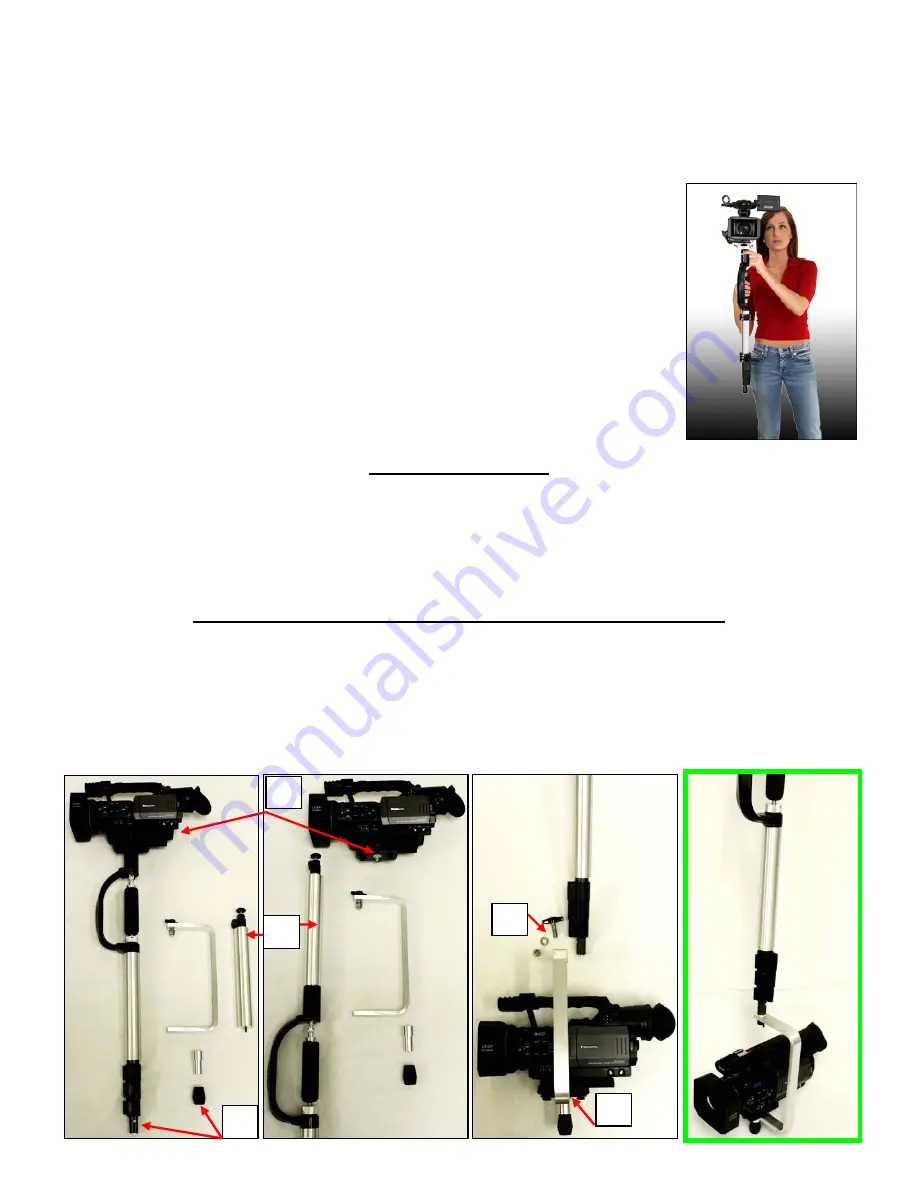
LOW-FLOW MODE (optional accessory) - ASSEMBLY
1. The first step in setting up your FlowPod for Low-Flow mode is to remove your centered and
balanced X-Y assembly (with camcorder mounted) from the top by unscrewing it counter-
clockwise. Support the weight of the camcorder as you unscrew the plate.
Note: Don’t lose the
plastic washer (and metal spacers, if present) sandwiched between the X-Y assembly and the C-
handle.
1.
2.
3.
4.
5.


