background image


POWDP4060 

EN


Copyright © 2019 VARO 

P a g e

 | 

8


www.varo.com 

Do not place the charger in an area of extreme heat or cold. Best is at normal room 
temperature. When the battery becomes fully charged, unplug your charger from the power 
supply and remove the battery pack from the charger. 
Note:  


Allow the battery pack to cool completely before charging 


Inspect the battery pack before charging, do not charge a cracked or leaking battery pack. 

9.2.1 

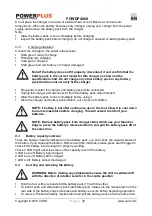
Charging indication 

Connect the charger to the power outlet socket 


Solid green: ready to charge 


Flickering red: charging 


Solid green: charged 


Solid green and red: battery or charger damaged 

Note:If the battery does not fit properly, disconnect it and confirm that the 
battery pack is the correct model for this charger as shown on the 
specification chart. Do not charge any other battery pack or any battery 
pack that does not securely fit the charger. 


Frequently monitor the charger and battery pack while connected 


Unplug the charger and disconnect it from the battery pack when finished. 


Allow the battery pack to cool completely before using it. 


Store the charger and battery pack indoors, out of reach of children. 

NOTE: If battery is hot after continuous use in the tool, allow it to cool down 
to room temperature before charging. This will extend the life of your 
batteries.  

NOTE: Remove battery pack from charger stand which use your thumb or 
fingers, press the battery

’s release button in and pull the battery pack off at 

the same time. 

9.3 

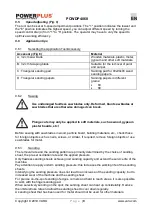
Battery capacity indicator 

There are battery capacity indicators on the battery pack, you can check the capacity status of 
the battery if you squeeze the button. Before using the machine, please press switch trigger to 
check if the battery is full enough for properly working. 
Those 3 LED might show the status of the capacity level of the battery: 
3 LED’s are litt: Battery fully charged 
2 LED’s are litt: Battery 60% charged 
1 LED is litt: Battery almost discharged 

9.4 

Inserting and removing the battery 

WARNING: Before making any adjustments ensure the drill is switched off 
with the direction of rotation selector in the centre position 


Hold the tool  with one hand and the battery pack (13) with the other. 


To install: push and slide battery pack into battery port, make sure the release latch on the 
rear side of the battery snaps into place and battery is secure before beginning operation. 


To remove: Press the battery release latch and pull the battery pack out at the same time. 

Summary of Contents for power plus POWDP4060

Page 1: ...Y INSTRUCTIONS FOR BATTERIES AND CHARGERS 6 7 1 Batteries 6 7 2 Chargers 6 8 ASSEMBLY 6 8 1 Mounting sanding plate saw blade spatula Fig 1 6 8 2 Mounting changing the sand paper 7 8 3 Mounting dust ex...

Page 2: ...POWDP4060 EN Copyright 2019 VARO P a g e 2 www varo com 10 CLEANING AND MAINTENANCE 10 11 TECHNICAL DETAILS 10 12 NOISE 10 13 WARRANTY 11 14 ENVIRONMENT 11 15 DECLARATION OF CONFORMITY 12...

Page 3: ...daptor 11 Dust pipe 12 Sanding plate 13 Battery not included 14 Charger not included 3 PACKAGE CONTENT LIST Remove all packaging materials Remove remaining packing and package inserts if included Chec...

Page 4: ...tlet Never modify the plug in any way Do not use adapter plugs with earthed power tools Unmodified plugs and matching outlets will reduce the risk of an electric shock Avoid body contact with earthed...

Page 5: ...f contact accidentally occurs flush with water If liquid contacts eyes additionally seek medical help Liquid ejected from the battery may cause irritation or burns 5 5 Service Your power tool should b...

Page 6: ...iquid on the battery proceed as follows Carefully wipe the liquid off using a cloth Avoid skin contact In case of skin or eye contact follow the instructions below Immediately rinse with water Neutral...

Page 7: ...ig 4 Take the dust adaptor 10 and screw it on the bottom part of the machine Keep in mind that the screw has to be on the bottom part of the dust adaptor this way you can screw it nice and gently in t...

Page 8: ...out of reach of children NOTE If battery is hot after continuous use in the tool allow it to cool down to room temperature before charging This will extend the life of your batteries NOTE Remove batte...

Page 9: ...ls such as wood gypsum plaster boards etc Before sawing with saw blades in wood particle board building materials etc check these for foreign objects such as nails screws or similar If required remove...

Page 10: ...the ventilation slots free from dust and dirt If the dirt does not come off use a soft cloth moistened with soapy water Never use solvents such as petrol alcohol ammonia water etc These solvents may...

Page 11: ...st penetration intentional damage on purpose or by gross carelessness inappropriate usage use for purposes for which the device is not suitable incompetent usage e g not following the instructions giv...

Page 12: ...d standards Any unauthorized modification of the apparatus voids this declaration European Directives including if applicable their amendments up to the date of signature 2011 65 EU 2014 30 EU 2006 42...

Reviews: