


POWP1010
EN
Copyright © 2018 VARO
p a g e
|
7
www.varo.com
Important! Only ever press the spindle lock when the motor and grinding
spindle are at a standstill!
You must keep the spindle lock pressed while you change the wheel !
For grinding wheels up to approx. 3 mm thick, screw on the flange nut with the flat side facing
the grinding wheel.
7.4
Switching on / off
Before working with the angle grinder, check that the voltage shown on the
machine’s model plate is the same as the mains voltage being used.
Before engage the ON/OFF switch button, check that the grinding disc is
properly fitted and run smoothly, the outer flange is well tightened.
7.4.1
Switching on
Switch the angle grinder on by depress the rear position of the ON/OFF switch button (4) and
pushing the switch button forward and lock onto the “ON” position.
7.4.2
Switching off
Depress the rear position of the ON/OFF switch button (4), it returns automatically to the
“OFF” position and the tool turns off. Do not let go of grinder until it has stopped running.
The wheel continues to rotate after the tool is switched off.
Do not put the machine down when the disc is still turning.
In case of interruption of the mains supply the on/off switch of the tool needs
to be released and reactuated.
8 OPERATON MODES
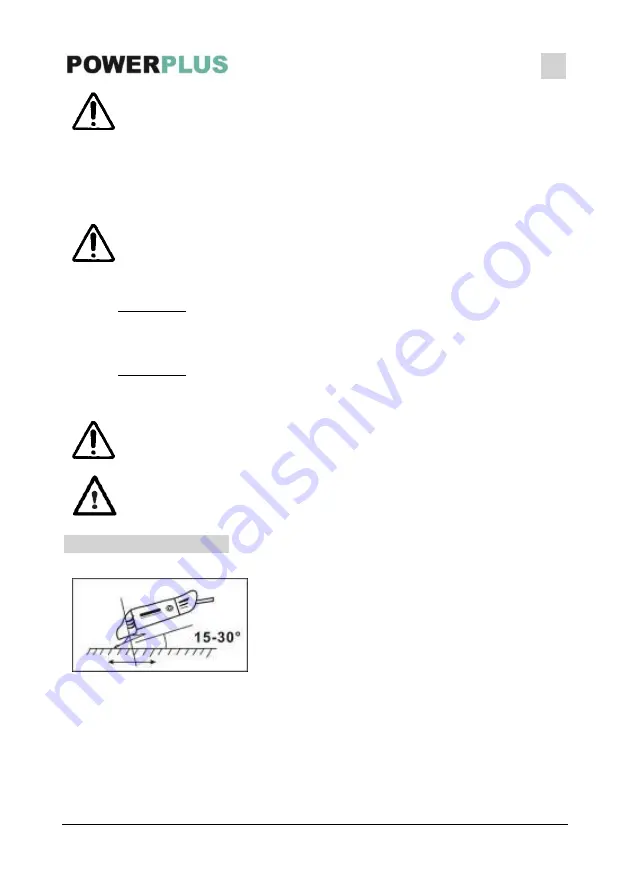
8.1
Grinding
Hold the handle (3) and auxiliary handle (6) firmly and
switch on. Avoid blocking the ventilation slots with your
hand, as this may cause the grinder to overheat. Let the
disc reach full speed. Apply the grinder to the item.
Maximum effect is achieved when the grinder is held at
an angle of 15-30
°
in relation to the item. Move the
grinder gently along the item. Give the grinder time to
work. It is rarely necessary to press the disc hard against the surface to be worked. Sparks
can occur in the motor compartment during use. This is normal and does not mean the grinder
is defective. Switch off the grinder after use.


