background image

Plug and connection assignments

This chapter will help you select the right cables and plugs to connect your valuable equip‐

ment so that a perfect light experience is guaranteed.
Please take our tips, because especially in ‘Sound & Light’ caution is indicated: Even if a plug

fits into a socket, the result of an incorrect connection may be a destroyed DMX controller, a

short circuit or ‘just’ a not working light show!

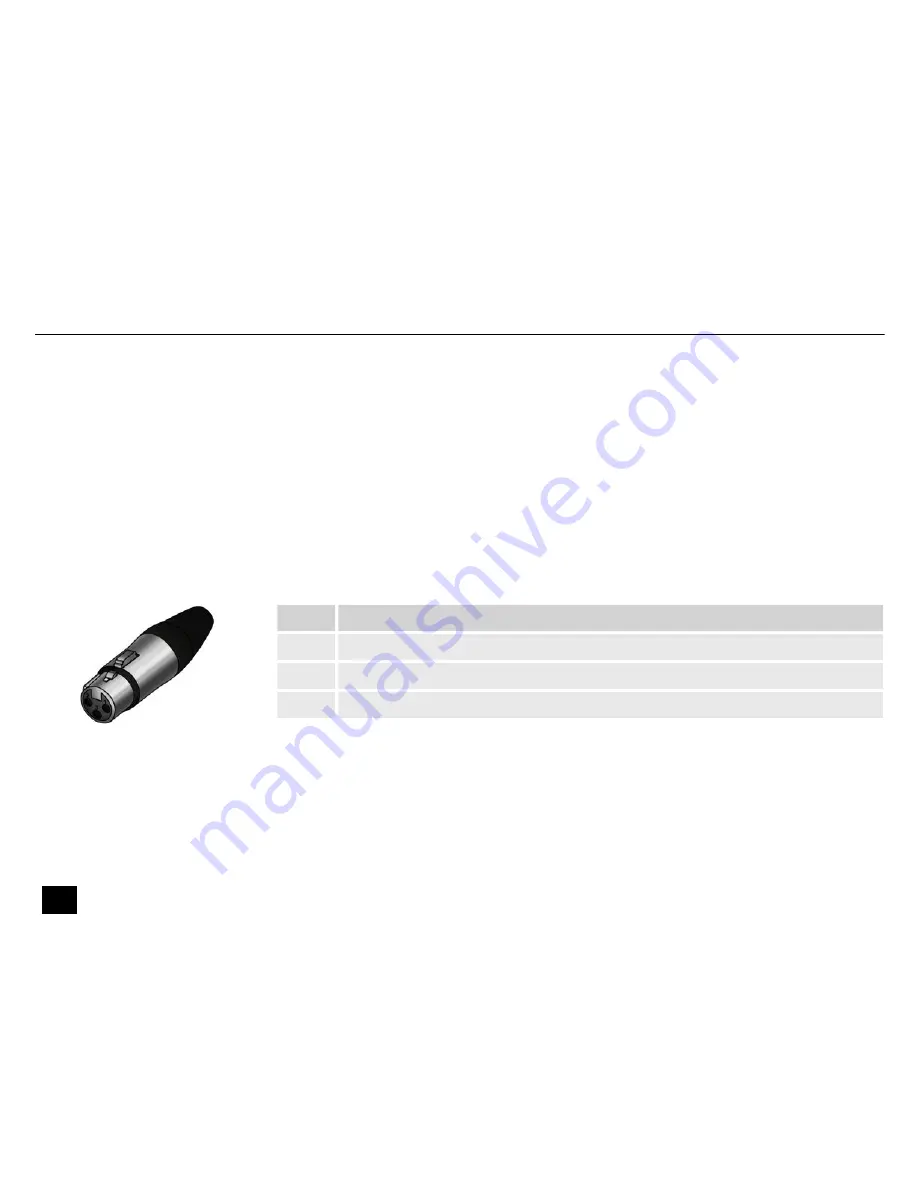
The unit offers a 3-pin XLR socket for DMX output and a 3-pin XLR plug for DMX input. Please

refer to the drawing and table below for the pin assignment of a suitable XLR plug.

Pin

Configuration

1

Ground, shielding

2

Signal inverted (DMX–, ‘cold signal’)

3

Signal (DMX+, ‘hot signal’)

Introduction

DMX connections

Plug and connection assignments


46

BAT.DERBY

LED effect

Summary of Contents for BAT.DERBY

Page 1: ...BAT DERBY LED effect User manual...

Page 2: ...Musikhaus Thomann Thomann GmbH Hans Thomann Stra e 1 96138 Burgebrach Germany Telephone 49 0 9546 9223 0 E mail info thomann de Internet www thomann de 18 12 2018 ID 385486...

Page 3: ...s 8 2 Safety instructions 11 3 Features 18 4 Installation 19 4 1 Dealing with lithium batteries 24 5 Starting up 26 6 Connections and controls 29 7 Operating 35 7 1 Starting the device 35 7 2 Operatin...

Page 4: ...tions in 7 channel DMX mode 43 8 Technical specifications 44 9 Plug and connection assignments 46 10 Troubleshooting 47 11 Cleaning 49 12 Protecting the environment 50 Table of contents 4 BAT DERBY LE...

Page 5: ...nd all other instructions Keep the manual for future reference Make sure that it is available to all those using the device If you sell the unit please make sure that the buyer also receives this manu...

Page 6: ...search Use the search function in the electronic version to find the topics of interest for you quickly Online guides Our online guides provide detailed information on technical basics and terms Pers...

Page 7: ...The letterings for connectors and controls are marked by square brackets and italics Examples VOLUME control Mono button Texts and values displayed on the device are marked by quotation marks and ita...

Page 8: ...ghted by an arrow Example 1 Switch on the device 2 Press Auto Automatic operation is started 3 Switch off the device 1 3 Symbols and signal words In this section you will find an overview of the meani...

Page 9: ...and signal word indicates a pos sible dangerous situation that can result in death or serious injury if it is not avoided NOTICE This combination of symbol and signal word indicates a pos sible dange...

Page 10: ...Warning signs Type of danger Warning suspended load Warning danger zone General notes 10 BAT DERBY LED effect...

Page 11: ...r property damage No liability will be assumed for damages resulting from improper use This device may be used only by persons with sufficient physical sensorial and intellectual abilities and having...

Page 12: ...rom the unit They could swallow the pieces and choke Never let children unattended use electrical devices DANGER Electric shock caused by high voltages inside Within the device there are areas where h...

Page 13: ...do so could result in electric shock death or fire If in doubt seek advice from a regis tered electrician WARNING Eye damage caused by high light intensity Never look directly into the light source W...

Page 14: ...amage lithium bat teries can cause severe injuries Follow the advice on the correct handling of lithium batteries in the present sec tion NOTICE Risk of fire Do not block areas of ventilation Do not i...

Page 15: ...ng the device ensure that the input voltage AC outlet matches the voltage rating of the device and that the AC outlet is protected by a residual current circuit breaker Failure to do so could result i...

Page 16: ...batteries Ensure that proper polarity is observed when inserting batteries NOTICE Possible damage by leaking batteries Leaking batteries can cause permanent damage to the device Take batteries out of...

Page 17: ...fore prolonged rest periods charge the batteries to around 50 of their capacity and then switch the equipment off Store the equipment at a tempera ture between 10 C and 32 C in as dry an environment a...

Page 18: ...it n Sound control n Strobe effect n dimmable n Battery or mains powered n incl IR remote control a rechargeable battery also available separately under item no 385488 and a charging cable for mains o...

Page 19: ...tation or storage use the original packaging or your own packaging material suitable for transport or storage respectively WARNING Risk of injury caused by falling objects Make sure that the installat...

Page 20: ...ufficient ventilation The ambient temperature must always be below 40 C 104 F NOTICE Use of stands When mounting the device onto a stand ensure that the stand is in a safe and stable position and that...

Page 21: ...stall the unit in hanging or standing position When in use the device must always be attached to a solid surface or an approved truss Use the openings of the bracket provided for mounting Always work...

Page 22: ...not be connected to a dimmer The infrared sensor for the remote control signals is located on the rear panel next to the dis play Make sure it s not obstructed Infrared sensor for remote con trol Ins...

Page 23: ...e points to the housing base of the remote control Slide the battery holder back into the remote until it clicks into place When shipping the battery is already installed in the remote and protected a...

Page 24: ...teries in a cool dry place ideally in the original packaging Store lithium batteries away from heat sources e g radiators or sunlight Lithium batteries are hermetically sealed Never attempt to open a...

Page 25: ...ended for the purpose Before disposing of the device remove the lithium batteries Protect used lithium batteries against potential short circuits e g by covering the poles with adhesive tape Only use...

Page 26: ...p Create all connections while the device is off Use the shortest possible high quality cables for all connections Take care when running the cables to prevent tripping hazards Starting up 26 BAT DERB...

Page 27: ...DMX device Connect the output of the first DMX device to the input of the second one and so on to form a daisy chain Always ensure that the output of the last DMX device in the daisy chain is terminat...

Page 28: ...ntrol the others Connect the DMX output of the master device to the DMX input of the first slave device Then connect the DMX output of the first slave device to the DMX input of the second slave devic...

Page 29: ...6 Connections and controls Connections and controls BAT DERBY 29 LED effect...

Page 30: ...evel increases or decreases the displayed value by one ENTER Confirms the selection 2 Infrared sensor for remote control 3 BATTERY INDICATOR Charging indicator of remaining battery capacity When all t...

Page 31: ...6 100 240 V 50 60 Hz Mains connection socket designed as IEC chassis plug 7 DMX IN DMX input DMX OUT DMX output Connections and controls BAT DERBY 31 LED effect...

Page 32: ...Remote control Connections and controls 32 BAT DERBY LED effect...

Page 33: ...er and slave mode 13 AUTO 1 AUTO 2 SPEED Buttons to activate automatic mode 1 or 2 and to adjust the programme speed 14 UP DOWN No function 15 Buttons for switching a basic colour on or off Use n W fo...

Page 34: ...17 No function 18 SOUND 1 SOUND 2 Buttons to activate sound control mode 1 or 2 Connections and controls 34 BAT DERBY LED effect...

Page 35: ...U to open the main menu 2 Press UP and DOWN to select the desired parameters or to change the respectively indicated value 3 When the display shows the desired parameter or value press ENTER The respe...

Page 36: ...he desired DMX address between 001 and 512 display shows A001 A512 Make sure that this number matches the configuration of your DMX controller 4 Confirm the selection with ENTER The selection is appli...

Page 37: ...of the built in micro phone For the sensitivity of the built in microphone a value between S 1 low and S 9 high can be selected Confirm the selection with ENTER The selection is applied Use CoLo to s...

Page 38: ...select six automatic programmes and set a running speed 1 Press MENU and press UP or DOWN repeatedly until the display shows AUto Con firm the selection with ENTER 2 Use UP or DOWN to select the desir...

Page 39: ...ol or OFF to deactivate the remote control Confirm the selection with ENTER The selected setting is accepted Use ver to get device information 1 Press MENU and press UP or DOWN repeatedly until the di...

Page 40: ...play shows SLAu Con firm the selection with ENTER 2 Use UP or DOWN to select SLA to activate the Slave mode Confirm the selection with ENTER The device now operates in slave mode and applies all setti...

Page 41: ...7 3 Menu overview Operating BAT DERBY 41 LED effect...

Page 42: ...t remove the battery during charging 1 Slide the battery into the battery compartment 2 Connect the mains plug to the mains socket of the device 3 Connect the power plug to the power grid Charging sta...

Page 43: ...w to fast 2 0 255 Dimmer red 0 to 100 3 0 255 Dimmer green 0 to 100 4 0 255 Dimmer blue 0 to 100 5 0 255 Dimmer white 0 to 100 6 0 7 Standard setting 8 255 Strobe effect slow to fast 0 Hz 20 Hz 7 0 15...

Page 44: ...eable battery pack item no 385488 lithium ion battery 10 8 V 1500 mAh Fuse 5 mm 20 mm 1 A 250 V fast acting Operating time per battery charge in automatic mode when using 2 batteries approx 3 h Chargi...

Page 45: ...Dimensions W H D 200 mm 165 mm 140 mm Weight 2 7 kg Temperature range 0 C 40 C Relative humidity 50 non condensing Environmental conditions Technical specifications BAT DERBY 45 LED effect...

Page 46: ...socket the result of an incorrect connection may be a destroyed DMX controller a short circuit or just a not working light show The unit offers a 3 pin XLR socket for DMX output and a 3 pin XLR plug f...

Page 47: ...X cables and do not use ordi nary microphone cables Never connect the DMX input or output to audio devices such as mixers or ampli fiers In the following we list a few common problems that may occur d...

Page 48: ...he address settings and the DMX polarity 3 Try using another DMX controller 4 Check whether the DMX cables run near or parallel to high voltage cables that may cause damage or interfer ence to a DMX i...

Page 49: ...e frequency of cleaning depends on the operating environment wet smoky or particularly dirty surroundings can cause more accumulation of dirt on the optics of the device n Clean with a soft cloth usin...

Page 50: ...se follow the notes and markings on the packaging Batteries do contain some hazardous chemicals so they should not be thrown away with the normal household waste They should be returned to the manufac...

Page 51: ...r normal household waste Dispose of this device through an approved waste disposal firm or through your local waste facility When discarding the device comply with the rules and regulations that apply...

Page 52: ...Notes 52 BAT DERBY LED effect...

Page 53: ...Notes BAT DERBY 53 LED effect...

Page 54: ...Notes 54 BAT DERBY LED effect...

Page 55: ......

Page 56: ...Musikhaus Thomann Hans Thomann Stra e 1 96138 Burgebrach Germany www thomann de...

Reviews: