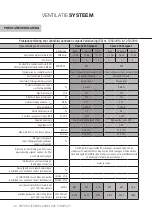

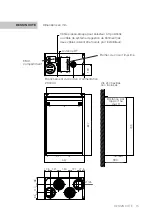
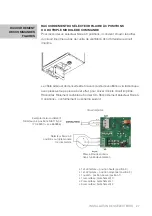
ENTRETIEN DE L’UNITÉ DE VENTILATION
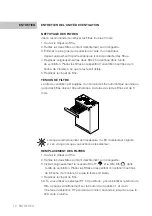
NETTOYAGE DES FILTRES
Vasco recommande de nettoyer les filtres tous les 3 mois.
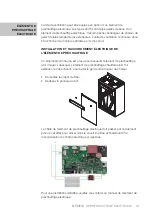
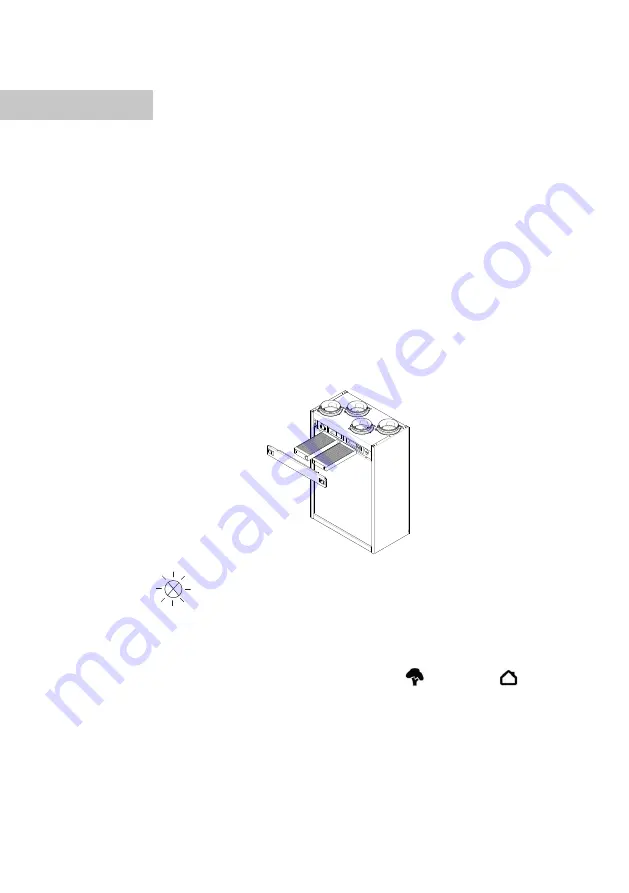
1. Ouvrez le clapet du filtre.
2. Retirez les deux filtres en tirant délicatement sur la languette.
3. Éliminez le plus gros de la poussière à l’aide d’un aspirateur.
Aspirez uniquement la partie supérieure (zone de collecte) des filtres.
4. Replacez soigneusement les deux filtres à l’identique dans l’unité
de ventilation. Placez les filtres en respectant l’orientation haut/bas de la
flèche, de manière à ce que le texte soit lisible.
5. Replacez le clapet du filtre.
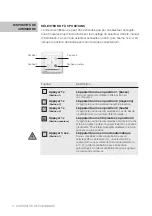
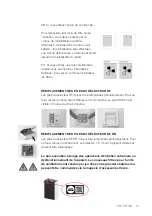
TÉMOIN DE FILTRE
L’unité de ventilation est équipée d’un témoin de filtre automatique qui indique
quand les filtres doivent être remplacés. La durée de vie des filtres est de 6
mois.
Lorsque le remplacement est nécessaire, la LED du sélecteur clignote
2 x en orange lorsque vous actionnez le sélecteur.
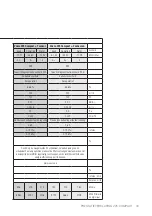
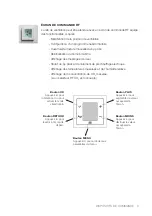
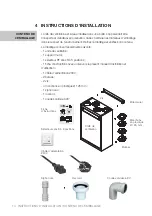
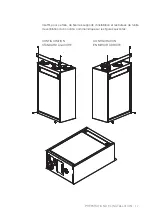
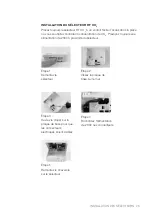
REMPLACEMENT DES FILTRES
1. Ouvrez le clapet du filtre.
2. Retirez les deux filtres en tirant délicatement sur la languette.
3. Insérez soigneusement le nouveau filtre F7
et le filtre M5
dans
l’unité de ventilation. Placez les filtres en respectant l’orientation haut/bas
de la flèche, de manière à ce que le texte soit lisible.
4. Replacez le clapet du filtre.
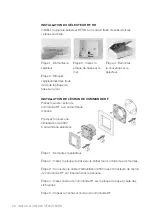
5A. Si vous utilisez le sélecteur RF à 3 positions : pour réinitialiser le témoin du
filtre, appuyez simultanément sur le bouton de la position 1 et de la
minuterie du sélection RF pendant au moins 4 secondes, jusqu'à ce que la
LED verte s'allume.
ENTRETIEN
12 ENTRETIEN


