E-mail Storage How To - Version 8.0.0
© VASCO Data Security 2014
39
Chapter 7. Troubleshooting
My client cannot log on to the AXS GUARD POP3 server.
1. Make sure the user is authenticated on the client (SSO).
2. Verify the user name and password. Passwords are case sensitive.
3. Verify if the user has e-mail access (sys-email Firewall Policy, see
Section 2.2.3, “E-mail Firewall Policy
).
4. Verify if the user has not been locked. (Authentication > Status > Blocked Users and Hosts).
My client cannot log on to the AXS GUARD IMAP server.
1. Make sure the user is authenticated on the client (SSO).
2. Verify the user name and password. Passwords are case sensitive.
3. Verify if the user has e-mail access (sys-email Firewall Policy, see
Section 2.2.3, “E-mail Firewall Policy
).
4. Verify if the user has not been locked. (Authentication > Status > Blocked Users and Hosts).
5. Verify if the user exists (see
Section 5.3.6, “Authentication Settings”
I cannot access the Address Book
1. Make sure the user is authenticated on the client (SSO).
2. Verify if the user has e-mail (LDAP) access (sys-email Firewall Policy, see
Section 2.2.3, “E-mail Firewall
).
3. Verify if the user has not been locked. (Authentication > Status > Blocked Users and Hosts).
I cannot modify the Address Book
Only Basic Administrators or above are authorized to modify the AXS GUARD Address Book (see
Section 4.2.2, “Server Configuration”
). You cannot modify the AXS GUARD Address Book via the mail client,
e.g. Outlook 2007.
I cannot access the Webmail service
1. Make sure the user is authorized to access the Webmail service (see
Section 5.3, “Server Configuration”
2. Verify if the user has not been locked. (Authentication > Status > Blocked Users and Hosts).
3. Make sure Firewall access is granted to port 443 for the authorized network zone (Internet, Secure LAN
or DMZ).
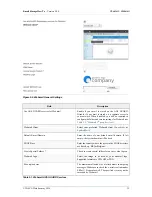
The users cannot change their auto-response settings.
Make sure the users are authorized to change their auto-response settings (see
):
1. Log on to the AXS GUARD as explained in the AXS GUARD System Administration How To, which is
accessible via the Documentation button.
2. Navigate to Users & Groups > General.
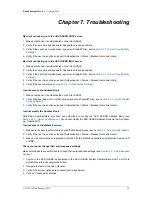
3. Verify if the correct options are checked (see image below).
4. Click on Update when finished.

