


VASNER
VASNER
10
11
Components
Below you will find an overview of the individual components that make up the
VASNER Ventury.
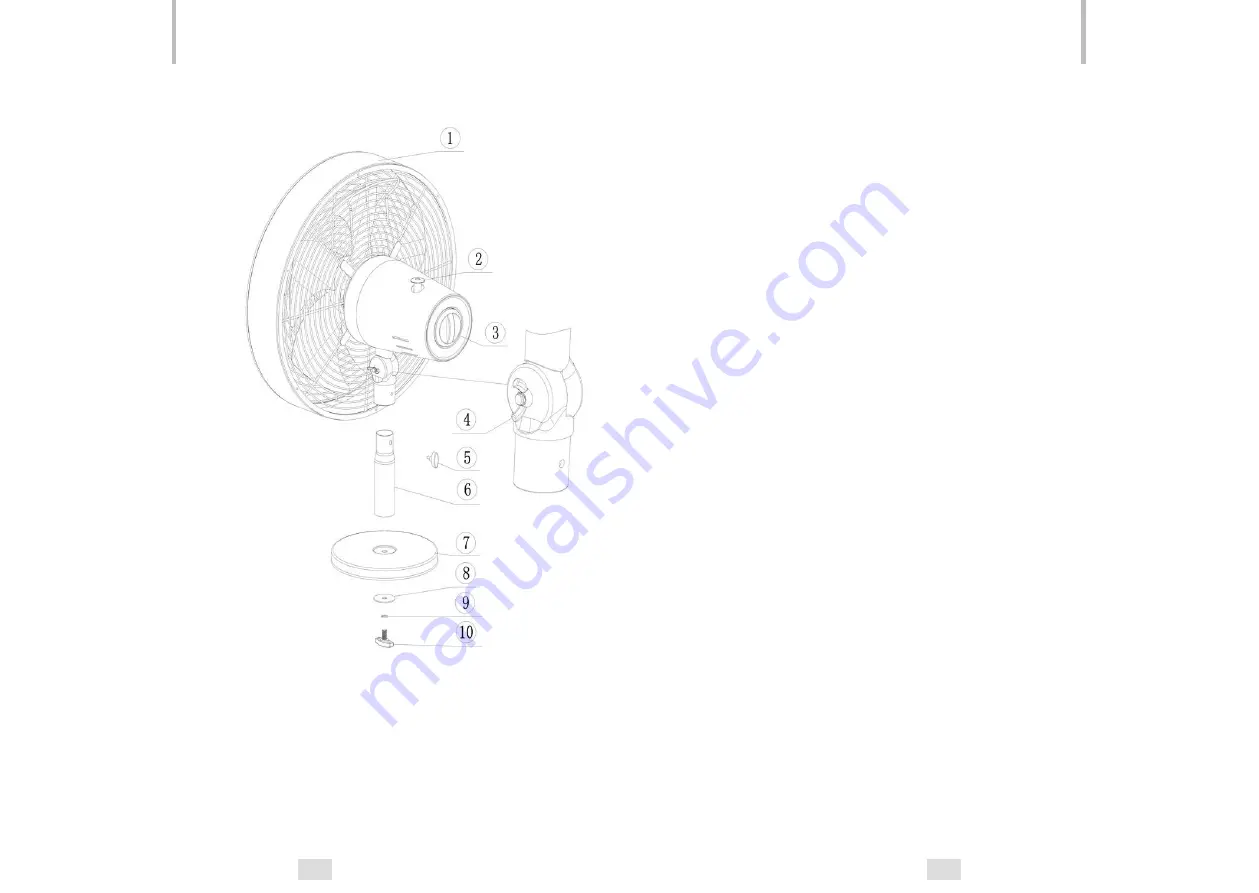
Ventury components:
1. Fan head with protective grill
2. Automatic oscillation > push / pull knob
3. Rotary switch: On / Off / 3 wind speeds
4. Wing screw to adjust tilt angle
5. Fixing screw: To fasten the fan joint to the stand
6. Stand
7. Round foot
8. Big washer
9. Small washer
10. Base screw: For fastening the foot to the stand
Assembly
The Ventury table fan can be assembled in just a few steps. Proceed as follows:
1. Remove all packaging material and perform the assembly on an even
surface.
2. First, connect the foot to the stand. In order to do so, place the stand (6) on
the foot and screw them together from below using the washers (8, 9) and the
included screw (10).
3. Ensure that the stand is set to medium height and the screw for height ad
justment (6) on the stand (7) is slightly tightened.
4. Now, take the assembled fan head (1) and insert the bottom part of the joint
into the upper opening of the stand (6). Caution: Ensure that the joint is
ad justed to prevent the fan head from pressing on the stand. Otherwise
scratches may occur! If necessary, straighten the joint beforehand using the
wing screw (4).
5. Make sure the threaded hole of the joint aligns with the bore on the upper
edge of the stand.
6. Next, screw the fixing screw (5) into the opening and the thread. The fan is
now ready for use.
Attention: Always ensure that the fan head does not come into contact with
the stand when tilted. Otherwise scratches may occur in the matt lacquer fin-
ish. Especially when the oscillation function is activated.
Operating instructions
The VASNER Ventury T has different functions that can be controlled via the
knobs on the fan. Proceed as follows:
1. Plug the power cord into a household outlet. The device is designed for the
voltage range 220V - 240V ~ 50 Hz.
2. Next, adjust the tilt of the fan head. Caution: Make sure that the fan head
does not come into contact with the stand when tilted. Otherwise the matt
lacquer finish may be scratched.
3. Turn the Ventury T table fan on using the rotary switch (3) on the back of
the device and select the desired wind setting. The digits above the switch
indicate the following:
GB
GB
Summary of Contents for Ventury T
Page 8: ...VASNER VASNER 14 15 ...
Page 9: ...VASNER VASNER COM ...


