Assembly
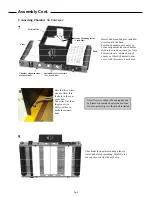
Belt Tracking
Perform after assembly is complete and dryer is on a flat surface.
Maintain belt as close to centered as possible on both rollers.
Do Not leave conveyor unattended during tracking process.
1) While conveyor is running at full speed, observe
position on both rollers.
2) Raising the belt aligner on one side moves the belt
in the opposite direction. Lowering the bar moves
the belt toward that side.
3) Make small adjustments, 1/4 turn of adjuster bolts.
Allow the belt to respond to the adjustment.
Never allow the belt to track off the rollers, belt damage
can result. Make belt tracking adjustments as needed.
Left Side
Right Side
Belt Tracking
Adjuster Bolts
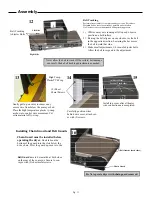
Gently pull up on wires to remove any
excess wire from below the conveyor bed.
Place the high temperature plastic ty-wrap
as shown to control wire movement. Cut
extra material off ty-wrap.
High Temp.
PlasticTY-Wrap
Carefully position wires
behind wire cover, attach cov-
er with (2) screws.
(2) Sheet
Metal Screws
Install top cover after all heater
wire connections are completed.
(6) Sheet Metal
Screws (3 each side)
12
13
14
15
Installing Chain Guard and Belt Guards
Belt Guards
are to be installed at both sides
on the rear of the conveyor. Secure to con-
veyor with (2) sheet metal screws.
Chain Guard must be installed before
operating the dryer.
Hook tabs on the
bottom of the guard into the slots below the
drive chain. Pivot the guard up, secure to the
Do Not operate dryer with chain guard removed.
Belt Guards (both sides)
Chain Guard
16
Pg. 11
Summary of Contents for D-100
Page 16: ......


