background image


ce

rti

fied

 QM-Sys

tem

g

ep

rüfte

s Q M-S

ys

te

m

ISO 9001

EN 29001


Installation, Operating, and Maintenance Instructions 

Series 021


VAT Vakuumventile AG, CH-9469 Haag, Switzerland    

Tel ++41 81 771 61 61   Fax ++41 81 771 48 30   Email reception@vat.ch   http://www.vat.ch


205440EC


2003-04-14 

8/12 


A

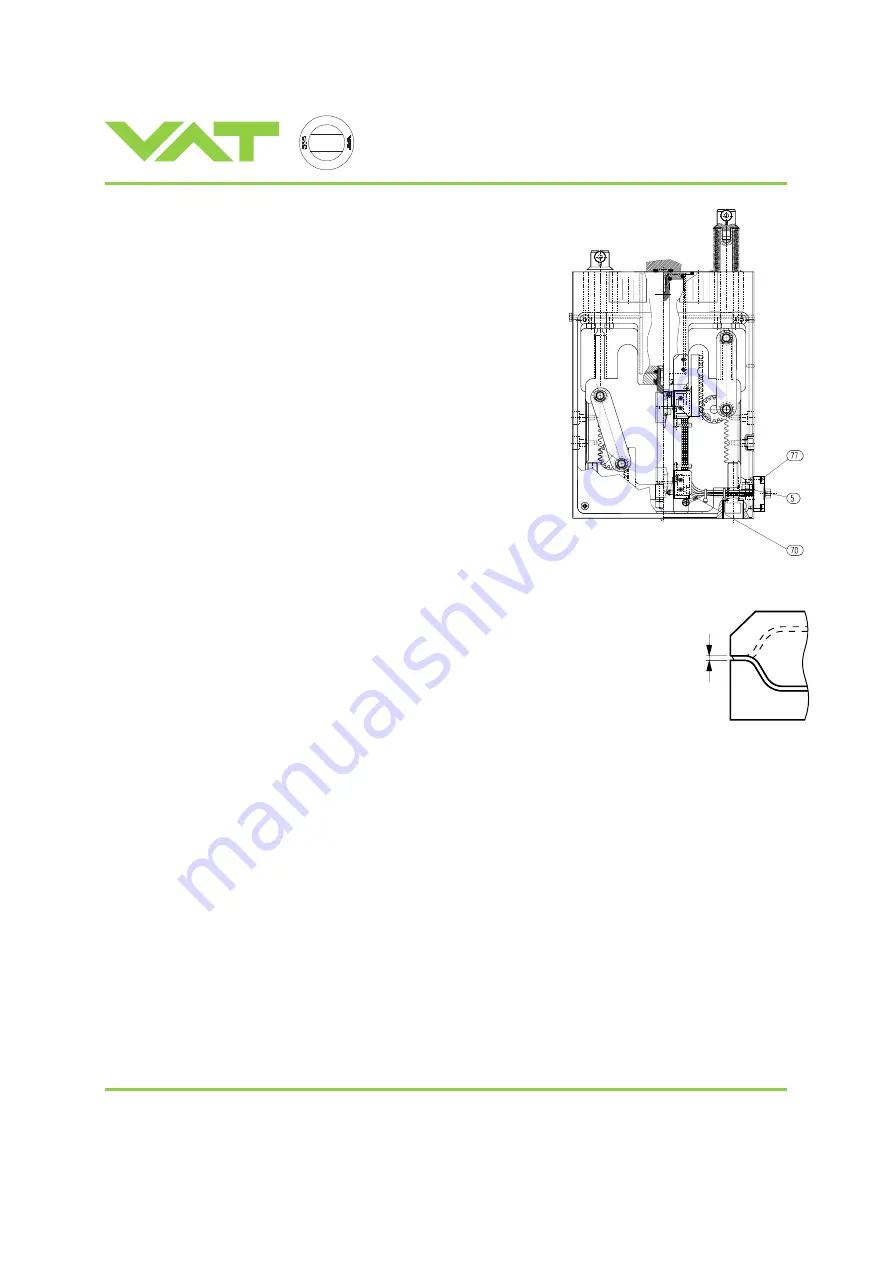
Replacing Position indicator


1.  Disconnect valve from compressed air and electrical supply 
2. Remove cover sheets 15 (2x) with screws 47 (4x per sheet) 
3. Unfasten screws 77 (4x), wire wrap and screws 70 (2x per assembly) 
4.  Pull mounting bar downwards out of it’s slot in the actuator house. 
5.  Pull out insert (to the left) and remove position indicator. 
6.  Reassemble in reverse direction 
 

The switch point can be readjusted by loosening the screws of the switch 
and moving the switch in the slotted holes of the mounting bar. The switch 
point should be set 1 to 1.5 mm prior to the end positions. 


Adjustment of Actuator 

 
The compression of the gate seal is adjusted and tested at our factory and must normally not be readjusted. 
 
Verification of Adjustment 

  Gap «A» between gate and seat (see sketch beside) should be 3.0 mm ±0.15 mm 

  Gate and seat should be parallel within 0.2 mm 

  During closing the mechanical locking should occur between 1.0 and 1.2 bar air pressure 

To check this :  1.  Reduce air pressure below 0.5 bar 
 

2.  Command valve in closed position 


3.  Increase air pressure until a clicking sound indicates the mechanical locking 


Adjustment of Compression and / or Parallelism 

1. Open valve 
2. Loosen screws 43 (2x per rack) of racks 12 (2x) 
3.  Adjust compression of gate seal by turning both screws 42 by the same angle 

Note : Turning screws 42 by 30° results in 0.125 mm change of compression. 

4.  Adjust parallelism by turning one screw 42 

Note : Turning one screw 42 by 30° results in 0.125 mm change of compression on the respective side 

5. Fasten screws 43 (4x) 
6.  Open and close valve, verify again compression and parallelism, repeat adjustment if necessary 


Lubrication of Valve 


  Gaskets in the vacuum area are not lubricated. Small amounts of a suitable high vacuum grease (VAT high 

performance vacuum grease) may be used to lubricate O-rings or gate seal. 

  Lubricate pneumatic cylinder and piston seals with VAT high temperature pneumatic grease. Other lubricants may not 

meet our cycle life specification. 

  Lubricate gears, racks, and lashes in the actuator with Rocol or equivalent. 

  Lubricate screws outside the vacuum with Molykote 321 R or equivalent. Screws supplied by VAT are lubricated. 

  Pneumatic cylinder and actuator parts must be relubricated after the specified cycle life (see chapter «Technical 

data»). The shaft of new bellows assembly is lubricated at the factory. 

Summary of Contents for 021 Series

Page 1: ...ication No patented 021 A Read these Installation Operating and Maintenance Instructions and the enclosed General Safety Instructions carefully before you start any other action Actuator 24 w o soleno...

Page 2: ...ed position Feedthrough welded metal bellows Technical Data Leak rate FKM seals valve body 1 10 9 mbar l s 1 seat 1 10 9 mbar l s 1 Leak rate FFKM seals valve body 1 10 8 mbar l s 1 seat 1 10 7 mbar l...

Page 3: ...ITON gate seal FKM VITON Mounting position any Position indicator Contact rating 3 A 50 V DC Compressed air pressure 4 7 bar 55 95 psig overpressure Compressed air connections internal threads M5 with...

Page 4: ...wing must be met under all operating conditions Compressed air connection Compressed air pressure min max overpressure 4 7 bar 55 95 psi Use only clean dry or slightly oiled air Connections Internal t...

Page 5: ...er to the dimensional drawing of the product to ensure it is properly specified for the application Normal operation Valve with pneumatic actuator Valve is opened and closed pneumatically Admissible t...

Page 6: ...69 Haag Switzerland Tel 41 81 771 61 61 Fax 41 81 771 48 30 Email reception vat ch http www vat ch 205440EC 2003 04 14 6 12 Emergency operation at power failure In case of power failure valve can be a...

Page 7: ...ator assembly carefully 4 Loosen screws 44 by 1 turn to withdraw gate from shafts 5 Clean or replace gate reassemble in reverse direction Tighten gate screws 44 with 5 Nm Replacing Bellows 1 Remove ga...

Page 8: ...2 bar air pressure To check this 1 Reduce air pressure below 0 5 bar 2 Command valve in closed position 3 Increase air pressure until a clicking sound indicates the mechanical locking Adjustment of C...

Page 9: ...VATSEAL optional SS body only 32 x 222 76168 R1 78175 R1 N 5100 266 N 5100 263 82180 01 46 x 236 77006 R1 78201 R1 N 5100 266 N 5100 263 82180 01 50 x 336 94027 R1 96031 R1 N 5100 275 N 5100 273 8169...

Page 10: ...fluoro black 81063 R1 78510 R1 Silicone red 79416 R1 82625 R1 Silicone transparent 85630 R1 Aluminium SC 1107 205580 205581 204585 VITON 80499 01 82510 01 95842 R1 Chemraz 630 99424 R1 101367 R1 Chemr...

Page 11: ...ste m ISO 9001 EN 29001 Installation Operating and Maintenance Instructions Series 021 VAT Vakuumventile AG CH 9469 Haag Switzerland Tel 41 81 771 61 61 Fax 41 81 771 48 30 Email reception vat ch http...

Page 12: ...the manufacturing defects that adversely affect the normal functioning thereof during the one year period immediately following delivery thereof by VAT provided that the same is properly operated unde...

Reviews: