background image

EN

ENGLISH

3

CHARGING PROCEDURE

NOTE: Before using the tool, read the instruc-
tion book carefully.

1. RECHARGING BATTERIES

A] CHARGING THE BATTERY

To the Li-ion battery installed in the machine. Do not use 
another battery charger.
The Li-ion battery is protected against deep discharging. 
When the battery is empty, the machine is switched off by 
means of a protective circuit: The chuck no longer rotates.
In a warm environment or after heavy use, the battery pack 
may become too hot. Allow time for the battery to cool 
down before recharging.

B] IMPORTANT NOTES FOR CHARGING THE BATTERY

The battery in your new tool is not charged when it leaves 
the plant. Therefore it must be charged for 1 hour before 
using the first time!

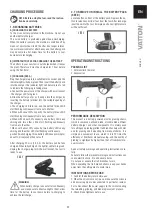
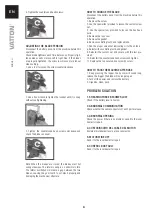
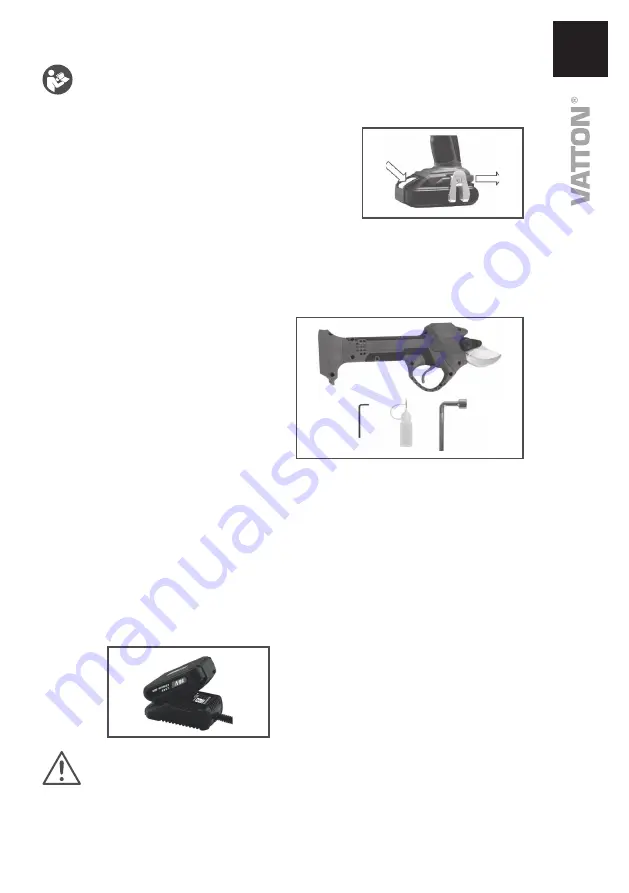
C] CHARGING (SEE A)

Plug the charger plug into a suitable mains socket, and the 
indicator light will show green. Then insert the battery pack 
into the charger, the indicator light will become red to red 
to indicate that charging is taking place.
a.Connect the power cord of the charger with a wall socket 
.The charger LED turn green
b.Slide the battery as far as it will go into the charger, by 
inserting the battery terminal into the suitable opening of 
the charger.
c.The charging LED turn red, and the battery three LEDS 
start flashing continuously from one to another.
d.When with about 30% capacity, the battery three LEDS 
start flashing continuously from one to another.
e.When with about 50% capacity, one battery LED keep 
shining and two other LEDs start flashing continuously 
from one to the other. 
f.When with about 75% capacity, two battery LEDs keep 
shining and the other LED start flashing continuously .
g.when finish charging, three battery LEDs keep shining for 
about 10 minutes and then turn off.

After charging 30 min (2.0 Ah), the battery will be fully 
charged. When fully charged, the light(a) will turn to green. 
Unplug the charger plug form the wall socket, the tool is 
ready to use.

¡WARNING!

When battery charge runs out after continuously 

use or exposure to direct sunlight or heat, allow 

time for the battery to cool down before re-charging to 
achieve the full charge.

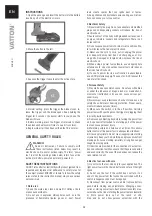
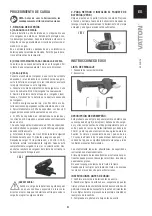
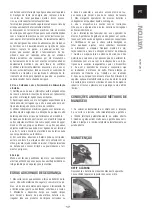
2. TO REMOVE OR INSTALL THE BATTERY PACK 

(SEE B)

Locate button on front of the battery pack. Depress the bu-
tton to release and slide it out from the tool. After recharge, 
insert back into the tool. A simple push and slight pressure 
will be sufficient. 

OPERATING INSTRUCTIONS

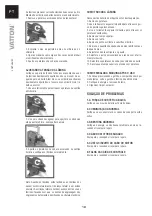
PACKING LIST 

1. Cordless limb trimmer
2. Accessories

PERFORMANCE DESCRIPTION  

This product is a battery-powered electric pruning shears, 
which is composed of fixed blade, movable blade, lithium 
battery, charger, and other components. It is mainly used 
for cutting and pruning grafted fruit branches below 30 mm 
and for pruning and harvesting from many orchards. It is 
simple and convenient to use, which is 8 to 10 times the 
efficiency of traditional manual pruning, and the quality of 
pruning is significantly higher than that of traditional ma-
nual scissors.

Read all safety warnings and operating instructions care-
fully.
Failure to follow the relevant warnings and instructions can 
cause electric shock, fire, and severe burns.
Do not use or expose the fruit branches to rain
When operating the fruit branch shears, keep your hands 
away from the cutting area to avoid injury.

INSTRUCTIONS BEFORE USE:

1. Confirm the battery level before use.
2. When the scissors are not in use, make sure the scissors 
and power supply are disconnected. In particular, remem-
ber to disconnect the power supply to the scissors during 
the refuelling, grinding, and blade replacement process.
3. Check blade tightness before use.

/ A /

/ B /

Summary of Contents for 48306

Page 1: ...48306...

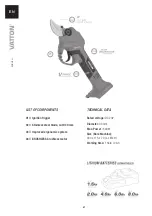
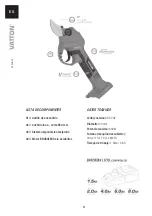
Page 2: ...2 Stainless steel blade cut 30 mm 03 Improved ergonomic system 04 BRUSHLESS brushless motor TECHNICAL DATA Rated voltage DC 20V Diameter 30 mm Max Power 540W Size Bare Machine 300 x 115 x 70 L x W x H...

Page 3: ...for about 10 minutes and then turn off After charging 30 min 2 0 Ah the battery will be fully charged When fully charged the light a will turn to green Unplug the charger plug form the wall socket the...

Page 4: ...or mo ving parts Damaged or tangled cords increase the risk of electric shock 5 When using a power tool outdoors use an appropriate extension cord Use of an outdoor power tool cord reduces the risk of...

Page 5: ...tool If the blade is worn or damaged please replace it in time 2 Keep the device clean wear clean clothing to clean the electric pruning shears battery pack and charger do not use corrosive or solvent...

Page 6: ...ol provided to loosen the custom screw nut 3 Use the special tool provided to loosen the hex head bolts 4 Remove the top cover 5 Remove the gasket 6 Remove oscillating tooth and replace blade 7 Add th...

Page 7: ...manual Warning Wear ear protection Wear eye protection Wear dust mask Indoor use only Do not expose to rain or water Do not burn Do not dispose of batteries Return exhausted batteries to your local c...

Page 8: ...a inox corte 30 mm 03 Sistema ergon mico mejorado 04 Motor BRUSHLESS sin escobillas DATOS T CNICOS Voltaje nominal DC 20V Di metro 30 mm Potencia m xima 540W Tama o m quina descubierta 300 x 115 x 70...

Page 9: ...gada Cuando est completamente cargada la luz a se volver verde Des enchufe el enchufe de cargador de la toma de corriente la herramienta est lista para usar ADVERTENCIA Cuando la carga de la bater a s...

Page 10: ...e el cable para transportar tirar o desenchufar la herramienta el ctrica Mantenga el cable alejado del ca lor aceite bordes afilados o piezas m viles 5 Cuando utilice una herramienta el ctrica en exte...

Page 11: ...o vegetales como metales y pie dras y no use tornillo de banco para sostener la herramienta Si la hoja est desgastada o da ada reempl cela a tiempo 2 Mantenga limpio el dispositivo use ropa limpia par...

Page 12: ...Quite el tornillo 2 Utilice la herramienta especial proporcionada para aflo jar la tuerca personalizada del tornillo 3 Utilice la herramienta especial proporcionada para aflo jar los pernos de cabeza...

Page 13: ...rotecci n para los o dos Use protecci n para los ojos Use mascarilla antipolvo Solamente para uso en interiores No exponer a la lluvia o al agua No quemar No deseche las bater as Devuelva las bater as...

Page 14: ...na inox corte 30 mm 03 Sistema ergon mico melhorado 04 Motor BRUSHLESS sem escovas ESPECIFICA ES Voltagem nominal DC 20V Di metro 30 mm For a maxima 540W Tamanho m quina descoberta 300 x 115 x 70 L x...

Page 15: ...egar durante 1h a primeira vez ou 30 min 2 0 Ah a bateria estar totalmen te carregada Quando completamente carregada a luz a ficar verde Desligue a ficha do carregador da tomada a ferramenta est pront...

Page 16: ...as m veis Os cabos danificados ou emaranhados aumentam o risco de choque el ctrico 5 Ao utilizar uma ferramenta el ctrica ao ar livre utilizar um cabo de extens o apropriado A utiliza o de um cabo de...

Page 17: ...O l quido injectado na bateria pode causar irrita o ou queimaduras e feri mentos perigosos 6 Servi o Mande um t cnico qualificado reparar a sua ferramenta el ctrica utilizando apenas pe as de substit...

Page 18: ...mec nica COMO TROCAR A L MINA Desconecte a bateria da m quina antes desta opera o 1 Remova o parafuso 2 Use a ferramenta especial fornecida para afrouxar a por ca do parafuso personalizado 3 Use a fe...

Page 19: ...dvert ncia Use prote o auditiva Use prote o ocular Use prote o respirat ria anti p Somente para utiliza o em interiores N o expor chuva ou gua N o queimar N o descarte as baterias Devolva as baterias...

Page 20: ...a Dyser S L Pol Ind Anoia C Cooperativa 2 08635 Sant Esteve Sesrovires Barcelona Espa a B 60163441 T 937831011 F 937838487 www alfadyser com alfa alfadyser com FABRICADO EN CHINA DISE O PACKAGING EN U...

Reviews: